Sunday 27 March 2011

BLOG 45


Don’t you just love this time of year? The intense bright green of new shoots in the hedgerows heralds the arrival of warmer weather and lighter nights; it gladdens the heart and quickens the pulse. I am an optimist by nature, just a simple soul and I am rarely anything but happy and content. Spring is my season!

I continue to prepare for Paducah next month. But occasionally I look over my shoulder, with regret it has to be said, at the work that I have had to put to one side for the time being. Its day will come!

Work in progress

I have been invited, by QUILT magazine in the US, to reproduce the quilt from the front cover of my book ‘Dual Image Appliqué’. This is to appear in the fall issue so the leaf pattern will be topical. The fabrics, chosen from the Hoffman watercolour range, can only be described as delicious! Just look at those colours and textures.

Fabrics

When they arrived I couldn’t help but get started on the lap quilt and this has taken over my sewing time for most of this week.

Constructed squares

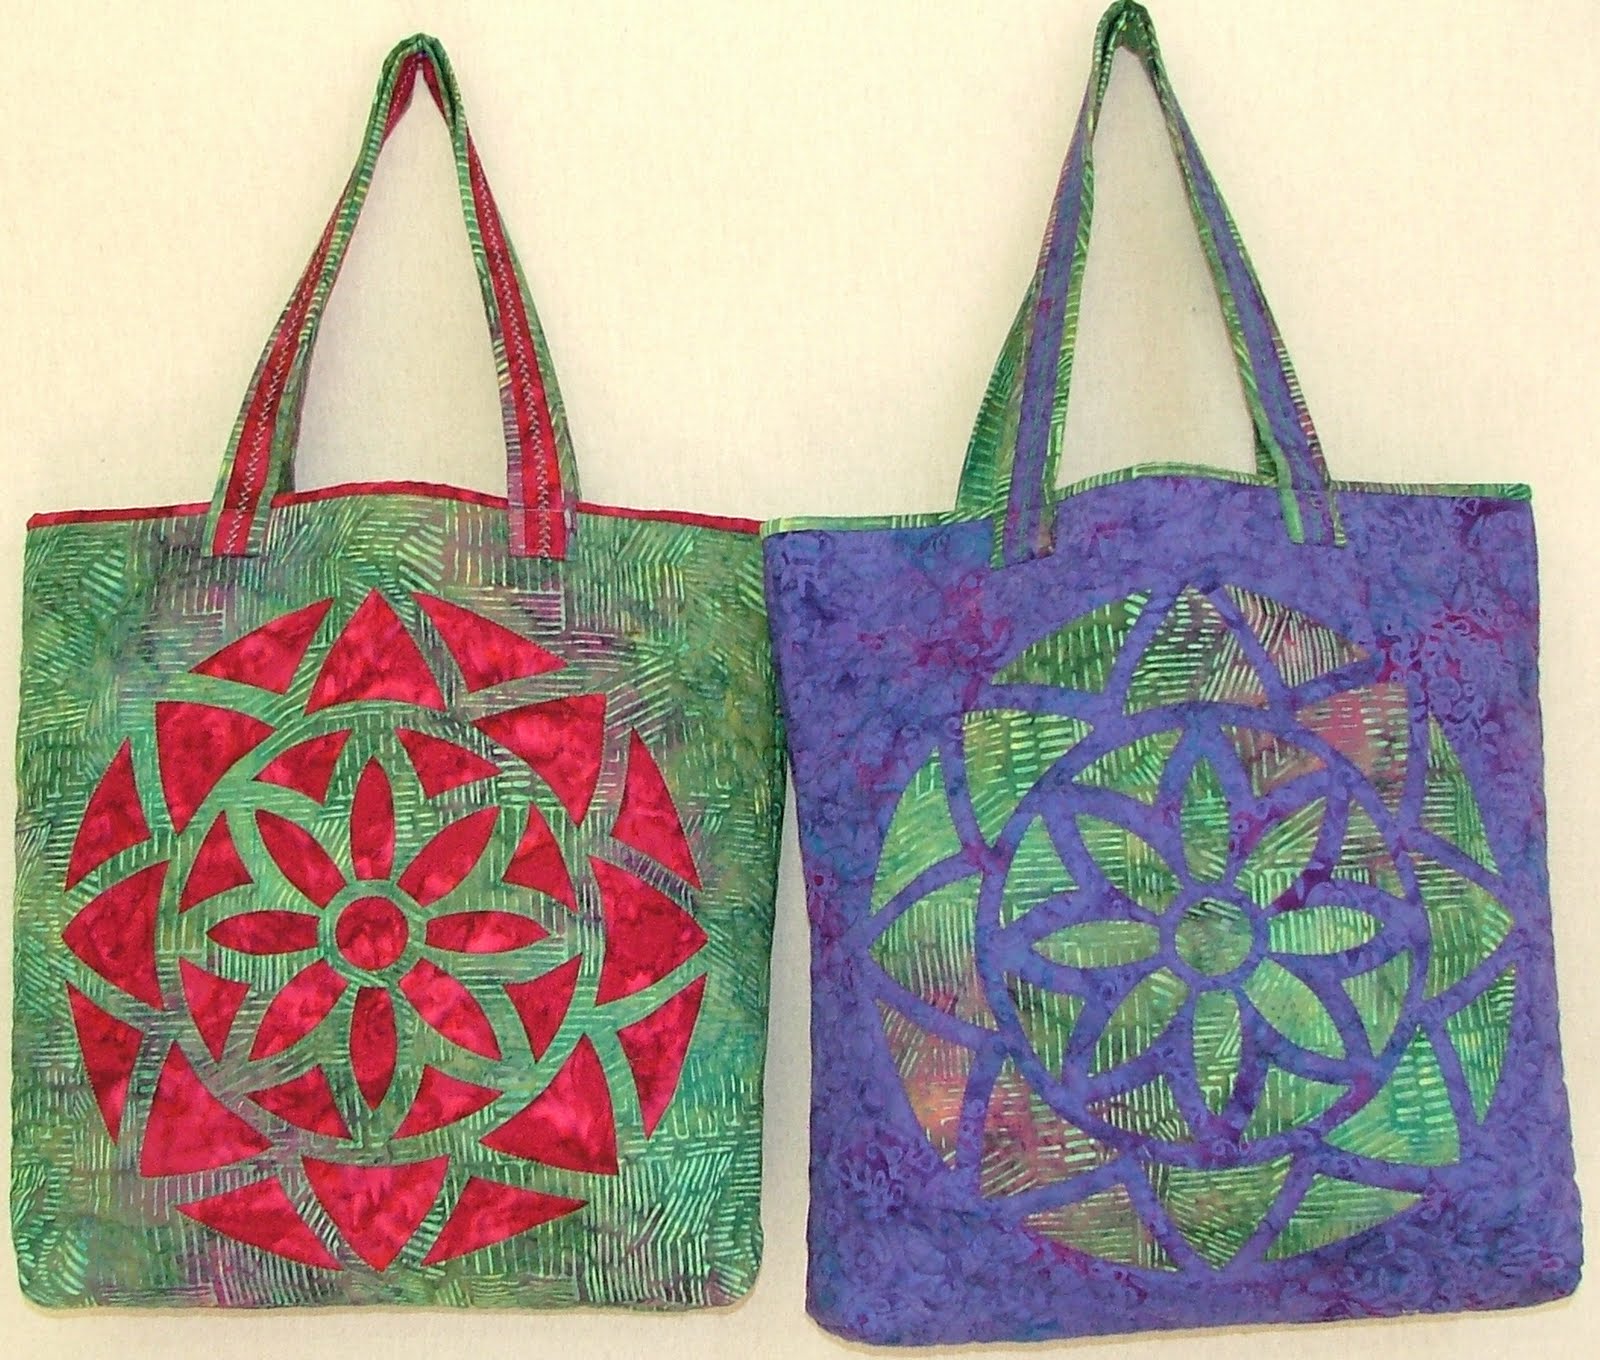
Positive and negative leaves

The procedure outlined in Blog 44 is followed. The difference here is that two fabrics, joined on the diagonal, make up the starting square. Three constructed squares make two blocks: 1 square with the fused pattern produces the frame and the fillers, the other 2 squares are foundations. One foundation goes behind the filler to give a positive appliqué and the other goes behind the frame to give a negative appliqué. The positioning of the frame and filler along to diagonal of the foundations is critical. Once ironed in place, the edge of the shape must be sewn to prevent fraying.

Satin stitch

I habitually place cotton batting behind where I am sewing to give the fabrics some body and to help prevent any tunnelling of the stitch and distortion of the fabric. I have chosen a cherry red thread and a small satin stitch for strong definition.

Satin stitch and batting

I am still working in the attic until the weather really warms up. I look forward to returning to my purpose-made workshop in the garage when I can comfortably sew there of an evening.

Sewing station in the attic

Sunday 20 March 2011

BLOG 44

There are two time-related focuses for my week at the moment. One is Sunday morning when I need to sit down and start my blog for the week, just assuming that there are people out there interested in what I have to say. The other is the Friday night gin! When my husband was at work, we always used to have a gin and tonic on a Friday night to celebrate the end of the working week and the start of the weekend; very civilised, eagerly anticipated and greatly enjoyed!! In retirement, this quaint habit has become a necessity as one day just trickles into the next. We usually know what month it is but the only way to distinguish the weeks from the weekends is to continue our gin habit. We switch off from retiring on Fridays and resume on a Monday mornings when my husband digs me in the ribs to get up because there is some hard retiring to do!! Isn’t life great?

This week I have continued to prepare for my classes at the AQS quilt show in Paducah next month. Time marches on and the preparation is on schedule. This week I have been concentrating on Dual Image Appliqué, my one-day workshop and the subject of my latest book.

The method is outlined as follows:

Mark the centres on the WS of the foreground fabric.

Foreground

Transfer the pattern clearly onto the paper side of the fusible web.

Pattern and fusible

Remove the excess fusible and iron the pattern centrally onto the WS of the foreground fabric.

Fusible on WS

Use a rotary cutter to cut right on the line of each shape. Cut out all the shapes or fillers from the intact frame.

Frame and fillers

Use the frame to audition potential fabrics. The one seen here has been constructed from 2” squares.

Audition fabrics

From the selected fabric, cut a large square to use with the fillers and a smaller square to go behind the frame.

Foundations

Use the frame, with its backing paper still on, to position the fillers with their paper off, onto the large foundation. Press to stick securely.

Remove the backing paper from the frame and press to stick it onto the small foundation securely.

Add batting and backing and then zigzag round the cut edged to appliqué and quilt at the same time.

Sewn samples

Quilt the surround to your satisfaction and use in to make cushions, bags, hangings etc. On the navy foreground I have sewn a wandering vine quilting stitch using a free motion method. On the coloured background, I have sewn a decorative stitch along regular marked lines with a walking foot.

Details of quilting

Use your samples to make cushions, wall hangings, bags etc. Here is a bag project from my book ‘Dual Image Appliqué’ published by AQS.

Bag project


Sunday 13 March 2011

BLOG 43

On previous blogs, I have mentioned that I attend a machine embroidery class at Castle Court Quilters in Shropshire, taught by Suzette Smart. She arrives each month with exciting and inspiring ideas and we pretty much have a free choice over what we choose to sew during the day. This is my humble effort in progress, a sorry attempt at Suzette’s unique style of working! In a nutshell, the method is a bit like drawing shapes in a dark thread and then colouring them in, much more complex than it sounds! I have used the same pale thread on the bobbin so that flecks of it appear on the surface and give an over-all uniformity across all the colours. There is much more to do.

Stitching in progress

My preparations continue for Paducah, and this week I have been refreshing my samples for an exercise in comparing Positive and Negative Appliqué. This workshops is sewn by hand and the samples are sewn side-by-side so that the comparisons are reinforced at each of the 4 steps.

Method 1: NEGATIVE APPLIQUE

Foreground refers to the fabric onto which the pattern is transferred and from which the pattern shapes are cut.

Background refers to the fabric(s) placed underneath to become visible through the cut shapes in the foreground fabric.

PREPARATION

NB The pattern must look like a stencil for this comparison to work.

Transfer the pattern onto the RS of the foreground fabric. Trace onto a light fabric or use transfer paper on a dark fabric.

Pattern

Transfer pattern

Step one PLACE: Place the WS of the marked foreground fabric onto the RS of the background fabric. Pin to secure the layers.

TIP: Pin from behind so that the thread doesn’t get caught around them during basting.

Step one: Place

Step two BASTE: On the RS, baste with small stitches, right on the line. Sew all round the shapes with a contrasting thread to secure the foreground fabric to the background.

Step two: Baste

Step three TURN: On the RS, cut on the inside of the marked line on the foreground fabric only, to leave a scant 3/16" seam. Clip into corners and into the concave curves only (see marked clips above). Remove the basting stitches and needle-turn the seam with small, concealed stitches and a thread to match the foreground fabric.

Step three: Turn

Step four TRIM: On the WS, trim away the excess background fabric to leave a scant 1/4" seam outside the line of stitches. Note the tiny stitches defining the shape on the back.

Step four: Trim

The completed sample:


Sunday 6 March 2011

BLOG 42

Now that we have somehow arrived in the month of March (where have the 2 months gone since Christmas?), most of my energies will be concentrated on my preparations for the quilting show in Paducah, Kentucky. I am part of the teaching faculty this year and will be kept very busy with workshops, a lecture and the all-star reviews. I am excited about being there again as I used to go regularly with friends many years ago. Paducah becomes ‘Quilt City’ when the American Quilters Society holds its annual show, this year during 27th -30th April.

This week I am preparing samples for template-free hand appliqué, a technique I have been teaching for years. Once the pattern is transferred onto the fabric, it can be translated as a 4-step method. Here is the method in a nutshell.

(Featured in ‘At Play with Appliqué’ published in the USA by C&T)

Template-free Hand Appliqué

NB: Background refers to the fabric onto which all the shapes are appliquéd.

Foreground refers to the shapes that are appliquéd onto the background fabric.

Preparation Transfer the pattern onto the WS of the background fabric. Trace onto a light fabric or use transfer paper on a dark fabric.

Place on the RS

Place from the WS

Step one PLACE: Place the WS of the foreground fabric onto the RS of the background fabric. Pin to secure the layers.

Step two BASTE: On the WS, baste with small stitches, right on the line. Sew all round the shapes to secure the fabric. Work in sequence if appropriate.

Step three TRIM: On the RS, trim away the excess fabrics on the outside of the stitches to leave a 3/16” seam. Mark the edges to be turned (optional).

Step four TURN: On the RS, remove the basting stitches, one by one, and needle-turn the seam with small, concealed stitches and a matching thread.

The method is a accurate as the drawn line and it eliminates the need for templates.

Jacobean silhouette

The work has slowed down on the Jacobean panels but I have managed to mark a background grid on the positive panels. This grid goes over the black too but misses all the flowers/leaves etc so I can add decorative free-motion detail.. eventually!!