Sunday 30 March 2014

BLOG 193


Well, have I had fun this week with my soldering iron? I should say so! Using it has opened a lot of doors for me in the way I approach and work my painterly style. I know I have come across the technique before because I still have my husband’s soldering iron stored amongst my supplies. (…. And he still hasn’t missed it yet!) The one I have now purchased is designed 
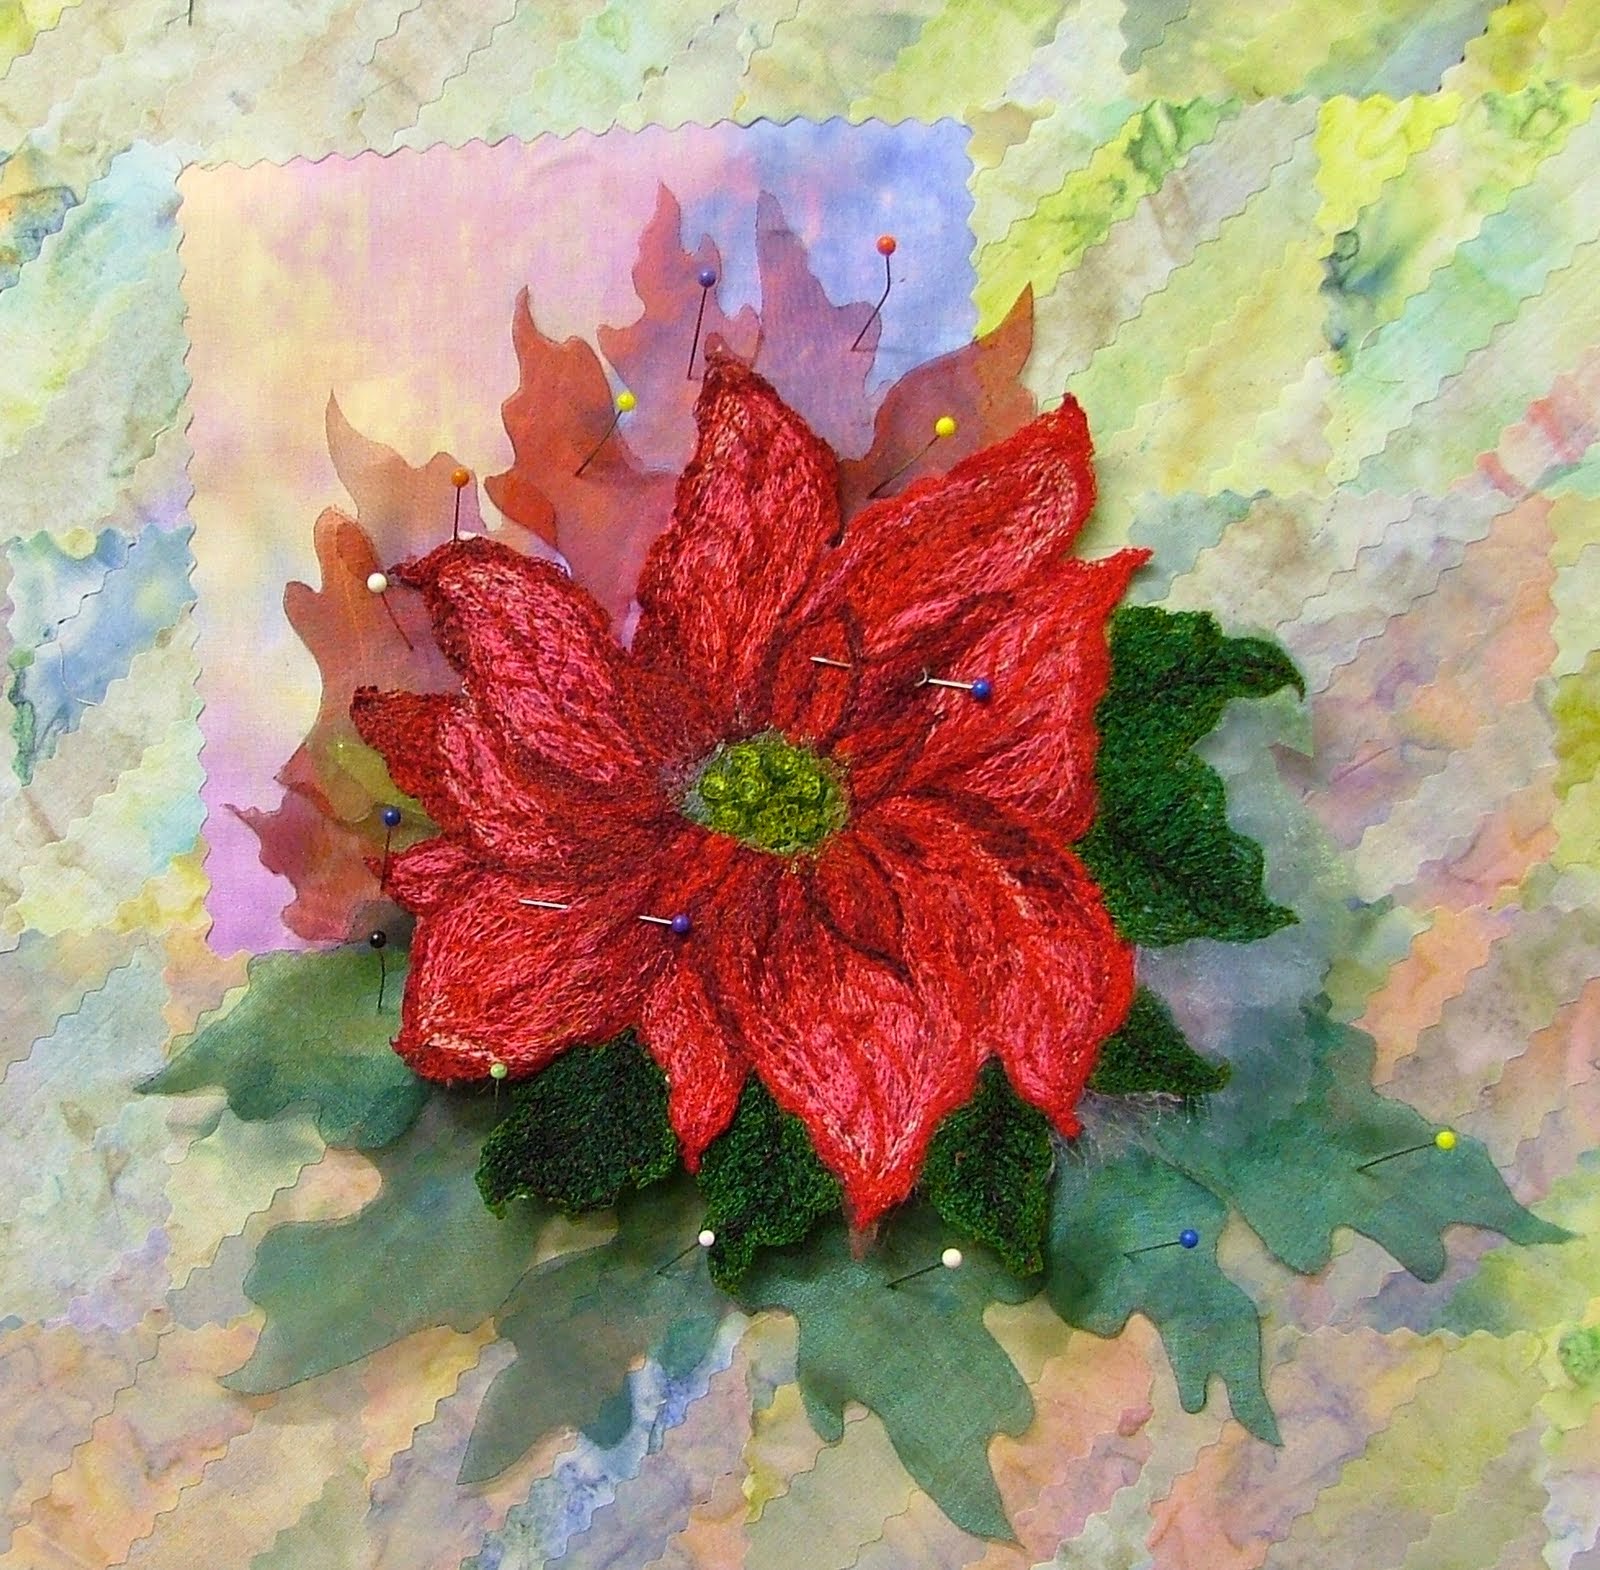
specifically for working with fabric by Margaret Beale. The point is very fine and it burns fabric like a knife cutting through butter. Following her technique, I cut out leaf shapes with the soldering iron for use on the poinsettia panel and placed them in situ. This was exactly the effect I wanted to achieve, where the colours seep away from the central flowers, much like a watercolour painting.

 
                                        Cut-out leaves

 The problem was that they were not attached to the fabric at all and sewing them in place would demand extreme precision. So I decided I would rather sew them in place first before cutting them out and I needed to think again. I came up with the idea of using ‘Stitch and Tear’ on the back of my background block, so I designed a spread of leaves to go around the edges of the poinsettia and then traced it onto the ’Stitch and Tear’. I pinned strips of sheer fabrics onto the RS and the ‘Stitch and Tear’ on the WS. I sewed from the WS where I could see the pattern lines and trapped the sheers with stitch on the RS. Then came the fun with the soldering iron! I burned away the excess fabric from around the edges of the stitches to remove them. The detail on the leaves will be done later as a quilting line. So far, so good.

                                             Sheers


I was then told about the work of Kathleen Laurel Sage (what a wonderful and unforgettable name!) and that led me into a wonderland of colour, stitch and expertise. Check out her website and blog at www.kathleenlaurelsage.com. This was the way forward for me!


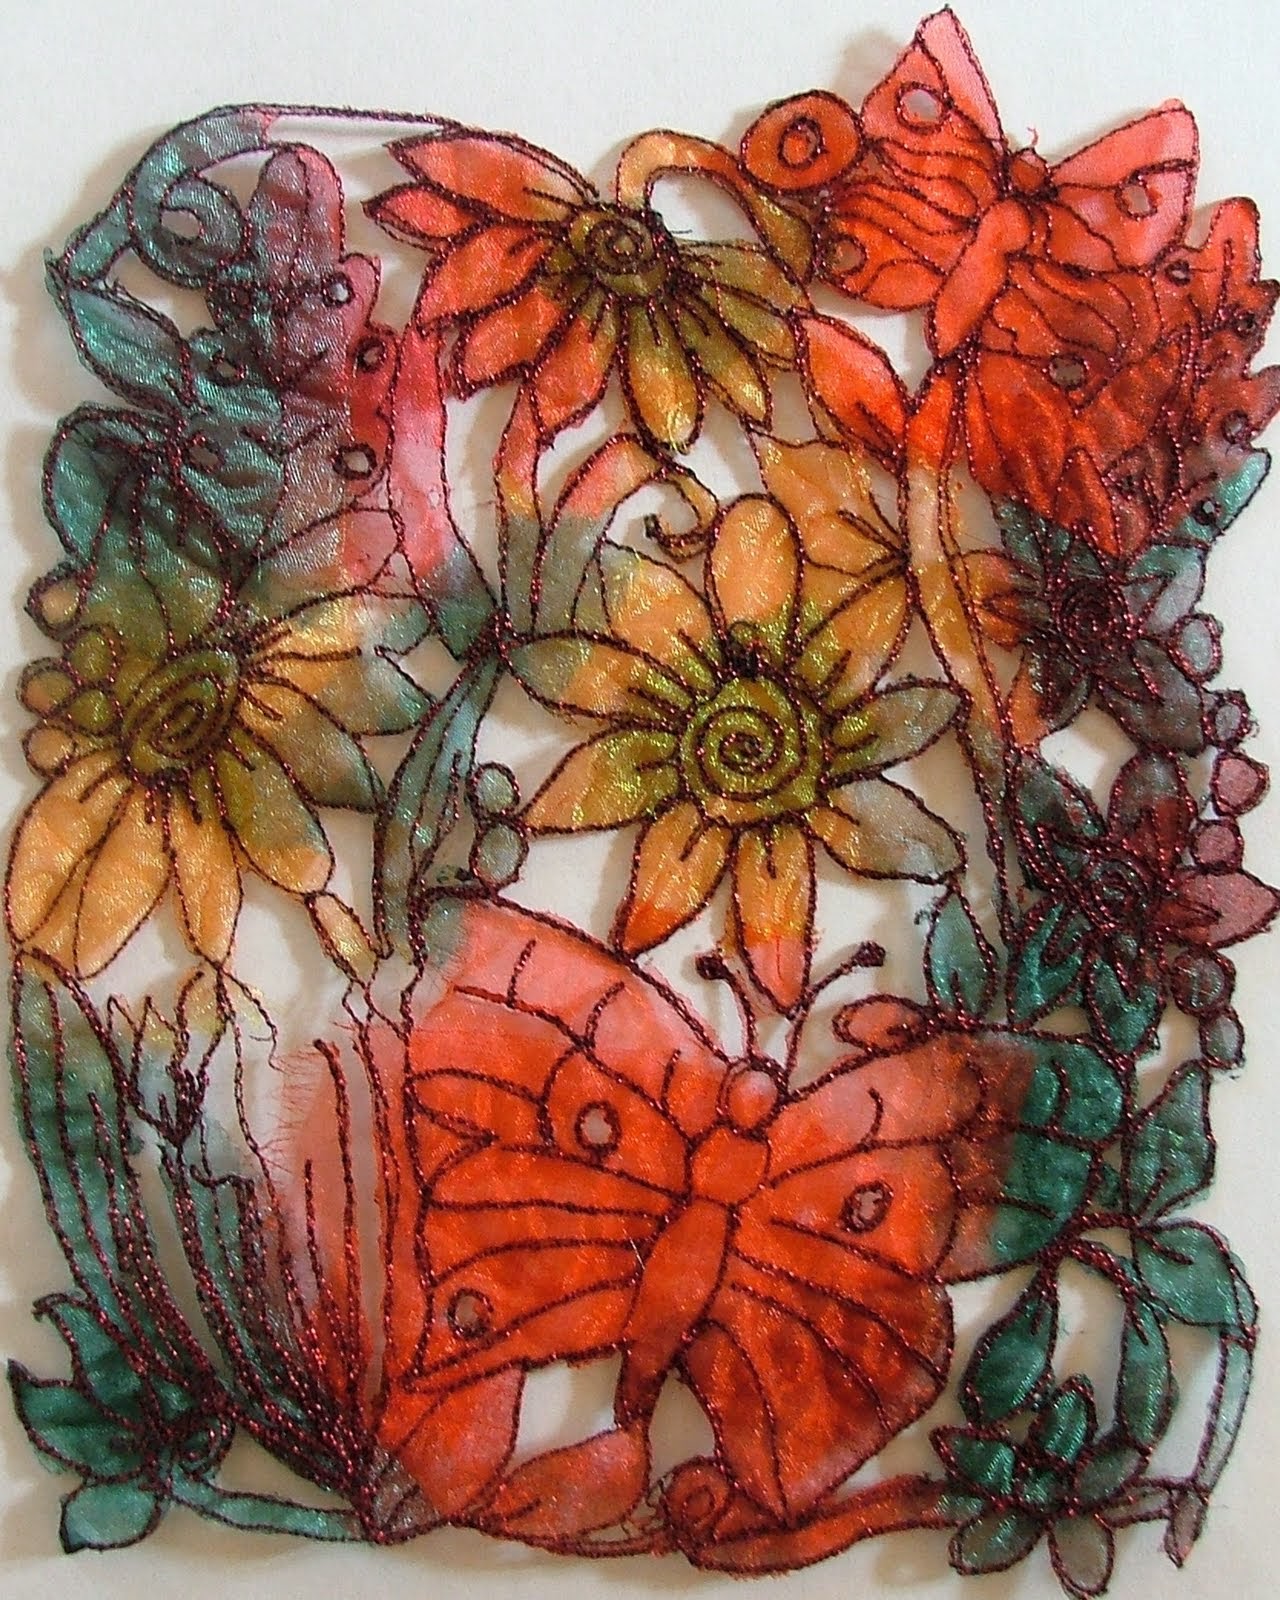
My first task was to have a go at her technique which isn’t explained anywhere on her website, (and quite rightly so,) because she sells her original patterns and makes her living from teaching the technique. But by reading through her blog, there was sufficient information that I could glean 
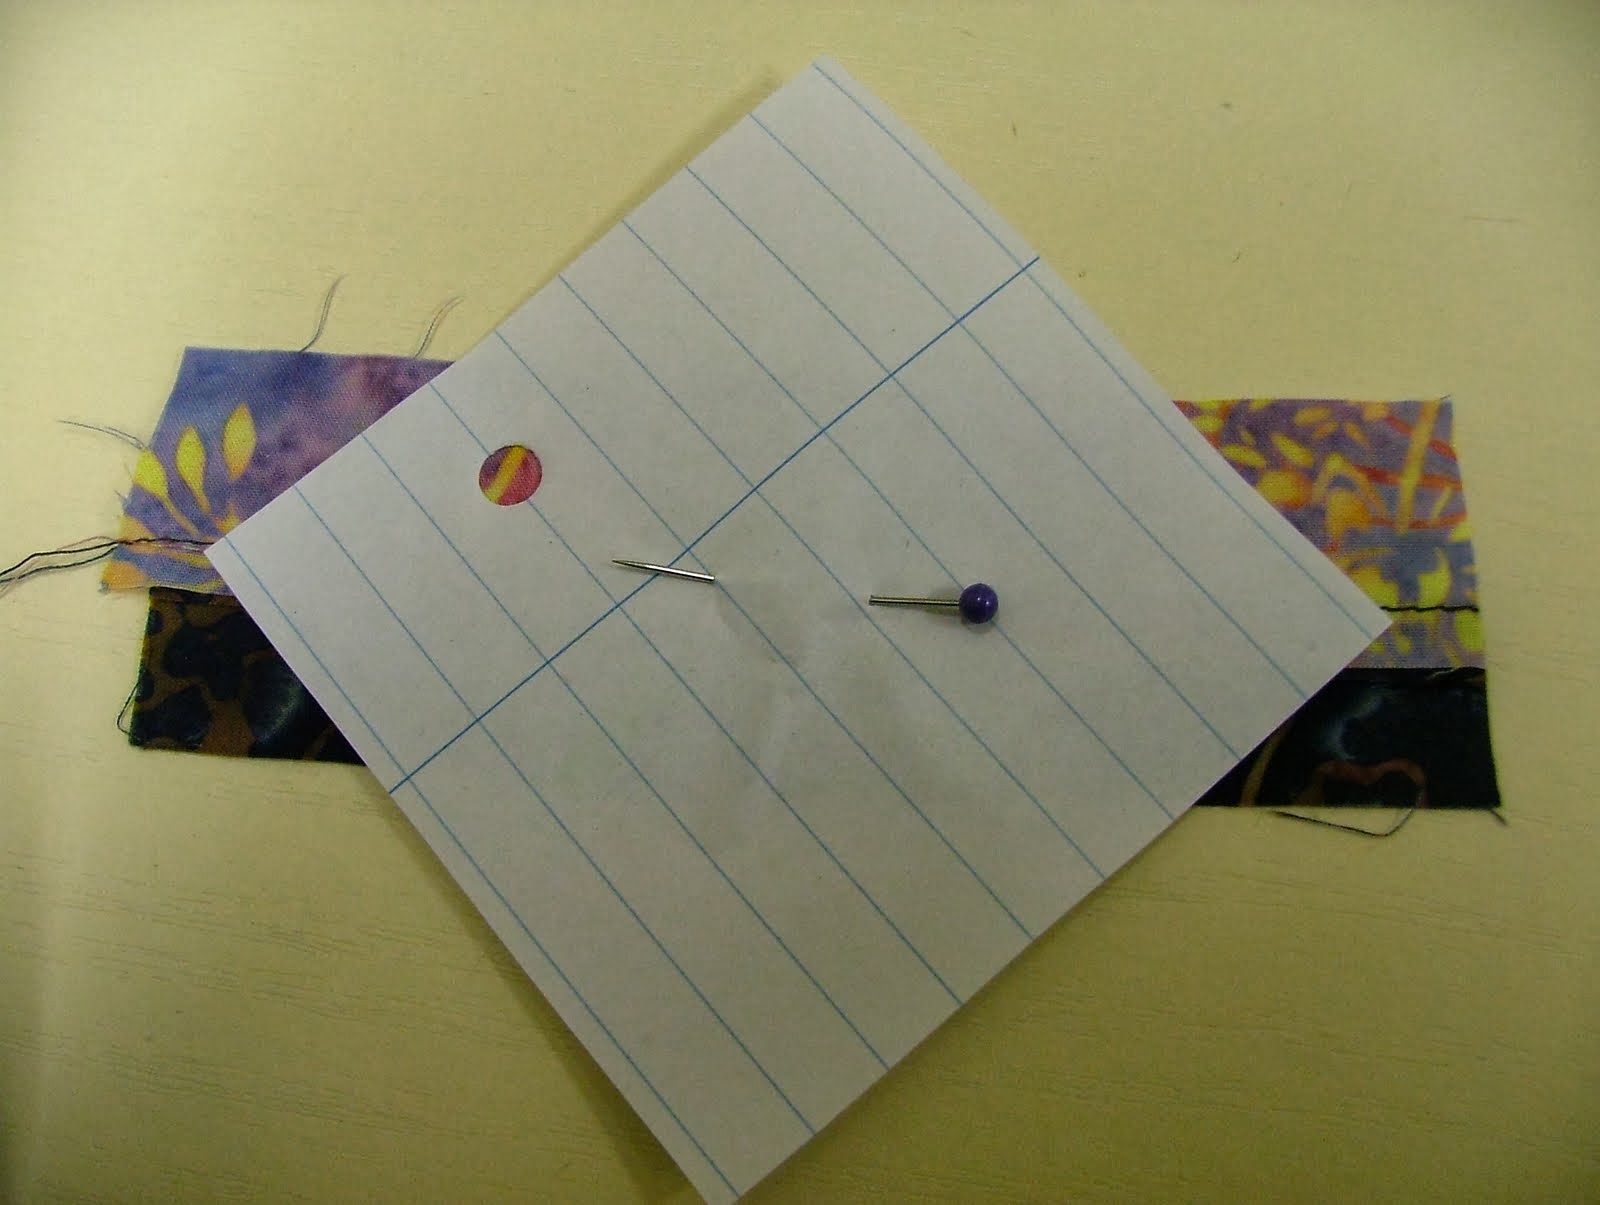
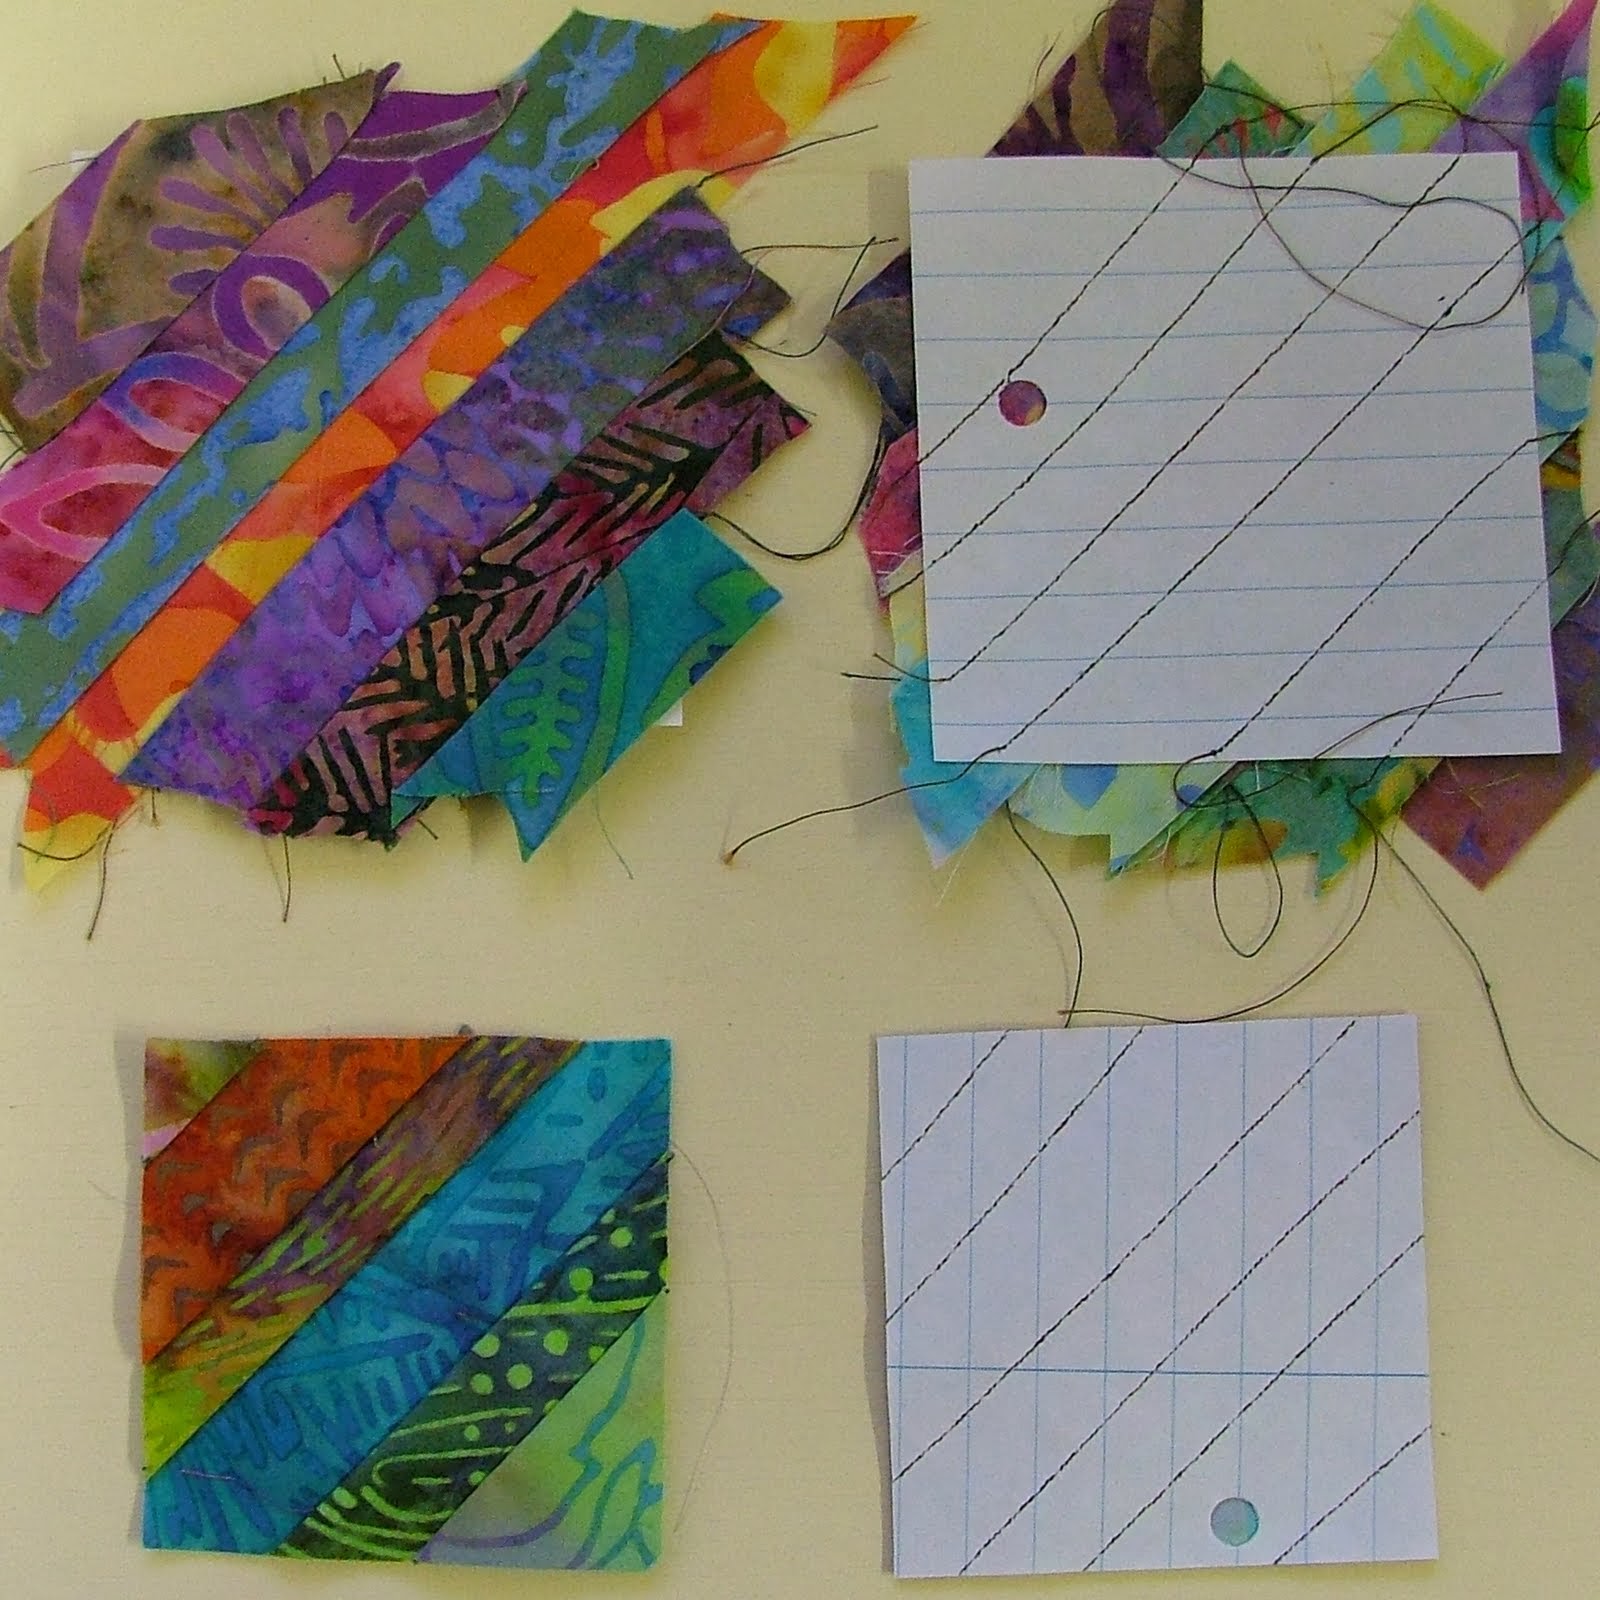
to enable me to try.  I just needed to use my drawing skills to draught a pattern first. Here is that first attempt. Just 
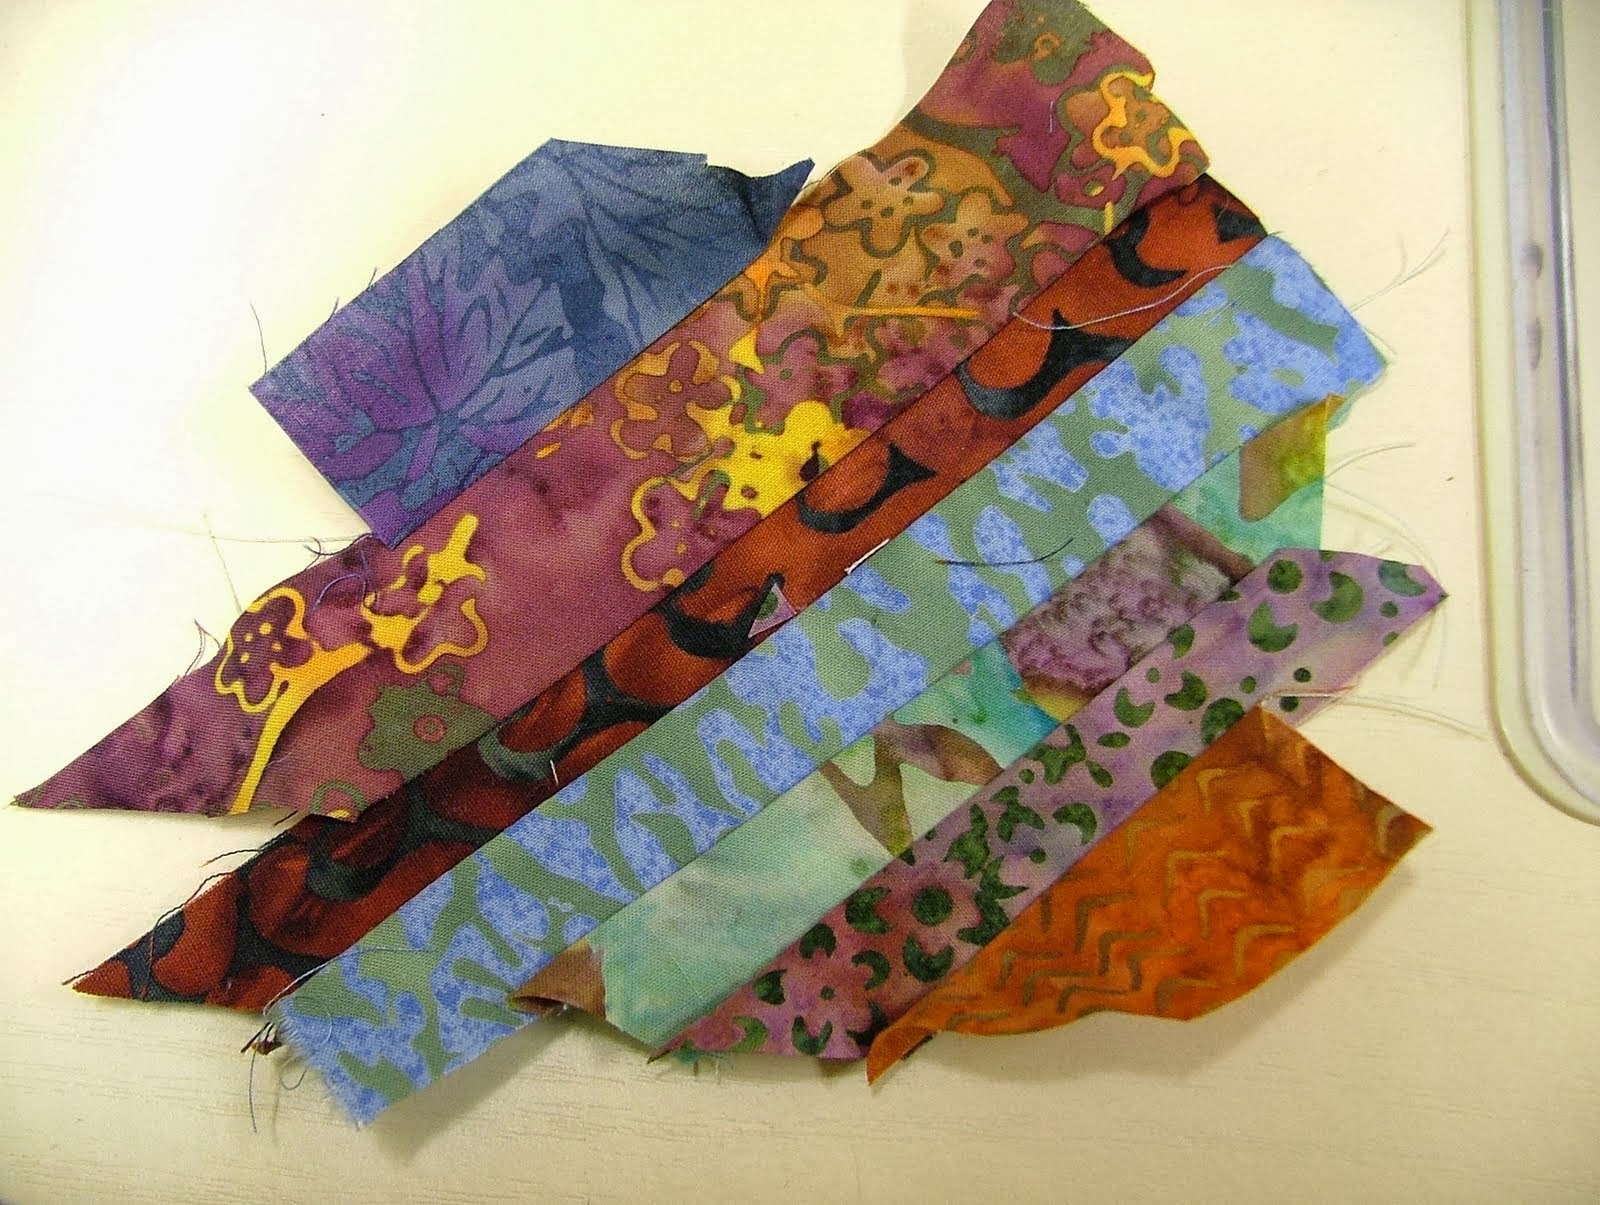
from having a go, I learned a lot about the sort of pattern I needed to draft, the way I needed to lay down my coloured sheers and how I needed to make the stitching lines complete and secure.

                                  First attempt

 Later that night, all fired up with enthusiasm, I sat with a piece of paper on my lap and tried to doodle a pattern suitable to go on the poinsettia panel. Here is the initial doodle.

 
                                          Holly doodle
 

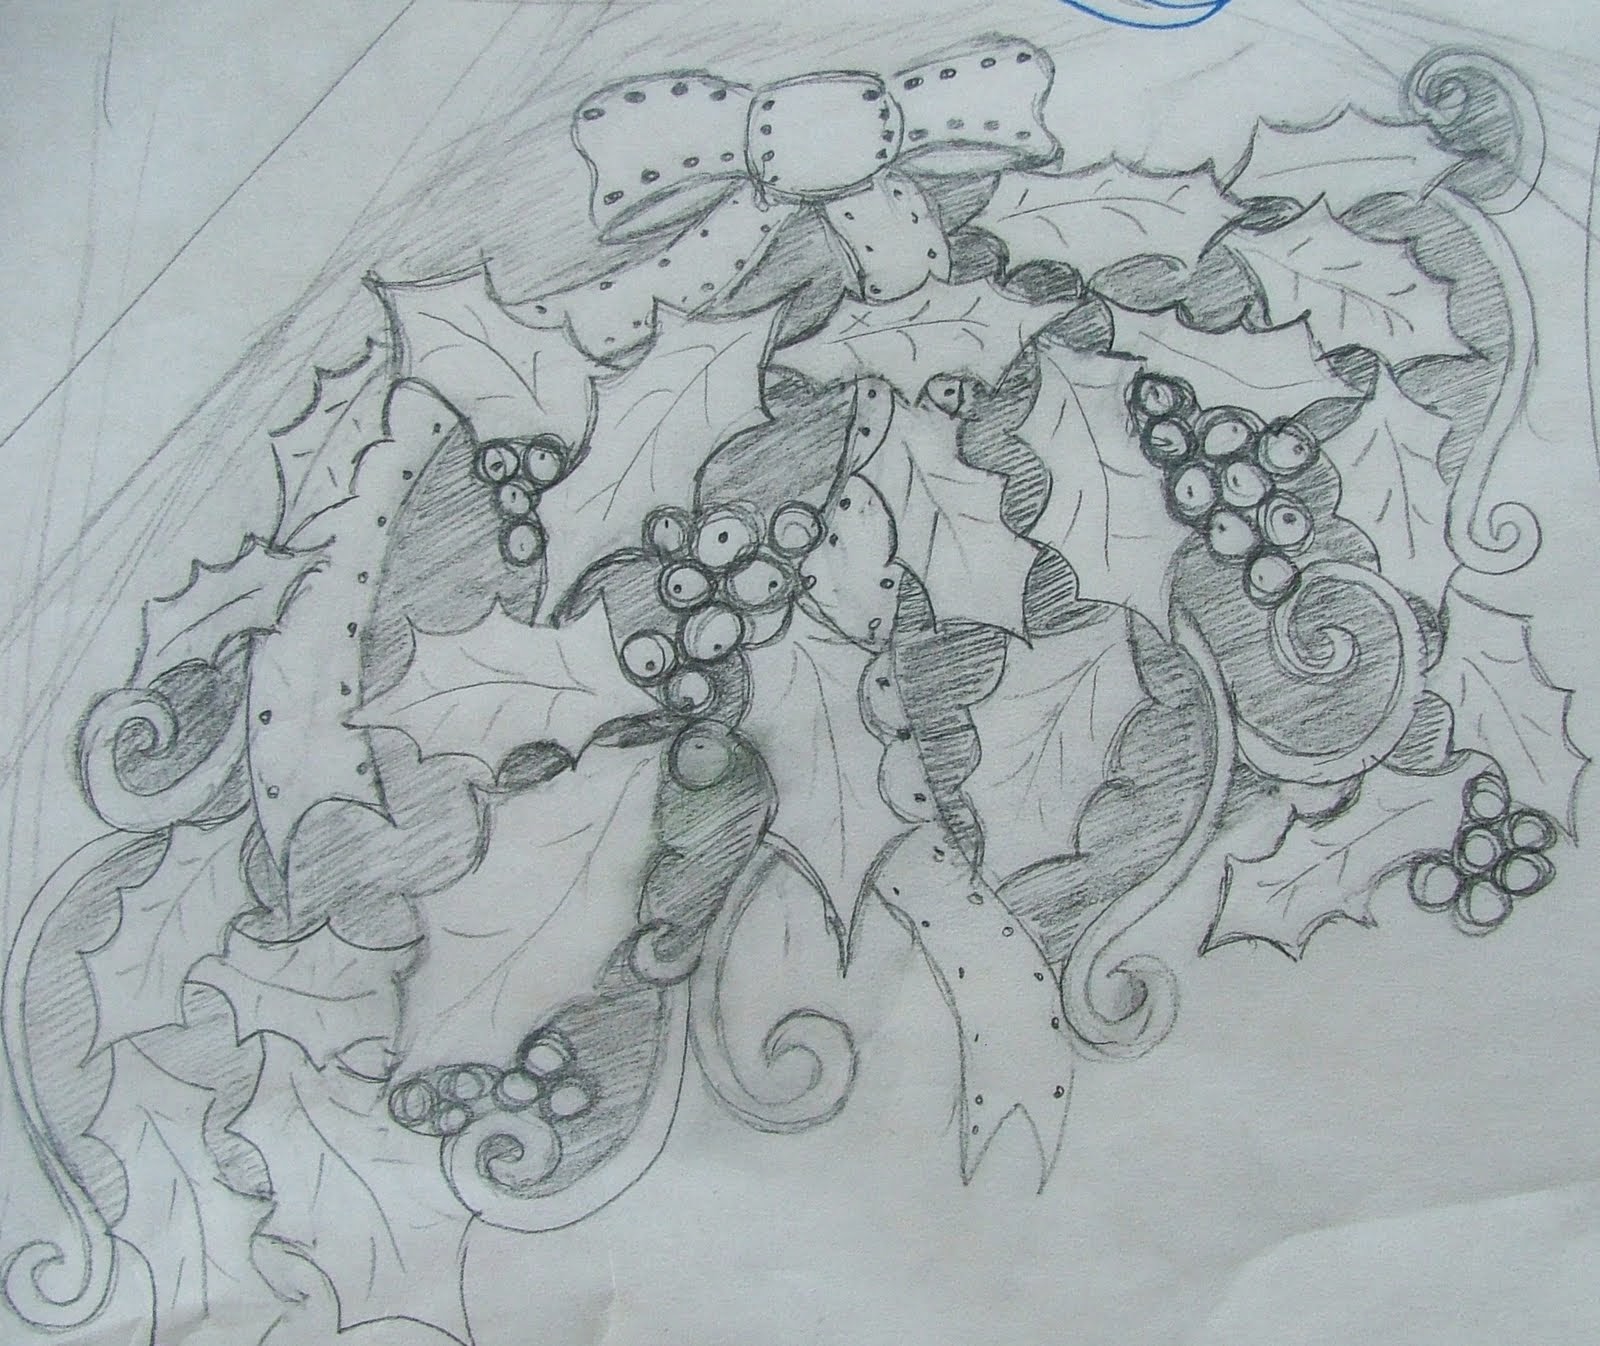
As I doodle, I am continually thinking and trying to work out what I want to achieve and how to achieve it. And it was then that I decided to create a pattern that spread across one corner of the block so the paper was marked out and the designed positioned accordingly.
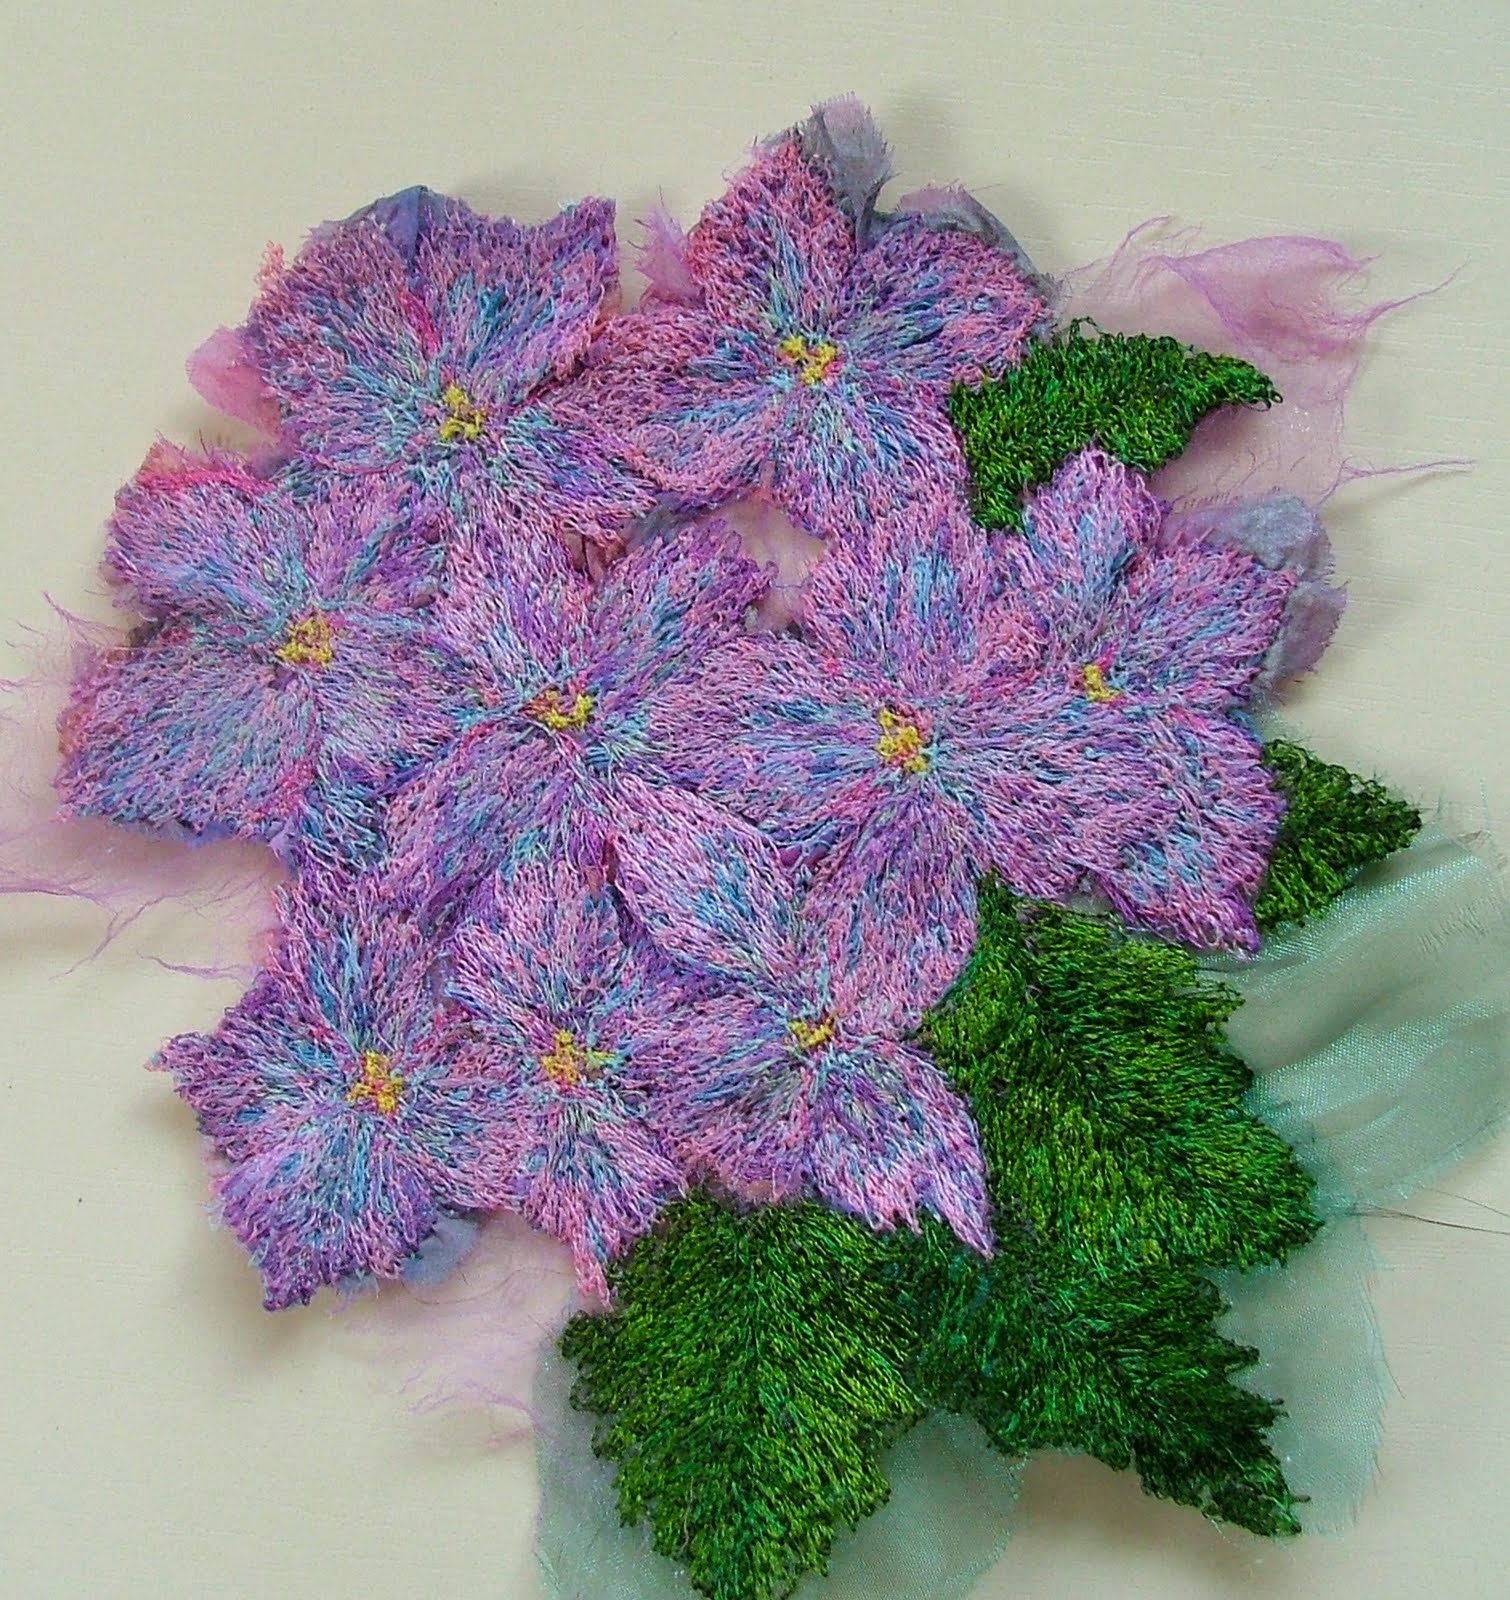


                                         Corner design

 ASIDE: It’s worth mentioning that while I have definitely been inspired by the work of Margaret Beale and Kathleen Laurel Sage, I don’t want to be them or replicate their lovely work. What I have done is learned from their methods and converted them to my own needs in terms of quilt making. That said, I will certainly be acknowledging their inspiration if this quilt is ever shown in public and it will be right and proper to do just that. Some people choose not to do this but it is a common courtesy to do so.

 Last week, I also completed two more thread flowers for the calendar quilt and there are two more to go. This week, I need to try the holly corner pattern on the poinsettia panel and, if it works, I will be designing a pattern for each month. I feel as though I am making progress a last!

                                          Hydrangea

                                       Hellebore


Sunday 23 March 2014

BLOG 192


I have started to think more positively about my calendar quilt and I have tried some different ideas. First I wondered how a dark fabric in the centre square would affect the look of the delicate colour-washed surface and embroidered flowers. I found it completely over-powering and rejected that idea very quickly.

                                 Dark centres?

 I chose a pastel sky fabric to go there instead and I liked that effect.

                                           Light centre


Then I wondered whether I could use sheer fabrics to create a shadow of the floral shapes thus giving a feeling of depth. Not sure about that one.

                                           Flower shadow

What if I tried sheer fabrics on two sides of the square to give the appearance of shadowing and therefore a feeling of depth? Again I found this quite harsh but at the moment the jury is out on that one.

                                        Square shadow


More pondering followed. I must say that I have always liked the effect of the sheer fabrics spilling out beyond the flower embroideries and how, when in position, they affect the colours of the batik fabrics underneath. So my next idea was to add more sheers to give the feeling of the brush strokes that you would find in the background of a watercolour painting. I liked that a lot but I am undecided how to proceed technique-wise. I need to think about this a bit more.

                                  Brush stroke effect


And then Jackie, a friend and fellow quilter (we are joint ‘mothers-in-law-elect’ too!), went to the Knitting and Stitching Show at the NEC and purchased a Margaret Beale soldering iron on my behalf …. And I got distracted once more! It is a marvellous tool and, after leaping straight in with a couple of samples, I decided that I had better read the book first and avail myself of all the knowledge, experience and expertise that the author has drawn on to the write the book. What do I know about this?  … Nothing! So I will read and learn.

                                      Soldering iron
 

BTW: I go to Suzette ‘one pin’ Smart’s house for machine embroidery and chat every fortnight and guess what? She has won something at the Knitting and Stitching Show at the NEC for a dimensional piece of embroidery featuring teacups. I will find an image of her entry for next week. Well done Suzette, thrilled for you! Google her and find her wordpress link.

suzettesmart.wordpress.com/author/suzettesmart/


Sunday 16 March 2014

BLOG 191


What a week it has been! I can reduce mine to these words: sunshine, Center Parcs, Auntie Blod and oil pastels.

The sunshine was enjoyed country-wide and it really did lift the spirits, although my spirits rarely need lifting as I am a quilter and a naturally happy little soul! The garden has taken up much of my time as I need to get on top of it before the weeds take over. I love flowers and they are the basis of my activities with fabric so I garden for inspiration, it’s a means to an end.

Center Parcs in Cumbria was the destination of my daughter and family this week and we joined them for a couple of days. They are wonderful places for families and activities and the sunny weather made our visit special. We walked and skipped and played and even saw red squirrels.

Auntie Blod, a very favourite aunt and my mother’s only sister, died on Friday. She had been frail for some time so it was not entirely unexpected. She lived along the coast from us in N Wales in the town of Llanfairpwllgwyngyllgogerychwryndrobwllllantysiliogogogoch (and yes I can pronounce it!) and we will be attending her funeral next week.  

Oil pastels were used In the art class this week to great effect. We coloured in a picture using the pastels, blending colours and scratching designs into the surface. The whole picture was then covered with black (Quink) ink and here is the result. You may be able to pick out the scratched designs in the garden areas; these are designs I would use in free motion texturing on a quilt. I enjoyed this technique as it pandered to my love of colour and use of black; I feel a quilt coming on!!


                                              Pastels and ink

 I have completed two more flower embroideries, Nasturtiums and Fuchsias. For some reason I am really dragging my feet on this calendar quilt, unsure of what to do next and I am trying to understand why. I used to sew very intuitively when I had a limited amount of time to spend on a piece of work and always worked at my best under pressure. I can only assume that because I am not working at speed, I am thinking about each stage too deeply, desperate not to get it wrong (why I ask myself). I can easily find other things to distract me as an avoidance technique. But I must resolve where I am going with this quilt and soon. Perhaps I need to set myself a dead line and go for it; it has always worked for me in the past.

                                                Nasturtiums

                                                   Fuschias


STRINGING THE STARS

I have made more progress on this scrap quilt, and here is the construction of the star block.

Arrange the pieces for the star block beside your sewing machine. Place a constructed block alongside for cross-reference. (The strips of my centre and corner squares all go from SW to NE and this will be consistent throughout the quilt.)

                           The squares for the block

Join the smaller squares together in pairs as shown.

                                            Join in pairs


Make sure that there is a ¼” space beyond the tip of the point. This will be taken into the seam when joining he blocks together to give a sharp point. Join the pairs together to make the top and bottom rows and join the remaining pairs to either side of the larger centre square making sure that the joins are crisp and accurate.

                                       Accurate seams 1

                                    Accurate seams 2

 Join all the rows together to make the block.

                                      Row to row


I have joined some squares together to review progress and to see whether I like the results. This will spur me on to make the quilt as from now on it is sheer slog! Here’s the story so far. This will be going on in the background all the time and I intend to have it completed for the Gresford exhibition this year.

                                          A string of stars


Sunday 9 March 2014

BLOG 190


Yesterday I attended a Regional Day in Frodsham, organised for Region 13 of the Quilters’ Guild (N Wales and NW). These events are always eagerly awaited, well attended and greatly enjoyed. We usually have 2 speakers, one in the morning and one in the afternoon, with time in between to socialise with fellow quilters and to spend money with the traders. They are great days and at £8:00, it is definitely an excellent perk of being a Guild member. I was only there for the morning because of other commitments but I was well satisfied and very excited by the work of Yvonne Brown. She has a textile/embroidery background and these skills dovetail nicely into quilting. Yvonne loves to make textiles using a reverse applique technique, just like me, but whereas my work was cut with scissors and needle-turned by hand, Yvonne cuts her edges with a soldering iron! I was amazed at her results. You can Google her to see more of her work but here are some pieces I particularly enjoyed.

                                      Jacobean panel

                                             Medieval tiles

                                       Sunflower

                                         Fleur de Lys

                                          Art Nouveau

                                          Stylised roses


The red horse was sent off this week to join the others that will appear as part of the challenge. Look out for the collection at the Grosvenor shows this year.


I  am just coming to the end of a 20 week art course which I have enjoyed immensely. I can’t believe that the tutor is now retiring from adult education to progress her own work. Here are a few of the projects I have tackled; I expect you too can see how they might be tranferable to fabric!

                       Monoprinting

                    Inks and oil pastel rubbings on paper

                  Still life with torn magazines

            Abstract with masking fluid and inks

     Jackson Pollock style with acrylics and snooker balls on a tray


Sunday 2 March 2014

BLOG 189


STRINGING THE STARS continued

When I sit down of an evening to sew for an hour on this project, I concentrate on one particular block and repeat it over and over again. This is so I don’t have to think about what I am doing and I can listen to music or to the radio in between bursts on the sewing machine. When all’s said and done, making a quilt is about application and stamina once the nuances of the design and method are solved. It’s sheer slog from here on in but well worth it in the end!


Half-square triangles

Cut the paper foundation squares at 3”.

Use the light and dark strips in Bags 2 and 3 (see Blog 188)

It is essential that the diagonal line runs exactly down the middle of the square. Use a normal stitch to join together several light and dark strips in varying combinations and iron the seams from light to dark.

                                     Diagonal seam
 

Place a sewn strip RS down on a flat surface and pin a square of paper over the top. Position it so that the corners of the square lie right along the sewing line.

                                                  Detail


Turn the paper over and lay another light strip, RS together, on top of the light side. Adjust the stitches to perforate the paper and sew along the strip.

                                      RS together
 

Continue adding strips to both sides of the diagonal to cover all the paper.

                                      Cover the paper
 

Press the fabrics and trim the square to measure 1 ½”, making sure that the diagonal line goes exactly from corner to corner.

                                                 Trim

The corner squares and centre squares are made much more simply.

                            Centre and corner squares

 
Sew strips to the paper foundation with a perforating stitch, press, trim and remove the papers.

                                          Sewing sequence
 

Lay the blocks in sequence prior to constructing the star block. You may have noticed that the strips in my centre and corner squares are all positioned to run from SW to NE. This will be constant throughout the quilt.

                             Building blocks of star

 More next week.