Sunday 25 May 2014

BLOG 200


 Another milestone in Blogland, my 200th posting: ‘Happy blogging to me …. Happy blogging to me…... Thank you to all of you who look in and keep in touch; it’s nice to know that you are interested in my ramblings.

I decided this week to get on with another of the panels for my calendar quilt. I went through the same involved procedure that I have described previously but I ended up with the flower in the wrong corner! The whole point of the background panels is that the colours run into one another but somehow I managed to rotate the block and didn’t notice until all the work was done. I can’t undo it as the process would leave marks on the fabric and I can’t make another block because I haven’t any more of the same fabrics!!! I am so cross with myself that I have shelved the project until after the Gresford show when I can think more clearly about a solution. Grrrrrrrrrrrrrrrr!

                                         Rotated block
 

So, in a spirit of cancel and continue, it has been onward with the exhibits for the Gresford show and the items for the Sale table. I still have a few workshop samples so I have used some to make bags. There’s now a bag with a flower wheel design with a repeated pattern front and back, and a positive/negative framed daisy.

                                   Flower wheel bag

                     Framed daisy negative

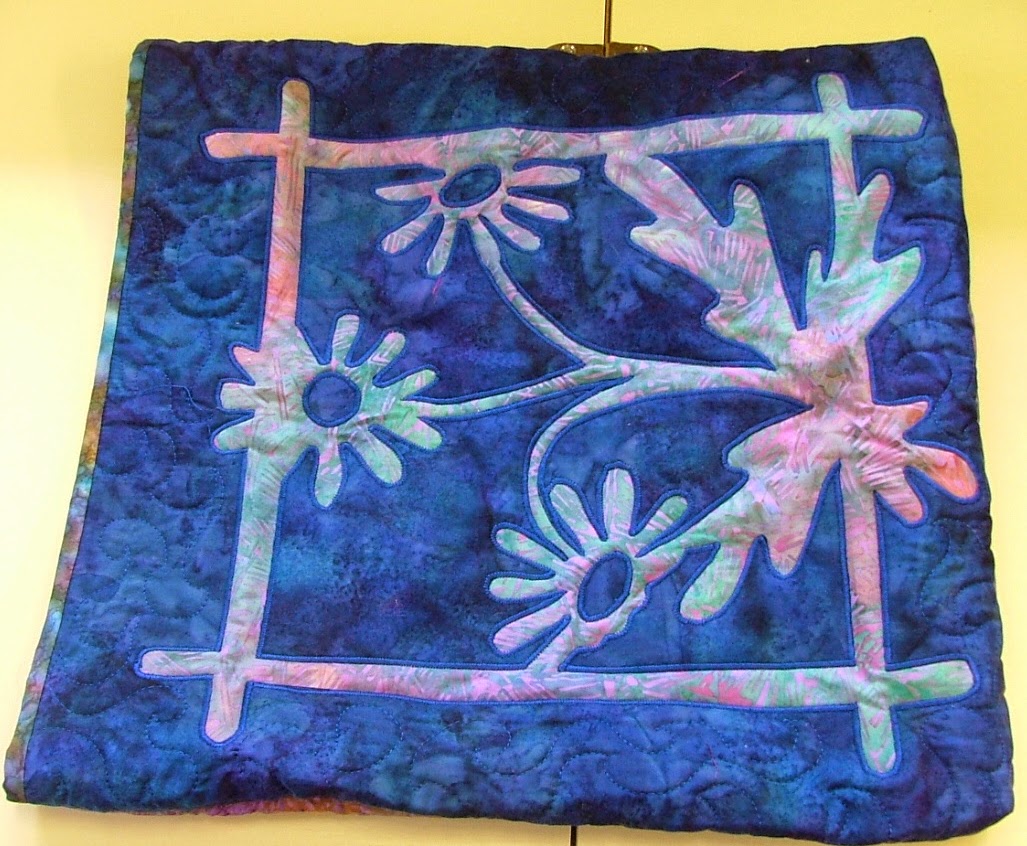
                         Framed daisy positive


I make the bags by joining two ready quilted panels together with a binding strip and then shape the corner by sewing across the base.

                                Shaping the corner


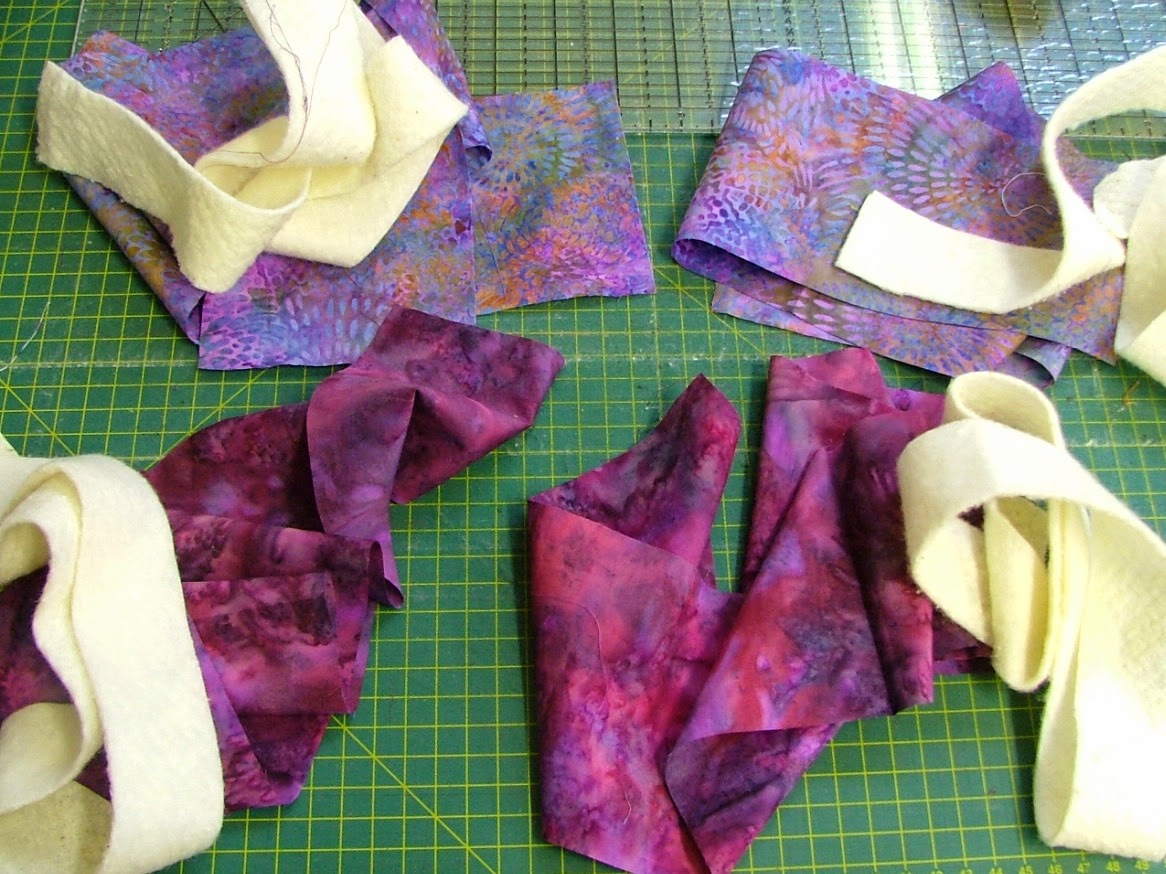
All I needed to do was to make the handles. The simplest way was to create strips of fabric and batting as follows: The fabric strips were cut at length of handles x 4” and the batting cut at length x 1 ½”.

                                          Strips


Press a ½” seam along the top edge of the strip and place the batting just below it. Iron the lower edge over the batting and fold down the turned edge to cover it. This seam should run along the centre of the strip. (It saves making a tube and turning it through.)

                         Batting and turned edge

                          Pressed lower edge

                                 Central seam


I sewed from the seamed side, down the middle of the strip with a decorative stitch to hold the fabrics in place through the batting.
 
                                 Sewn strips

 
The ends were attached under the seam at the top of the bag, 3” either side of the centre.

 
                           Attached handles

 
I completed the free motion quilting in the centre of a stained glass panel.

                    Stained glass panel

 I joined squares of Batiks together to create a backing fabric for my ‘Trip round the Batiks’. I am awaiting the batting so that I can quilt it.

 
                            Trip Round the Batiks

 The pile of finished work is growing!

                        Finished projects


Sunday 18 May 2014

BLOG 199


Long light days, a blooming garden, lovely weather and …… frantic sewing … and I am supposed to be retired!! I often wonder why I feel so compelled to slam things under my sewing machine. I suppose the main reason is that I don’t like to waste anything and that attitude was ingrained in us as children in the 50s. We were also encouraged not to waste any time as it is very precious and so we were always busy. The chores were completed first before sitting down and then we usually had something in our hands so as to make good use of our TV watching time! Another reason for frantic sewing just now is that I am trying to finish off unfinished projects for the Gresford show. This is the only time now when I choose to exhibit new pieces and sell my ‘historic’ projects, of which there are many. Once this phase has passed, I will rethink where I am going with my creative endeavours.


That said, I was anxious this week to make progress on my calendar quilt, where I am enjoying the creative process without the pressure of deadlines. So, continuing from last week, the pattern was pinned onto the back of the panel.

 
                                          Pattern on WS

 
I placed sheers onto the RS, where I more or less wanted them to appear. From the WS (the pattern side) I sewed around the shape to trap the sheers in place.

                                          Sewn shape

 Then I used the soldering iron to remove the excess fabric from around the outside edges. I particularly like the way that the background fabric affects the look of the sheers.

                                  Soldered shape
 

I thought I would continue to do this, placing colour where I wanted it to be to build up the design. After placing a green sheer on the next part of the pattern, I realised straight away that I did not like it and that the design was in danger of becoming contrived; this is not what I was trying to achieve.

 
                             Building the design

 
After a bit of reverse sewing (which incidentally I hate to do because it smacks of failure!!) I started to layer and pin sheers more randomly on the RS.

 
                            Random placement

 
Then I began defining the pattern from the WS again, building up strength of colour in areas where I wanted it.

                        Stitching the design


More sheers and more stitching followed.

                                         Layers

 The finished corner looked pleasing … apart from the purple berries on the corner which seemed like a good idea at the time. The thing about this method is that if I don’t like something, I can just solder it away. I think I may have cracked the technique!

 
                        Completed corner

 
I have a water colour garden hanging which I am quilting for Gresford and here is Chivers trying to halt my progress by sitting on my quilt so I can’t move it freely under my machine. Must be his tea time!

 
                                           Chivers

Sunday 11 May 2014

BLOG 198


I’m back from our week in Kefalonia and what a wonderful relaxing time we had there. Last week was the very start of the season and a plane full of Thompson’s passengers was distributed around the island to the hotels that were open for guests. There were only 30 in our large hotel so the service was magnificent and there was lots of room around the pool and on the deserted beaches nearby. By the time we left, they were expecting to have 350 guests in residence. Half of the people on our outward flight were spending 2 weeks there so we returned in a half-empty plane so there was lots of room to stretch out. Brilliant! So, I strongly recommend package holidays during the first or last weeks of the season. But look what was waiting in the garden when we returned. Don’t you just love spring!

                                     Clematis 1

                                           Clematis 2

                             Cherry blossom


However, in my studio, the spring warmth had the effect of fading the pattern for the bird panel that I started in my last blog. It was drawn with a water-erasable pen and had been left out on a table surface. With no pattern, I can’t see where to position the applique fabrics so I have undone it ready to start again   …..  soon!

                                   Faded pattern


So I have decided to focus on my calendar quilt for a while. I need to work out my method for adding a pattern made from sheers to each block. The pattern needs to be designed first and this is the stage that often holds me up. I find other things to sew as a way of avoiding getting my pencil and paper out. That said, once I get started I enjoy the process. So, it’s blinkers on and a week of concentrated effort ahead!! This in the block for September.

                               September block

 
This is the corner pattern I have designed for September.

                  Corner pattern for September

And to remind myself what I am trying to achieve, I need to refer to my first attempt at working with sheers, using a Margaret Beale soldering iron and being inspired by the work of Kathleen Laurel Sage. What I like about this panel is the spontaneity of the colours and the way that the colours bleed into one another. But how do I go about it directly onto the fabric of a quilt block?

                       Panel with sheers

 
The story so far: I overlaid the pattern with light-weight Vilene and traced it with a permanent marker.

                        Pattern onto Vilene

I positioned and pinned the pattern onto the WS of the corner where I wanted the detail to be seen. You can see the stitching lines where I previously added detail to the hydrangea in the centre of the block. I used ‘Stitch and Tear’ on that but found it hard to remove afterwards and will use Vilene (which will remain in place) for this purpose from now on.

                       Pattern onto the WS

 
The sheers are ready, what’s not to like eh?! Mouth-watering!

                                          Sheers


I have selected my thread and this will go on the bobbin as I want it to appear on the RS of the panel and I will be sewing from the WS. More next week.

                                    Thread
 

PS Terri Vorsteher contacted me at the end of Blog 94, making enquiries about my Signature quilt from 2012. If you are reading this Terri, I am happy to answer any of your questions about the quilt but I just don’t do Facebook. Looking forward to hearing from you. Dilys