Sunday, 29 May 2011

BLOG 52

I have made good progress with the baby quilt this week, finishing the centre and adding the borders. Here is the top from the right side and the wrong side. On the WS the seam allowances have been pressed consistently in the same direction; this will be helpful when I get to the quilting stage.

Right side

Wrong side

The borders are added to extend the size and to frame the centre. I have used the remaining rainbow fabric to cut 1” strips and added 2” strips of the cream. After an accurate ¼” seam allowance is sewn, the raw edges should meet on the WS.

Border strips, WS and RS

I decided to mitre the corners so I needed to make sure that all 4 borders strips extended about 5” beyond the corners. When sewing the border strips, I started ¼” in from one corner and finished ¼” from the other corner.

(NB This exact ¼” gap at the beginning and the end allows the strips to overlap each other at the corners and leaves just room to manoeuvre them to create the mitre.)

Overlapped corners

Prepared mitre

The top strip is turned under until the raw edges of the top strip lie parallel with those of the bottom strip. Once pressed, the mitre is established. There are 2 ways to sew a mitre. You can use a ruler and water-erasable marker to define the creased line on the WS and sew it by machine. The excess fabric is trimmed away to leave a ¼” seam allowance.

Marking the seam

Sewing the seam

Or, and this is my preferred method, you can sew it by hand using a matching thread and concealed stitch from the RS. Trim away the excess fabric and iron the seam open. The completed top is ready for quilting now.

Appliquéing the mitre

On Monday I went to Castle Court Quilters to attend the monthly machine embroidery class with Suzette. This was the second part of a box-making workshop so, as I had missed the first part, I did my own thing, just happy to have made the space for a day’s sewing. I chose Hydrangeas as a theme and used various fabrics and threads to make a sewing case. These make lovely gifts and it is something I have done before. The colours of Primulas inspired a previous sample.


Embroidery Detail

Primula sewing case

Sunday, 22 May 2011

BLOG 51

It has rained for a week following our arrival back in the UK. Frustrating from the gardening point of view but good for the quilting!

A new great nephew, Ben Luke Osmotherley has arrived whilst I have been away and it is my custom to make a quilt/play mat for any new baby in the family. So this was my need-to-sew starting point this week. I have a basket of pre-cut rainbow squares and child-like prints so the fabrics were at hand. The method now needs to be quick!

Method for a simple 9-patch quilt

All the squares aree cut at 2” and placed by my machine ready to sew with a neutral thread and an accurate ¼” seam. Accuracy in cutting and sewing are vital!

Rainbow squares

The squares are string-pieced through my machine.

String piecing

Thread saver

I sew onto a scrap of fabric, folded to the length of my machine foot, at the end of a line. This allows me to cut away the sewn squares and saves on thread. It also prevents the thread-tangling that sometimes happens when you start to sew.

I decided that there would be a red square in the centre of all the blocks.

Seam allowances

I press my seam allowances from light to dark so that when I join the lines together, the seams butt up to one another. All the 9-patch squares will be pressed in the same way.

9-patch blocks

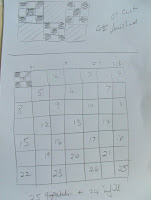
I intend to join the patchwork squares together with a square of rainbow fabric so a quick design on a scrap of paper was sufficient for me to work out quantities. I only have ½ yard of the rainbow fabric so I need to make it fit the project!

Design

9-patch and infill square

The lines are joined together and the seams pressed towards the rainbow fabric. This will be consistent throughout the quilt top with the result that the seams will butt together when joining line to line. Consistency in pressing and sewing is preferred because it establishes seam directions and makes quilting straightforward.

Joining lines

Another project receiving attention now is a want-to-sew (as opposed to a need-to-sew) piece in my painterly style. ‘Hollyhocks’ has been put to one side whilst I concentrated on my teaching preparation for America. It’s time has come and there will be more of this next week.

Hollyhocks

Sunday, 15 May 2011

BLOG 50

I am back again from flying with the Eagles in Paducah and more or less settled back at home again, scratching with the hens!

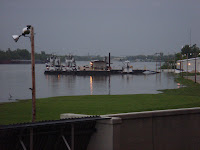
Paducah, or Quilt City as it has been labelled, stands on the banks of the Ohio. It was badly affected by torrential rain and thunderstorms so that all the flood barriers were raised to protect the town from the rapidly rising river.

Flood gates, Paducah

The Ohio in flood

By the end of the week the water had reached the floodgates, evidenced by seepage at the base of the gates. This caused great upheaval for the organisers because the convention centre that usually houses the quilt show was built between the river and the levees. At the eleventh hour, it was decided to move the venue to a huge Baptist church that was almost the size of a university campus building. Vendors were re-sited in empty shops and quilts were hung in alternative galleries. How the organisers coped I know not, but everyone was anxious that it was going to work and it did! This year will be the one that everyone remembers and says ‘I was there!’

My week in Paducah was exciting and exhausting. Being the only international teacher and a new author for AQS, I was happily worked to the bone. I taught 4 workshops, gave a lecture, did both All-star reviews, took part in an author’s roundtable and did a video promotion for my book. This left me no time to visit the vendors or see downtown Paducah and allowed me only to walk past, rather than study, the exhibited quilts. I really enjoyed the experience and made many new quilting friends.

And then it was holiday time as I met my husband and we flew to Miami and motored down the Florida Keys to Key West.

Relaxing! South Beach, Miami

We saw pampered pooches, pelicans and huge fish.

Pampered pooches

Pelican

Fish

We saw Ernest Hemmingway’s pure line of 6-toed cats and the sponge man.

6-toed cat

Spongeman

A colourful beacon marks the most Southerly point of the USA and a busker’s dog is trained to take your money!

Beacon

Money collector

We actually found the No Name Pub where the walls are plastered with defaced dollar bills and we added our own.

No Name pub

Roger piloted a Waco bi-plane and I swam with Tina the dolphin

WACO and pilot Tina

We took an airboat ride and saw loads of gators, on land and in the water.

And we sipped sunset cocktails on Sunset Pier and, guess what, saw the sunset!!


I started my blog purely as a place to talk and share quilting matters so forgive me for showing my holiday pics. You are actually forbidden to show quilts from Paducah without the express permission of the makers, so I can’t share those with you. Rest assured that next week I will be back to as normal as I get!