Sunday 26 April 2020

BLOG 493

Blog 493
 
I can do it if I really try! And I tried and I did empty my waste basket and it was quite a cathartic experience! It’s good to let go sometimes, to give yourself permission to move on! Hark at me; you’d think I was in therapy! All I did was to throwaway some small scarps that I didn’t want anymore! Put it in proportion and get over yourself girl!!


           Empty basket


I took all the greens and blues off the design wall from last week and started again, this time with the blues and reds. It is so useful to take pictures as you work; you can witness the progress you are making, you can assess your runs of colours and you can see straight away if there are any placement problems. For example, there is a strong line of unblended red going down the middle of the lay-out below.


               Blues/reds


It was at this stage that I decided that I needed to start with the lightest colours in the centre and to blend out to the darkest colours at the edges. So it was back to square one again (or rectangle one if you are being pedantic!) and back to the yellow/greens, this time trying to avoid any strong lines and to blend the colours better. Here’s the sequence.


Yellows/greens


Plus blues


               Plus oranges


               Plus purples


             Plus reds


At this stage I decided, for whatever reason, that the vibrant greens needed to be at the left hand side!


            Moving the greens


               Plus purples


10 Reshuffling


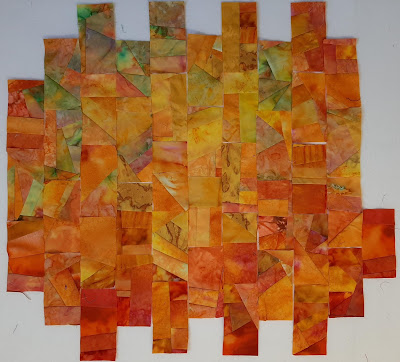
And then I wasn’t happy with the right-hand corner and needed to take a picture to find out why. It was evident straight away that there was a strong line of maroons. So there was more reshuffling and I’d like to say that I have arrived at the final lay-out but I still find the lower right hand corner too heavy. There will perhaps be a bit more shuffling before I am entirely happy but, rest assured that I am almost there. You may have noticed that the rectangles are staggered in vertical lines. This is so I don’t have to line up horizontal seams when I am joining the vertical lines together. It just makes life easier and it was how I used to make my gardens to go behind the wrought iron gates.


              Right hand corner


              Almost there
 

Sunday 19 April 2020

BLOG 492

Blog 492
 It’s no wonder I am enjoying the obsessive work involved in this scrap ‘crumb quilt’ project. All you have to do is look at my sewing table and you will know why! Colour, colour and more colour! But I have to say that I am happier with the warm tones as opposed to the cool tones.


           Warm tones


              Cool tones


And isn’t this waste paper basket a delight! And daft as it sounds, I still have to stop myself from pulling all these shavings out and trying to do something with them. Pathetic isn’t it!


          Shavings
 

               Palette


Now that all the fabric is used up and the preparatory sewing is done, I need to lay out my lozenges of colour and turn to my design wall to play. My design wall is covered with a flannelette sheet which means that I don’t have to pin the shapes, which in turn means that I can move them around freely (there’s nothing more restricting to this sort of creativity than pinning!).  I just stroke them in place in a staggered formation and they stay there. My starting point was the golds and I worked from the lightest in the centre gradually introducing the oranges.
 

           Golds


             Golds/oranges


And then I had a garden break for a couple of days and returned to view it. It’s no wonder I enjoy what I do when this is what greets me on the design wall when I go into my room! But I needed to clear the space to give me room to expand and continue. I started again trying to transition from golds, through greens into blues and purples.


         Design wall


           Gold/green


           Green/blue


             Green/blue/purple


               Progress


This will change daily as I fiddle and faff but I will continue to play in this way until I come up with something I really like. I have yet to incorporate the warm tones which could be tricky!


             Remaining palette


My little felted houses continue to pile up; we are after all still self-isolating and self-distancing! They are at different stages on the conveyor belt but very all individual and a delight to make.


         Felt houses


Another project that has been long overlooked is this wall hanging of machine embroidered flowers. I have just pinned the smaller pansies and violas in place ready for catching down. I LOVE IT!


             Machine embroidery
 

And finally, along with self-distancing and self-isolating, I have been self-birthdaying this week! It was a very quiet and strange day although we did chat en famille, with birthday cakes all round. My younger daughter is great at finding the right cards for the right occasion and I thought I would share the one she got for my birthday. (Not that I drink a lot, you understand. I just drink more than her and that’s easily done because she rarely drinks at all!)
 

            Birthday card


Sunday 12 April 2020

BLOG 491


Blog 491


Another week of lockdown and more progress has been made and in the right direction too. I don’t know about you but I’m the fittest I have been for a long while! I have just completed my Lenten fast, something I have been doing since I was a little girl at Sunday school. This helps to keep me trim and if you add to that the daily walks we have been doing up our local ‘mountain’, then I am fit as well! Now that we are allowed only one outing a day, it’s got to be a good one and these restrictions help to concentrate the mind and body.
 

I have finished the top of the scrap quilt which has been in progress for some while. It was to hang for the first time in Gresford this year but that has been cancelled along with everything else. It would have been our 40th exhibition so preparations were in hand to make it the best ever. It will be something to look forward to next year instead and with twice the time to prepare, the church will be packed!!! This top will now be put to one side with the others I have yet to quilt.


             Quilt top
 

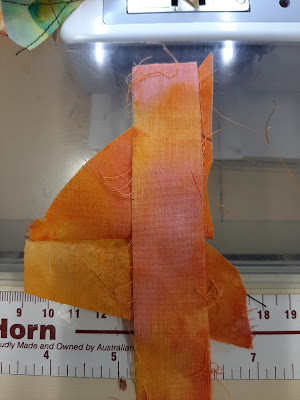
Last week I started to do ‘crumb quilting’ using the smaller pieces left over from the above quilt. This will be as far as my colourful scraps will go, there are no more thank goodness (… unless I start sewing numerous new projects and start to accumulate them again…. AAAAHHHH!!!!) I am making 4½”squares and then cutting them in half. I haven’t a clue why yet but my mind is mulling things over and I am sure something significant will come from these endeavours! I have shown the sequence below. I started by sewing the smaller bits together haphazardly to make larger bits and all I needed was one straight edge to sew against. Anything sticking out beyond this was trimmed off after sewing. It is being constructed using a ‘sew-and-flip’ method and there are plenty of references to crumb quilting on line if you are interested.


             Crumb 1


           Crumb 2


             Crumb 3


             Crumb 4
 

 As it grew, I measured it against a paper template to give me an idea as to whether it was big enough or, if not, where I needed to add some extra pieces.


               Template 1


             Template 2


              Progress


Last week I showed a picture of the ‘get-rid-ofs’; these will be handed over to someone I know after this crisis is over. And now I only have really small scraps left and I need to release them…….
 

I can throw them away.
I CAN throw them away.
I can THROW them away.
I can throw THEM away.
I can throw them AWAY!


                Throw-outs


FABRIC MANIPULATION Part 3
The final stage in the preparation of the cushion square is to add the corner squares and border strips. You will need 4 squares at 3½” and four border strips at 2½” x 14”.


              Corners and borders
 

1 Press the squares in half along the diagonal and position them, one at each corner. Tack in place.


               Add corners


              Tack in place
 

2 Place the first border strip RS down onto the front of the cushion and sew from where it lines up with the left hand corner to about 3” from the next corner. Use a ¼” seam allowance and a matching thread.


              Border 1


3 The second border will fit along the next edge exactly. Place it RS down onto the appropriate edge and sew it is place.


               Border 2


4 Sew all the borders in place in the same way and complete the sewing on the first border.


 Finish border 1


             Borders added


The next stage will be the rolling and sewing of the bias edges.
 
Now that everything is being closed and cancelled or postponed, I am beginning to wonder if anyone from the Nercwys group is following this project. Let me know and I will continue to post details of the sewing phase.