Sunday 25 August 2019

BLOG 458

Blog 458
 
COASTER BOX CONTINUED.
8 Cut the outer fabric as follows: For the base: a strip 22” x 3” and a 5 ½” square. For the lid: a strip 22” x 2” and a 5 ½” square
(NB If you want to try your own design for the box lid, prepare a 5 ½” square as above but make sure that your design doesn’t extend beyond the 4 3/8” x 4 3/8” size.)
               Outer fabric
 

9 Cover the base (and lid) as follows: Place the base centrally onto the WS of the square. Add Pritt across the corners of the fabric and all around of the lower edge of the box. Stick the fabric to the sides of the box, working opposite sides together. Pinch the excess fabric at the corners and tidy it to one side with masking tape.
           Stick the square


            Pinch the corners


                Tidy the corners


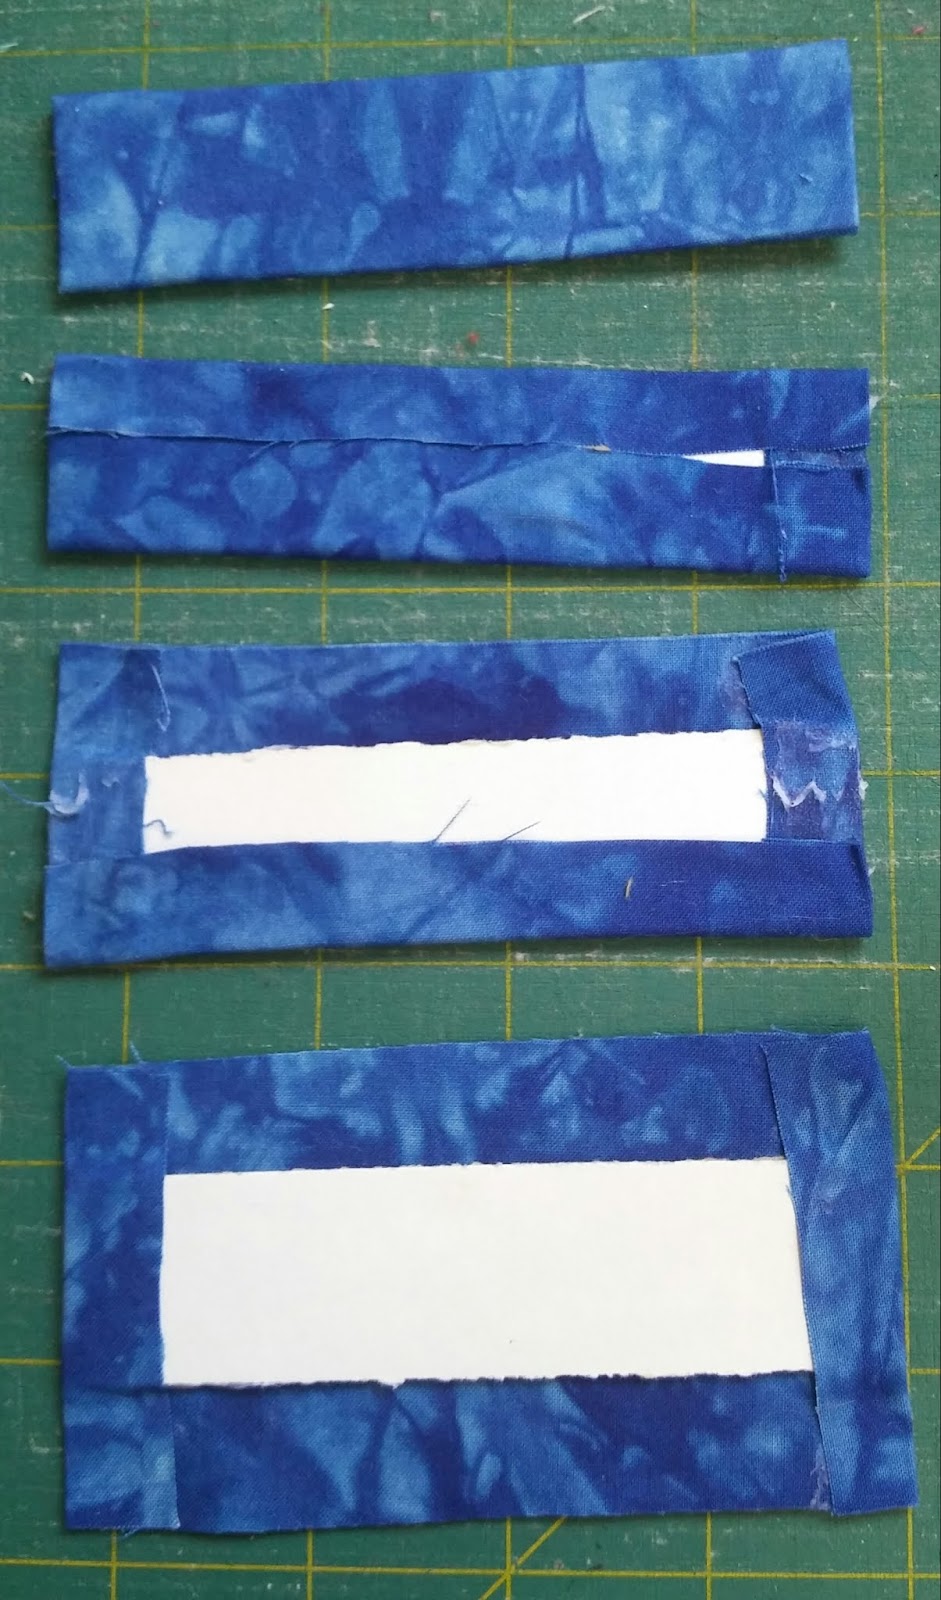
10 Iron under a ½” seam allowance along one long edge of both the strips. Work the base of the box first and place the ironed edge of the 3” strip around the base of the box. Remember to over-lap a corner by 1” and hold the strip in place with masking tape as you sew. Use a thread that blends into your fabric and a concealed stitch to sew around the four sides and attach the folded edge to the fabric on the base of the box.
                Add the strip
 

           Sew around the top edge
 
11 Turn under a small seam allowance as you approach the corner and trim away the excess fabric. Sew along the corner and finger-press under a small seam allowance along the other long edge of the strip so that it is level with the edge of the box. Sew along this edge to complete the base of the box. Repeat this procedure for the top of the box.
 

              Sew around the other edge
 
 
               Base and lid
 
 
              Gift


And that’s all there is to it! Next week I will go through the same method to make a serviette box, one of my Christmas gifts.


Sunday 18 August 2019

BLOG 457

Blog 457
 
If you get pleasure out of making gifts for Christmas, here’s a little idea for you that will run over 2 blogs. Coasters are useful and can be bought or personalised for the recipient and you can make a little decorative box to keep them in. You could use fabrics to match a décor or a favourite colour or perhaps you could use Christmas fabric for seasonal coasters. Just use your imagination!
 
THE COASTER BOX
Cardboard requirements: Cut the following accurately from strong card (e.g. mount card from art shops or ask a picture framer if he has off-cuts)
Base: 4” x 4”
4 Base sides: 4” X 2”
Top: 4 3/8” x 4 3/8”
4 Top sides: 4 3/8” x 1”
 
            Card


Other requirements: fat ¼ metre of lining fabric and long ¼ metre of outer fabric, small amount of wadding, Pritt stick, masking tape and threads to match the fabrics.
          Fabric
 
 
1 For each piece of cardboard, cut out a piece of lining fabric which measures ½” extra all the way round.


            Cut-outs


2 Cut one piece of wadding to the exact size of the base square. Cut 2 pieces of wadding the exact size of the lid square.
           Wadding
 

3 Stick the wadding onto the base square and stick one piece onto the lid square. Trim away any excess.
           Wadding onto square
 

4 Place the lid square, wadding side down, onto the WS of the prepared fabric. Add Pritt all around the edge of the card (1/2” wide) and across the corners as shown.
           Fabric onto square
 

Fold over the opposite sides. Add more glue to the corners and fold in the two remaining sides.
           Glue
 

           Completed square
 

5 Repeat the sticking method for each of the side shapes, folding in the short ends first. This completes the lining.
          Sequence for sides


         Completed sections
 

6 Construct the box as follows: Place a side piece onto the lid square with RS together and corners matching and secure with pegs. Using a strong thread that matches the fabric, whip stitch the edges firmly together. Sew all around the square to attach the four sides. Then stand up two adjacent sides and sew the vertical corners. Repeat for each corner to construct the lid. Repeat the process to construct the base.
           Position and sew
 

          Sides sewn
 

            Verticals sewn
 

            Top and base
 

7 Stick the extra square of wadding to the box lid.
             Wadding on box lid
 

Sunday 11 August 2019

BLOG 456

Blog 456
Here is another selection of quilts from the festival of Quilts for you to enjoy. Next week I will be back to normal; well, as normal as I can be! I will be showing you how to make a coaster box because I have been making a few lately for special birthdays; it’s amazing how many of my friends are reaching 70!! We are all soooo last century.


             (Made me smile!)


           Painted surface


             Postage stamps


(Colour produced by the density of machine quilting)


               (Best hand quilting)


              Best in Show