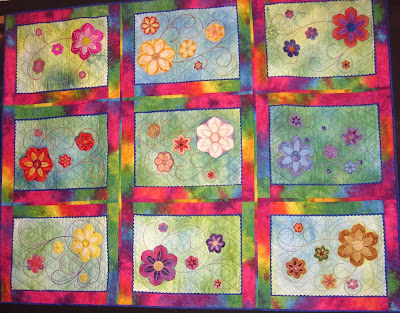
I have been indulging myself this week by playing solely
with threads and this has been a complete diversion to my usual preference of
working with fabric. I suppose that these days, when I make a quilt, I
generally have to have a bed or a wall for it to go on or an exhibition in
which to enter it. Not like in my teaching days when I made quilts at the drop
of a hat, usually with the excuse that it was for teaching purposes, when it
was really that I just needed to make something; I just couldn’t stop myself. I
still have vast collections of fabric but not the excuse now to knock out
quilts. So diversions like playing with threads give me time to ponder on my
next piece of fabric work.
As you may have read in earlier blogs, I go for a sewing day
to machine embroiderer Suzette Smart in Shropshire. These fortnightly
get-togethers aren’t lessons as such; 3 of us just sit at Suzette’s table and
do our own thing. But that said, I certainly couldn’t do my own thing without
having Suzette’s samples for inspiration and the advice of the other two very
experienced embroiderers. It was from Suzette that I got the idea to make
decorative plates with threads. I am toying with the idea of combining thread
painting with my painterly quilts, I just don’t know how yet.
And here is my paint palette of threads. There are many
different types of thread and just looking at them makes my mouth water!
Thread palette
To make the plate, I placed a square of ‘Ultra Solvy’ onto
my embroidery ring. (This layer does just as it says on the packet: Extra
strong, transparent, water soluble film). It dissolves in warm water to leave
just the threads.
Water soluble film
I then teased a thin
layer of fibres around the embroidery ring in the colours I have selected for
the project.
Solvy and fibres
I added another layer of ‘Ultra Solvy’ over the top and held
it all in place tightly with the inner ring of the embroidery frame.
Extra Solvy layer
I put a free motion foot on my sewing machine and the same
thread in the spool and on top. I started by scribbling with the thread in the
areas where the inserted fibres of the same colour are positioned. I made sure
when I was scribbling that the threads overlapped one another so that they would
form a mesh when the soluble was washed away.
Scribbling with thread
I tried to get as close to the edge of the embroidery ring
as was possible with my machine foot, in order to define the most accurate
circle. I changed colour often, both in the bobbin and on top, and continued to
scribble over the fibres of the same colour.
Colour changes
Once the colours have
been laid down, I add some decorative floral detail over the top of the mesh of
threads.
Decorative detail
I took the layers out of the embroidery hoop and followed
the directions on the water soluble packet. Once the soluble has been removed I
placed the embroidery onto a deep plate and left it to dry overnight.
Shape over a plate
And that was it! I got such a sense of achievement from the
process, now I need to work out how to adapt the idea in relation to my quilts.
Finished plate


