Sunday, 18 December 2016

BLOG 328


Blog 328

It’s that time of year again! In the kitchen, the robin is hanging again and the cards are strung.

               Robin


In the hallway, one of my Christmas trees is adorned solely with patchwork decorations.

             Patchwork decorations


Up the corridor, the church pew is wearing a quilt.

                Church pew
And the Christmas box, made for me by two special friends, has found its place on the wall again.

             Christmas box

The kitchen dresser looks cosy with its red lights and its greeting ‘ Nadolig LLawen’.


        Dresser

And the family Christmas tree is dressed and surrounded by presents.

                Family tree

The fire place just lends itself to decoration and so all is well with our world.

                 Fireplace

All that remains is to wish you all a very happy Christmas and all the creative best for 2017.


Sunday, 11 December 2016

BLOG 327


BLOG 327
Something messy is afoot! Just one look at the creative clutter in the loft room will confirm that I am obviously on a mission and need to get a wriggle on! No heed is given to tidiness and order because all I want to do is sew and get things finished. This is what it is like for me during the run-up to Christmas and it always makes me ask myself why I just don’t go out and buy everything. It would make life a lot easier! But, the fact of the matter is, I really enjoy giving a little bit of my creative self to others on these special occasions. I have always done it and, as you can’t buy what I make in the shops, that makes these gifts truely unique! QED

                Creative clutter

            Foundation piecing

I hadn’t done any foundation piecing for a long time so I was pleased to have been using the technique last week to construct the boat wall hanging. That sorted out one neighbour! So, fired up with the precision and effectiveness of that hanging, I decided to do one for another neighbour who lives in a cottage in the woods. Here are some of her completed blocks which I have placed on potential sashing fabrics to audition them.

           Fabric 1

                                                                    
           Fabric 2
 

I preferred the darker fabric on the left and so I used this to join the 4” squares together. The fabric on the right was used for backing.

             Completed hanging


A third and final neighbour will get a special cushion this year. Sometimes you see a fabric and you know it is just right! These particular neighbours buy and train sheep dog pups and sell them on as working dogs. What about this for an appropriate fabric? I made the cushion centre by printing off an image from ‘Footrot Flats’, my all-time favourite comic strip. It just requires a zipped back and a cushion pad and that’s another one ticked off!

            Appropriate fabric

               Cushion

I exchange hand-made cards with some friends and this year I have made a fabric wreath inspired by an image I found on the internet. My wreath was made from six 2” squares which were cut with pinking shears. Each was then roughly folded into 4 to give an uneven edge and then it was well pressed. A dab of glue in the centre helped to hold it in place. I stuck these onto a circular cardboard background first to form the wreath before sticking it onto the actual card. The centre of the wreath is a pinked circle cut from card which is the same as the background. A bow and some sequins completed the effect.

            Hand-made card

I never really forgave my daughters for leaving primary school! They did me out of the nativity play which always started the Christmas festivities for me. So you can imagine my delight now that I can legitimately attend those plays which involve my granddaughters. The first traditional play was last week and quite charming as usual. We laughed when one little angel lifted her long gown to show everyone her underwear and we howled when two of the cutest possible sheep started to brawl across the stage. But the star of the show was the one little boy who yelled every song at the top of his voice, and sometimes he almost hit the right note! Aw Bless!

Sunday, 4 December 2016

BLOG 326


BLOG 326
I have been making steady progress with my Xmas gifts this week. All 5 blocks of the boat wall hanging have been sewn using the paper foundation method and joined together with narrow strips of the sea fabric. It was decoratively quilted through the batting only. The backing fabric was cut out to the same size and placed over the top with RS together. You will notice a slit through a strip of Bondaweb just below the top of the backing strip (RS); this is for turning the wall hanging through after it has been sewn.

                 Fusible strip

             RS together

The layers were sewn together using an accurate ¼” seam allowance. Notice the dot ¼” in from the corner. I stopped sewing just before that dot and sewed 3 stitches on the diagonal across the corner.

                   Corner dot

I usually go back and forward along these corner stitches a couple of times to reinforce and soften the corner when the wall hanging gets turned through. I forgot to do it and so I went back again to do it.

               Reinforced corners

The wall hanging is turned RS outwards through the bonded slit just below the top of the hanging.

                   Turning through
When the paper on the fusible is removed, it is easy to match the cut edges and iron them together so they stick onto the cotton wading. A thin hanging sleeve will go over the top of this to hide it.

               Fused slit

                  Decorative hanger

             Completed hanging

I attended a wreath-making workshop run by a local gardening club yesterday …  and walked out with an 8’ decorative strip!!! The trouble I had to get it into the car! It was all done on a willow base with natural vegetation from the garden and it fits fine along the top of our fire place. I was thrilled to have learned how to do this for the first time, and I also know how to make a wreath too from watching the other more experienced members. I really want to make a willow sheep but haven’t found a suitable workshop yet.

                Decorative strip

I have been running a small course with our village craft group and here is the simple 5” tree block.


                Tree block

I am just at the quilting stage now and I have noticed that I have sewn 6 blocks instead of the 5 I intended to do. This is above and beyond the call of duty and, as there are some unfinished demonstration blocks, I think it is fair to assume that I will be making 2 hangings now!


              In progress
The other project I demonstrated was a wall strip made with 3 hexagon stars. And so Christmas gets closer and I am so excited!

 
                     Hexagon stars


Sunday, 27 November 2016

BLOG 325


BLOG 325

My commissioned table runners were very well received; it made me very proud to know that someone sees the real value in my work (thanks Chris!) Now however, I need to get on with the things I like to make for Xmas presents. I only make for people who I know will appreciate them and the process of deciding what to make and how to go about it always gives me great pleasure.

The first project is for the parents of a family who have everything, including a second home by the sea. A small wall hanging of boats seems the right thing to hang on the wall ….. even if it does end up hanging in the loo! I won’t know, will I? So, the shelf unit I bought from a charity shop for the bargain price of £6 has now been converted to an ironing table placed beside the sewing machine.

               Bargain unit

The fabrics have been chosen to represent an atmospheric sky, neutral sails, an inky sea and colourful hull.

              Fabric

The 2 boat patterns are taken from a Carol Doak book on ‘foundation piecing’ and this is the method I am going to use for these small 4” blocks. The last thing I want is to spend hours preparing tiny templates and so I strongly recommend this technique for small scale sewing. You can see that the pattern is numbered and this shows the sewing sequence. The marked side is where the sewing is done along the lines; the unmarked side is where the fabric is placed.

              Pattern

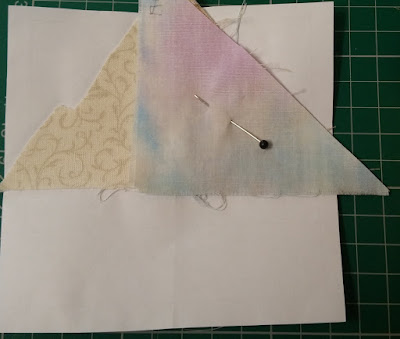
I rough-cut some generous triangles for the sails (1 and 2) and placed them RS together on the unmarked side of the paper, over the place where #1 sail is going to be.

              Pin

Using a neutral thread top and bottom and a tiny stitch (to perforate the paper and make it easier to remove later) I sewed on the marked side, along the line between #1 and #2. I sewed from one end to the other and not beyond to make it easier to fold the paper

pattern for trimming.


     Sew

This is now ready for trimming on the cutting board using a rotary cutter and ruler.

            Cutting board

It is very important to fold the paper pattern out of the way so that you only trim the seam allowance from the edge you have just sewn.

          Folded pattern

Once trimmed, it can be pressed open to produce 2 sails. And that’s the method: place, sew, trim and press. I usually rough-cut squares and rectangles much larger than I need so there is no unpicking but some people like to cut to size and risk it!

             Pressed open

              Pinned corner

I carried on working through the number sequence until it had all been sewn and then trimmed the edge to a ¼” seam allowance.

           Trimmed edge

               Completed blocks

               2 designs

I intend to make this as a long strip so I need to do one more to complete it. And so folks I have started my Christmas preparations, it’s official!

Sunday, 20 November 2016

BLOG 324


BLOG 324

Another week and another table runner is finished, thus completing my commitments to others. I need to make a start on Xmas cards and presents because I do like to make things for other people, particularly for those who I know are going to appreciate them.


            Detail 1

            Detail 2
  
        Detail 3
 
               Detail 4

 I have thoroughly enjoyed making these runners which were inspired by a Susan Lenz method and a Margaret Beale soldering technique. I now want to use this invaluable experience as a jumping off spot for my own personal style of work. Through experience I now know sufficient about synthetics, sheers, fusible and soldering irons to be able to make a competent attempt at doing something personal. Watch this space.


Sunday, 13 November 2016


BLOG 323

Vertigo is still my constant companion but not quite so severely now. There are still certain head movements that I find problematic so I make sure that I don’t do them! That said it hasn’t stopped me sewing and this week there is a new quilt on the block. All the rows were joined together in stages, and the strips on the back were hand sewn down to finish them off. The corners needed squaring off and this I did with a square ruler and rotary cutter before trimming around the entire outer edge. A double binding was added and a great feeling of pride and satisfaction was felt!

            Squaring off

              Ruler position

            Trimmed

           Displayed on the settle

          Displayed on the bed

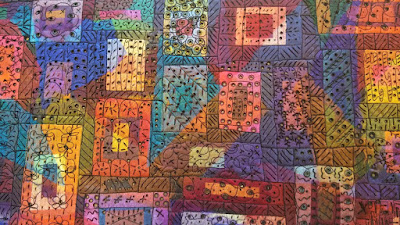
On the other side of the studio, progress has also been made on the first table runner. I love the mark making with the soldering iron best of all so this was a real joy to do! I have to wear a respirator for this because of all the synthetic fumes and look a real honey! I have to make sure that I finish wearing it about 3 hours before I go out so that the pressure marks disappear from my face!

          Mark making 1

                Mark making 2

           Mark making 3

            Mark making 4

Some more progress has been made on the second runner too with the colourful layer of sheer fabrics being ironed in place. I am half way along the 7 feet and itching to get it to the next stage.

                Sheers