Sunday, 27 November 2016

BLOG 325


BLOG 325

My commissioned table runners were very well received; it made me very proud to know that someone sees the real value in my work (thanks Chris!) Now however, I need to get on with the things I like to make for Xmas presents. I only make for people who I know will appreciate them and the process of deciding what to make and how to go about it always gives me great pleasure.

The first project is for the parents of a family who have everything, including a second home by the sea. A small wall hanging of boats seems the right thing to hang on the wall ….. even if it does end up hanging in the loo! I won’t know, will I? So, the shelf unit I bought from a charity shop for the bargain price of £6 has now been converted to an ironing table placed beside the sewing machine.

               Bargain unit

The fabrics have been chosen to represent an atmospheric sky, neutral sails, an inky sea and colourful hull.

              Fabric

The 2 boat patterns are taken from a Carol Doak book on ‘foundation piecing’ and this is the method I am going to use for these small 4” blocks. The last thing I want is to spend hours preparing tiny templates and so I strongly recommend this technique for small scale sewing. You can see that the pattern is numbered and this shows the sewing sequence. The marked side is where the sewing is done along the lines; the unmarked side is where the fabric is placed.

              Pattern

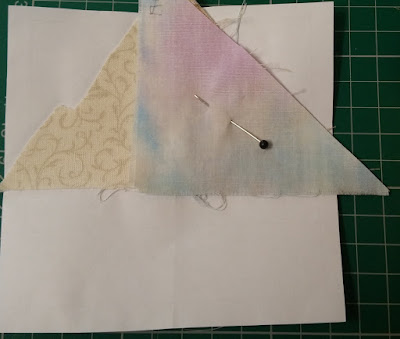
I rough-cut some generous triangles for the sails (1 and 2) and placed them RS together on the unmarked side of the paper, over the place where #1 sail is going to be.

              Pin

Using a neutral thread top and bottom and a tiny stitch (to perforate the paper and make it easier to remove later) I sewed on the marked side, along the line between #1 and #2. I sewed from one end to the other and not beyond to make it easier to fold the paper

pattern for trimming.


     Sew

This is now ready for trimming on the cutting board using a rotary cutter and ruler.

            Cutting board

It is very important to fold the paper pattern out of the way so that you only trim the seam allowance from the edge you have just sewn.

          Folded pattern

Once trimmed, it can be pressed open to produce 2 sails. And that’s the method: place, sew, trim and press. I usually rough-cut squares and rectangles much larger than I need so there is no unpicking but some people like to cut to size and risk it!

             Pressed open

              Pinned corner

I carried on working through the number sequence until it had all been sewn and then trimmed the edge to a ¼” seam allowance.

           Trimmed edge

               Completed blocks

               2 designs

I intend to make this as a long strip so I need to do one more to complete it. And so folks I have started my Christmas preparations, it’s official!

Sunday, 20 November 2016

BLOG 324


BLOG 324

Another week and another table runner is finished, thus completing my commitments to others. I need to make a start on Xmas cards and presents because I do like to make things for other people, particularly for those who I know are going to appreciate them.


            Detail 1

            Detail 2
  
        Detail 3
 
               Detail 4

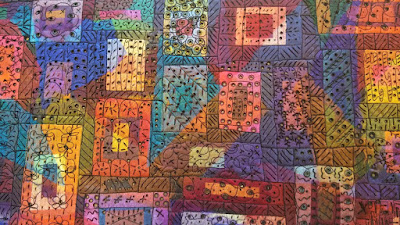
 I have thoroughly enjoyed making these runners which were inspired by a Susan Lenz method and a Margaret Beale soldering technique. I now want to use this invaluable experience as a jumping off spot for my own personal style of work. Through experience I now know sufficient about synthetics, sheers, fusible and soldering irons to be able to make a competent attempt at doing something personal. Watch this space.


Sunday, 13 November 2016


BLOG 323

Vertigo is still my constant companion but not quite so severely now. There are still certain head movements that I find problematic so I make sure that I don’t do them! That said it hasn’t stopped me sewing and this week there is a new quilt on the block. All the rows were joined together in stages, and the strips on the back were hand sewn down to finish them off. The corners needed squaring off and this I did with a square ruler and rotary cutter before trimming around the entire outer edge. A double binding was added and a great feeling of pride and satisfaction was felt!

            Squaring off

              Ruler position

            Trimmed

           Displayed on the settle

          Displayed on the bed

On the other side of the studio, progress has also been made on the first table runner. I love the mark making with the soldering iron best of all so this was a real joy to do! I have to wear a respirator for this because of all the synthetic fumes and look a real honey! I have to make sure that I finish wearing it about 3 hours before I go out so that the pressure marks disappear from my face!

          Mark making 1

                Mark making 2

           Mark making 3

            Mark making 4

Some more progress has been made on the second runner too with the colourful layer of sheer fabrics being ironed in place. I am half way along the 7 feet and itching to get it to the next stage.

                Sheers

Sunday, 6 November 2016

BLOG 322


BLOG 322
I have been incapacitated this week with a bout of vertigo. It practically welded me to the settee and curtailed my activities for some days! I am not used to being inactive and I found the experience extremely frustrating. I am considerably better now than I was at the beginning of the attack though I keep veering off to the left occasionally! So I have continued to sew what I know, namely the Corner Log Cabin quilt.

             Floor space

          Joining blocks

I have covered this joining system thoroughly before on my blog so picture sequence is all you will get this time. The top black strip is cut at 1” and the coloured back strip is cut at 1 ½” and these are both  sewn onto the edge of one row at the same time. The next row is sewn onto the black top strip only, with the coloured back strip being turned and sewn down by hand. All seam allowances are sewn at a very accurate ¼”.

             Sewing both joining strips (moved to show the strips)

            Rows RS together for pinning

          Sewing top strip only

             Securely pinned seams

           Accurate joins

            Butted raw edges on back

               First fold of backing strips

             Second fold for hand sewing


I mentioned a while ago that I fancied sewing small pieces in the shape of a luggage label. Here are some of the more interesting ones.

Why bother doing something when you don’t enjoy it? My mother left a lot of hand embroidery behind when she died. My sister had the bulk of it because I don’t do cross stitch but I did fancy having a go at a bit of long stitch embroidery so I chose a small kit with a flower arrangement in a cup. I hated every minute of it! Every time I brought it out at the various sewing groups I attend, I would sigh and puff and moan and the people close by would ask: why bother? And so I not going to anymore and I feel better already! And this label just reminds me that life is too short to do things if you don’t have to.

           Why bother?


The next is my family coat of arms. Osmotherley (my maiden name) is an unusual name and can be traced back to the 12th century. Somewhere along the line we were awarded a coat of arms as one of our forebears was the sheriff of the county. Needless to say we are impoverished now and how could we forget the motto ‘Remember thou art mortal’!

           Coat of arms


And finally, my favourite bird, a blue tit.

            Blue tit