Sunday, 26 February 2017

BLOG 336


Blog 336

Last Thursday, hurricane DORIS caused me to cancel the lunch I was hosting for friends and kept me indoors. I was on my way to my sewing room when the power went off. What to do? What to do? I couldn’t do laundry, hoover the floor, dig the garden, cut back shrubs, and cook a casserole ……..

So I went to my fabrics and started to tidy them up in a half-hearted sort of fashion and that lasted all of 30 minutes until the power came back on! On a whim, I picked out one of my most luscious and expensive Heidi Stoll-Webber fabrics and started to cut and sew. I am revisiting an old favourite, a block called ’Delectable Mountain’. I cut the fabric into 6” blocks, the most economical cut for the size of the fabric, and placed them into pairs with one warm colour (red, orange and yellow) and one cool colour (blue green and mauve).

             Fabric

              6” Squares

I drew a line across the diagonal and sewed a line of stitches ¼” away on both sides. I then cut along the marked line to divide the square into 2 half-square triangles. These were pressed ready for the next stage.

           Diagonal

               Sew and cut

              2 half square triangles

 On a cutting board, I used a rotary cutter and ruler to divide each square into 4 equal strips. I shuffled the pieces as shown and sewed them together to make a single block. (TIP: In order to produce a mirror image block you need to cut mirror image squares.)

                 Cut into 4

               Shuffle

             2 Mirror image squares

            2 Mirror image blocks

             Potential layout 1

             Potential layout 2

In common with many grandparents, I did a bit of childminding during half term week. Ella is 7 and full of energy but always keen to learn so I let her loose on my sewing machine. In the past I have controlled the food pedal and she has moved thepaper/fabric but this time it was all her own work. She placed small pieces of sheer onto a layer of vanishing medium and covered it with a second layer. These were then held tightly into an embroidery frame. She chose to do rainbow colours in sequence and learned very quickly how to scribble in circles. Once complete, we soaked it in hot water to get rid of most of the vanishing medium before placing onto an up-turned bowl so it would dry to that shape. She had no fear of the machine and just did it! It was nerve wracking for me watching her but the frame kept her fingers away from the needle. Phew!

                Ella

          Thread bowl

 The crazy quilt continues to make steady progress and I have even started to join squares together to get a feel of the quilt. I quilted and trimmed each of the pos/neg squares for the Daisy quilt before joining them together using a quilt-as-you-go method. The positive blocks were sewn with close vertical lines using a walking foot; the negative blocks were sewn using free-motion quilting. The complementary colour combination of the fabrics makes it an appealing quilt. Another busy week!

            Crazy quilt progress

             Positive quilting

               Negative quilting

           Daisy quilt

Sunday, 19 February 2017

BLOG 335


BLOG 335

It has been a cheery week for me this week regarding quilting as I have been working in colour and that suits my cheery disposition very well! I have finished the colourful wall hanging this week and I am exceedingly proud of it and will hopefully use it as a jumping off spot for other work.

              Colour study

 For a while I have been doing some English paper-piecing on a good sized lozenge shape at Gresford and I have to admit that I hated every minute of it! So I passed on all the remaining papers from the pack to a friend so I didn’t have to do any more and joined together the papers that I had already covered. They were colourful too so there was some joy in that, but the size of 14” x 16” was good for nothing much really. However, in another aspect of my creative life, I had made some foxgloves using scraps of sheer fabric and machine embroidery and it occurred to me that they would sit rather nicely onto the patchwork background. And so, by marrying together two totally unrelated projects, a lovely cushion has resulted.

            Foxglove cushion

             Detail

            Quilting

The size was still a bit of a worry as I could only get a good 12” square from the quilted piece. So I cut this square out and around the edge I added a neat binding, sticking the edge onto the back rather than turning under the seam. I quilted an 18” square with a crosshatch design using a decorative stitch on my machine and I appliqued the smaller quilted square on top of it. It worked very well and I was thrilled with the finished effect.

             Quilted and mounted

          In situ
I have had a rare outing as a teacher this week. I was invited to do a mini workshop at Quiltfest at the Royal Pavilion in Llangollen. I chose positive and negative applique based on my book Dual Image Applique.

               Workshop sample

             Quilt blocks

Here’s an outline of how to do it.

1 Trace the pattern onto the paper side of the fusible.

            Pattern and tracing


2 Iron the fusible onto the WS of the fabric

                Fusible on fabric


3 Make a small cut with cutter on the line so that you can get your scissors in and cut out the flower and centre circle to produce the frame and the fillers.

                Cutting

             Frame and fillers

4 Keep the backing paper on the frame and place it onto the RS of one piece of foundation fabric. Take the backing paper off the filler and place it back into the frame where it will fit perfectly. Press the filler gently with the toe of the iron, just enough to hold it in place whilst the frame is removed. Once removed, press the block more thoroughly.

             Frame on foundation

             Filler inside frame

               Press gently

             Remove frame

             Positive sample

5 Take the backing paper off the frame and place it onto another piece of foundation fabric and press thoroughly.

             Frame on foundation

            Positive and negative applique

And here’s what I have done with the samples so far. More next week.

             Quilt in progress

             Book cover


Sunday, 12 February 2017

BLOG 334


Blog 334

The ‘Stack the Deck’ blocks are continued here. They were organised beside my machine and I had the iron handy.  I joined the pieces together in the reverse order.

               Stacks

              First seam

              Second seam

              Final seam

And the block is completed! I had forgotten how quick this technique was. However, when I stacked my fabrics squares, I placed them ‘dark, dark, light, light’ and that has placed the darks together and the lights together, so obvious when you think about it! When 16 blocks (1/4 yard of each fabric) were laid out, a rather modern looking design had been created. The other problem that occurred was that I made the cut between 3 and 4 go from one side of the fabric across to the other which created a big chunk of fabric across each the 4 blocks. This only occurred on one set of 4 as I cut each stack in a different way. I should have bought the book on the subject by Karla Alexander so I had a better knowledge of it!!

                Lay-out 1

             Lay-out 2

 I then started to wonder if the effect would be different if I placed the fabrics ‘dark, light, dark, light.’ That resulted in a more balanced distribution of the fabrics as seen in the comparison below. They both work and they have been completed as Linus quilts.

          2 variations

          Quilting the cats

             Decorative seams

           Quilting the 9-patch

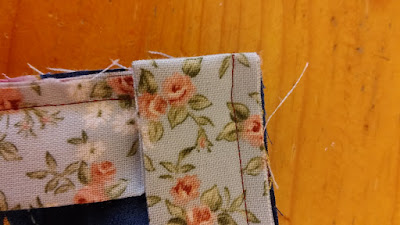
             Sewing the binding

                 Mitred corner

                Starting edge

                Finishing edge

 And there you have it, 6 quilts for the Linus project. I am glad I have got that out of my system. Slamming quilts under the sewing machine allows you to cover ground quickly but there is little joy in working at that level constantly. I am now returning to my creative pursuits and will make more Linus quilts later in the year.

            6 Linus quilts

 And finally, it must be cold. Here’s Willow as close to the fire as she can get without stepping on the hearth!

            Winter