Sunday, 29 November 2015

BLOG 276


BLOG 276


To complete the Christmas Tree Project, place the quilt top onto wadding and a backing layer that is a couple of inches bigger. Quilt to your personal taste. The one below has been quilted ¼” in from the edge of the Xmas tree.

 
          1/4” Edge quilting

            Detail

 
I used decorative stitches and red thread on my sewing machine to go across the seams of the Xmas tree on this next one.

           Decorative stitches

           Stitch detail


Trim away any excess fabric from around the borders before binding.

           Trim


Prepare a 2” binding, joining if necessary.

           Diagonal join


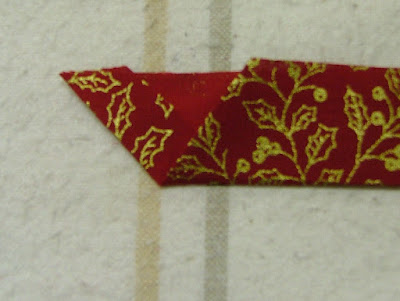
Prepare an angled fold at the start, ready for an over-lap at the end.

                 Angled fold

 Sew with a 1/4” seam allowance to attach the binding remembering to mitre the corners.

             Start


Complete by catching the folded edge down by hand on the back.

                Complete
 

And there you have it, 3 Christmas wall hangings, in a variety of fabrics and styles!

             Trio of trees


 I hope this has tempted some of you to have a go. It is a straight forward project to do once the cutting is done; that is the hardest part! And if anyone would like to share their efforts, I would be delighted to see them. Happy almost December!

Sunday, 22 November 2015

BLOG 275


BLOG 275
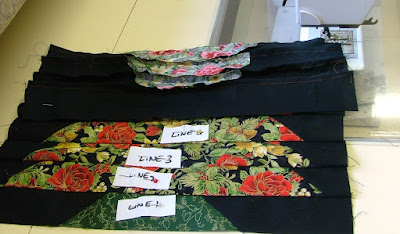
Place the prepared lines, in sequence, beside the sewing machine prepared with a neutral thread and a ¼” foot.

 
              In sequence

 
Join the lines together in pairs and then join the pairs together until the Xmas tree is constructed.

            Join the lines


And just a word of warning, don’t sew your labels into the seams as I managed to do with Line 3!

            Labels in seam

 Once the tree is constructed, press it thoroughly without stretching the shape. Let the iron do the work and press from the back to settle the stitches and then from the front to remove any tucks in the seams.

           Before pressing


After pressing, straighten any uneven edges using a long ruler.

            Trim


Place one of the marked lines on the ruler along one of the shorter edges to make sure you are cutting at a right angle.

            Marked line along edge

              Pressed tree
 

Prepare a star and draw round it on a fusible web.

          Fused star


Cut it out and press it into place at the top of the tree.

              Add star

Measure along the edges of the wall hanging and cut out 1” strips of contrasting colour to those measurements. These are for the inserts for the inner frame so iron them in half along their length.

           Iron the inserts

Add these to the edges, top and bottom first and then the long sides. Make sure all the raw edges are level and sew 1/8” away from the edges.

             Add the inserts

Cut 2” strips to fit the top and bottom edges and sew them in place with a ¼” seam.  Flip them over and press them in place for the outer border. Measure the remaining sides from top to bottom and cut 2” strips to this length. Sew them in place to finish the top. Quilting and finishing next week.

                 Finished top

Sunday, 15 November 2015

BLOG 274


BLOG 274
I battled on with the Picket Fence lap quilt, adding a 2 ½” border all round.

           Border

           Top with border


I chose a coordinating fabric for the back

          Backing


I trimmed some of the off-cut triangles to audition on the edge but I didn’t think that they added any appeal to the finished top (nothing to do with the fact that I didn’t have enough and I would have had to prepare several more!!)

            Auditioning triangles

          Chivers assisted

 I just decided to add wadding and a backing and quilt it vertically and horizontally in the ditch of the seams. I then used a decorative stitch and variegated thread to sew round the inner border. Binding completed the quilt and here it is in situ. I may return to hand quilt more detail on this quilt over winter; it will be good to have it across my lap to warm me as I work on it!

          In situ

          Detail
 

PROJECT: CHRISTMAS TREE WALL HANGING 15” x 18” (or 18” x 21” with borders)

This machine-pieced wall hanging will make a welcome addition to your Christmas decorations. It is easy to make so it could also be made as a gift for special people. Simple construction techniques are used, and as long as you work in a logical way, it goes together fine, with no matching of awkward angles. (NB this wall hanging is not original to me; I cannot remember who designed it originally to acknowledge them, so sorry about that.)

               Simple

              With borders


REQUIREMENTS

Tree trunk: 2” x 7” green strip

Background: fat quarter

Tree: ½ m Christmas fabric

Star: 3 ½” square of both gold fabric and fusible

Low loft wadding: 20” x 24” (includes border)

Backing fabric: 20” x 24” (includes border)

Sewing machine: with a dark neutral thread, ready to sew a straight stitch.

General sewing kit: with pins, scissors, ruler and marking tool
 

PREPARATION The success of the wall hanging starts here! These strips need to be accurately cut and labelled.

Cut the following strips accurately and pin them together as lines with the appropriate label.

           Cut and label the strips


LINE 1: tree trunk: cut 2”x7” green, background: 2 strips of 2” x 6”

LINE 2: tree: 2” x 14”, background: 2 strips of 2” x 2 ½”

LINE 3: tree 2” x 13”, background: 2 strips of 2” x 3”

LINE 4: tree 2” x 12” background: 2 strips of 2” x 3 ½”

LINE 5: tree 2” x 11” background: 2 strips of 2” x 4”

LINE 6: tree 2” x 10” background: 2 strips of 2” x 4 ½”

LINE 7: tree 2” x 9” background: 2 strips of 2” x 5”

LINE 8: tree 2” x 8” background: 2 strips of 2” x 5 ½”

LINE 9: tree 2” x 7” background: 2 strips of 2” x 6”

LINE 10: tree 2” x 6” background: 2 strips of 2” x 6 ½”

LINE 11: tree 2” x 5” background: 2 strips of 2” x 7”

LINE 12: background 2” x 15”


METHOD
For lines 1 to 11: place the 2 background strips, with RS together, on either side of the tree fabric as shown.  Mark a sewing line from the top corner of the background fabric diagonally to the bottom corner of the tree fabric.

 
          Mark sewing lines

 
Sew along the marked lines and trim away the excess fabric at the corner.

             Sew and trim


Place the lines back in sequence once they are completed. More next week!

           Sequence

Sunday, 8 November 2015

BLOG 273


BLOG 273

Progress has continued steadily with the Picket Fence quilt and I have to admit that I am much happier when there is a project afoot. I’m the sort who prefers to just roll up my sleeves and get on with it and if there is nothing on the go I can happily waste a lot of time.

          3 Blocks

 I thought at this stage that I ought to see how it is going to look in its environment, if the colours work and more importantly if I like it.

          In situ

 And the answer is, yes it suits its environment, and yes the colours work but no I don’t like it. And the reason I don’t like it is because the colours are too muted for me. However, sometimes I have to over-ride my passion for bright and startling colour and just make something that goes. I suppose this shows some strength of character as I feel I have to continue to the end of the project and my motivation is very low! However, there is a system of sorts beside the sewing machine, and I continue to join strips and pin them into batches of 3.

          Sewing system

 On the Ironing board, there is a further system where I unpin the sets of 3 ready for pressing. Once they are pressed they are stacked in piles at right angles to one another, ready for sewing into the building blocks of the pattern.

         Pressing system

And before I know it another row is on the way.
 
          2 Rows

 The rest of the squares have been joined together into half-blocks and by the end of the week these should hopefully be sewn together.

          Remaining half squares

One ¼-square caused a bit of a problem, it just didn’t seem to work in the quilt. And then I realised that I had constructed it incorrectly so it was rectified with a bit of reverse sewing (unpicking by any other name!)

             Wrong

            Last seam


     Finished centre 36” x 48”

Now it’s time to contemplate the border. Next week I will be featuring a Christmas wall-hanging which is not complicated but which looks very effective. Perhaps some of you will have a go too?

Sunday, 1 November 2015

BLOG 272


BLOG 272

HAPPY NOVEMBER! I have had a busy week this week with granddaughters and sleep-overs (a misnomer if ever I heard one!) and overnight visitors from Scotland. Just add to that a Hallowe’en party and a developing head cold and you can imagine how I feel this end of the week! That said, on one side I love the energy of children and always enjoy rising to the challenge; and on the other side it is great to catch up with old friends over leisurely meals. There’s a sense of balance there.

Recently, I was reminded too of the balance in my sewing activities. I meet up regularly with a local chum from my teaching days; she was actually my right hand woman when I used to sell fabrics and supplies. When I first met her and asked her name she said ‘Kath, Kath-with-a-K’ and that is who she has always been. Anyway, on our last occasion together, Kath, Kath-with-a-K told me about a scrap quilt top that she had made years ago with a group of ladies from her church. The group had long ceased to exist but the quilt was part hand quilted and she couldn’t face doing any more. I have taken it on with the intention of completing it, selling it and giving the proceeds to charity. So, as autumn gets underway, I find myself warmed by this Friendship Star quilt most evenings as I hand-quilt it. I love the relaxing pace and rhythm of hand work as a change from the ‘slam it under the machine’ work that I mainly do these days. It’s very therapeutic and reminds me that there ought to be contrasts and balance in one’s life.

        Friendship Star

              Detail

 PICKET FENCE QUILT: I have made more squares as building blocks for the Picket Fence quilt. As this will be a small decorative quilt for draping over a chair, I think that 3 blocks across by 4 blocks down will be sufficient. I have set up a conveyor belt system of sewing with a finished block, a repeated square for reference and a pile of 2-colour strips.

         Conveyor belt

My intention at first is to join 3 lines together to make the squares, making sure there are no repeated fabrics.

        Squares

 The squares are pressed on the back to establish the directions of the seams and then on the front to make sure there are no tucks in the seams. This helps the stars to form accurately when the squares are sewn together.

          Pressing


I place the squares together to make a potential block but as you can see from this sample, there are repeated fabrics side by side. This is what I am trying to avoid.

         Blocks


As I press each square, I place 4 squares together to make the blocks. There is still the opportunity at this stage to swop things around but I need to make enough for all 12 blocks before I start to construct in earnest. This will be my quest over the next few days.

          Layouts