BLOG 275
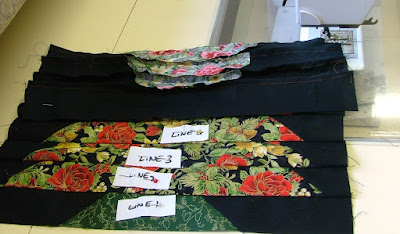
Place the prepared lines, in sequence, beside the sewing
machine prepared with a neutral thread and a ¼” foot.
Join the lines together in pairs and then join the pairs
together until the Xmas tree is constructed.
And just a word of warning, don’t sew your labels into the
seams as I managed to do with Line 3!
Labels in seam
After pressing, straighten any uneven edges using a long
ruler.
Place one of the marked lines on the ruler along one of the
shorter edges to make sure you are cutting at a right angle.
Prepare a star and draw round it on a fusible web.
Cut it out and press it into place at the top of the tree.
Measure along the edges of the wall hanging and cut out 1”
strips of contrasting colour to those measurements. These are for the inserts
for the inner frame so iron them in half along their length.
Add these to the edges, top and bottom first and then the
long sides. Make sure all the raw edges are level and sew 1/8” away from the
edges.
Cut 2” strips to fit the top and bottom edges and sew them
in place with a ¼” seam. Flip them over
and press them in place for the outer border. Measure the remaining sides from
top to bottom and cut 2” strips to this length. Sew them in place to finish the
top. Quilting and finishing next week.


No comments:
Post a Comment