Sunday, 22 September 2013

BLOG 167


This week I have concentrating on completing the wall hanging of Ella’s drawings, mentioned in Blog 164. In that blog, I showed the method used to make several blocks of what is basically crazy log cabin. I was not able to control the size of her drawings, even by giving her constant 8” squares of fabric to draw on (you can’t put a damper on spontaneity!) so I took the best of the drawings and, with borders, produced squares measuring 3”, 4” 6” and 8”. On paper I also drafted a crude gird of what size blocks I needed to make a balanced wall hanging, 16” wide.

Joining the squares

Place the blocks RS together and join them to make a line, and join line to line to create the wall hanging. You will see that I have sewn onto cotton batting with no backing fabric thus enabling me to iron open the ¼” seam to make it flat. (These seam allowances could be hand basted to hold them down if you prefer.)

                           Seams open


Once all the blocks are joined together, I use a long ruler and rotary cutter to straighten the raw edges.

                         Trim the edges


I have decided to add a length of folded patchwork to the lower edge of the wall hanging, and this is one of those super techniques that you just NEED to know. (ASIDE: When I first started to teach, 30 years ago, I would have been cutting individual squares and trying to fold and iron them individually without burning my fingers! This method is much easier and you have my apologies for being unable to recall the name of the person I saw demonstrating it over 20 years ago.)

Folded patchwork border

Cut a 5” strip by the length you require from your selected fabric (mine was 5” x 15”). On the WS, draw a central line along the length, to divide each half into 2 ½”. Mark the top half into 2 ½” sections (creating a line of 2 ½” squares). Cut away half a 2 ½” square from the lower line (2 ½” x 1 ¼”) and mark the lower section into 2 ½” squares also. The sides of the lower squares should be exactly halfway along the sides of the upper squares.

                            Mark the WS


Cut along each of the vertical marked lines up to the centre line.

                       Cut the vertical lines


Working one row at a time on an ironing board, fold and press each square on the diagonal as shown.

                      Press on the diagonal


Repeat for the other row, pressing in the same direction.

                                     Repeat


On both lines, fold the top point of the triangle down to meet the other end of the diagonal and press as shown.

                                     Press


Fold and press along the central line marked along the length. Pin to hold the triangles in place.

               Press triangles together


Take out the pins, inter-weave the triangles and re-pin.

                 Inter-weave the triangles


Sew a machine line 1/8” in from the fold to hold the triangles in place.

                             Machine line

Pin the strip to the edge where it is to be featured.
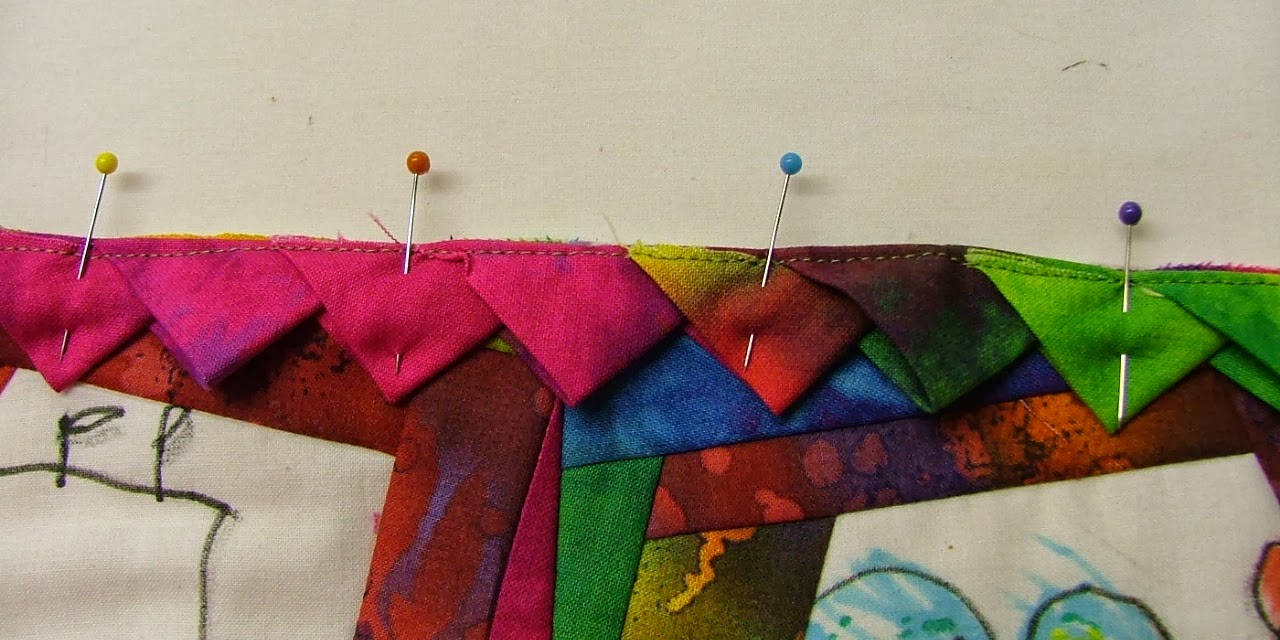
                        Pin the wall hanging

Prepare a piece of backing fabric that is about 1” larger all around than the size of the front. Iron a 1” strip of fusible to the WS, about 2” below the top edge (mine measured 1” x 13”). Use a rotary cutter to cut a clean line, leaving 1” either side of the cut.

                         Cut the fusible


Pin well to hold the prepared top and the backing RS together, placing the pins at right angles to the seam.

                             Pin the backing


With the batting side uppermost, sew all the way round with ¼” seam making sure that you don’t remove the pins until you are almost sewing over them to prevent slippage. Trim away the excess fabric and trim across the corners (ASIDE: you will see that I have exaggerated the corner by sewing 3 diagonal stitches across it. This helps to give a softer corner and it is easier to turn through.)

                  Trim the excess fabric


Remove the paper from the fusible and turn the quilt RS out carefully through the remaining hole.

               Remove the fusible paper


Use a blunt point to help to get a pleasing corner and iron only the edge of the quilt so that the backing is not visible on the front.

                        Ease out the corners

On the back, hold the edges of the hole together and iron to stick them onto the batting.

                       Iron to close the hole

Make a thin hanging sleeve to go onto the back to cover the hole.


                                Add a sleeve

I have added Ella’s name and my signature to complete.

(Darn it!! I forgot to take a picture of the completed hanging in my enthusiasm to hand it over to Ella so you’ll have to wait until next week to view it! Sorry about that.)


                                          Label

Sunday, 15 September 2013

BLOG 166


ASIDE: This Blog was written last weekend with the intention of posting it early as Roger and I were flying off to the Yellowstone National Park for 10 days. We had visited my mother who was in hospital again and, after a happy chatty hour together, we were satisfied that we should go ahead with our holiday. But as she began to deteriorate, we knew that we couldn’t go away and enjoy ourselves under the circumstances so we cancelled the holiday. Now we are in a strange limbo, knowing that she has rallied from situations like this many this before. Personally, the only way I can work through this unsettling time is by keeping myself occupied and immersing myself in fabric and colour. It's turning out to be a lengthy and therefore productive period!

 TISSUE BOX LID

 Cut lining strips that are ¾” larger all round than the cardboard. Follow the same procedure of adding glue to the card and the corners of the fabric to stick the lining fabric to the lid sides, remembering to stick the short side first.

                 Cover the lid sides


Cut a square of batting to the size of the lid and stick it in place. Cut out the centre hole and make sure the batting is cut right to the edge of the card. Prepare a lining square that is ¾” larger all round than the top of the box (7” x 6 ½”).

                           Batting onto lid


Stick the lining fabric onto the batting side of the box.


Lining onto batting


 Cut out a small hole from the centre to leave a good 1” seam allowance. Use small sharp scissors to clip up to 1/8” of the cardboard edge. Clip every ¼”.

                       Clip the seam allowance
 

Apply glue to the card around the edge of the circle. Stick each of the shapes down securely to complete the lining of the lid.

                            Lining complete


Cut a piece of batting to the exact size of the lid, and outer fabric that is ¾” larger all round (7” x 6 ½”).

                         Batting and fabric


Use a marker to draw round the hole for the box top on the RS of the fabric. Cut out a small circle to leave a good 1” seam allowance and clip every ¼”, up to1/8” of the marked line.

                                  Clip the seam


Place the batting centrally onto the WS of the fabric. Add glue around the circle and stick the clipped seam down.

                            Stick the seam


Stick the fabric onto the lid as described above for the base of the box.

                    Glue the sides

 
                        Pinch the corners

                             Tape the folds


Sew around the centre hole with a ladder stitch and add the edge strip as described for the base of the box.

                         Add the edge strip


If you have difficulty concealing stitches on the top of the box, you can always add a bit of trimming to cover them! This completes the box. 

                        Completed box


ASIDE: Stumbled on a free drop-in workshop with Mandy Coates at the Ruthin Craft Centre on Saturday and came out with this half an hour later!

                           Willow dragonfly

Sunday, 8 September 2013

BLOG 165


It’s all about the Tissue Box this week and next week. A couple of Blogs ago, I prepared the lining for the box base and now I am ready to cover it with the outer fabric and do the lid.


PREPRATION

Cut a rectangle of fabric which is 1” larger all round than the base of the box (7 ½” x 7”).

Cut a strip (22 ½” x 7 ½”) to go all round the outside of the box with 2” to spare on the length measurement for an over-lap (22 ½”). The width should be 2” wider so that both edges can be turned (7 ½”). Notice that I have ironed under a 1” seam allowance along one long edge only.

                           Outer fabric


Add glue to the corners of the fabric rectangle and place it, WS up, on a flat surface. Add 1” of glue around the lower sides of the box (this corresponds with the extra fabric of the rectangle). Place the base of the box onto the fabric.

                           Base onto fabric

 Pull the fabric firmly to stick it up the box sides. Pinch the corners to stick them together firmly. Turn it upside down to make sure the base is smooth.

                            Smooth base

 Fold the pinched fabric to one side and use a small strip of masking tape to hold it down. Repeat for all corners.


                                    Masking tape

                       Base complete

 To add the side strip, start by over-lapping one of the vertical corners by 1” and secure it with masking tape. Make sure that the fold of the ironed edge lies level with the base and tape to secure it for sewing.

                           Overlap a corner


                  Sew around the base

 
Use a close matching thread and a concealed stitch to sew around the base.

 
Turn under the excess fabric so that the fold lies on the vertical edge. Sew up the vertical seam.

                           Vertical seam

 When you are half way towards the top edge, turn under the excess fabric so that it is level with top edge of the box. Sew along this top edge using a ladder stitch. (This is the shortest possible stitch, going straight across from one fabric to another. The needle slides for 1/8” in the fold before going back straight across to the other side.) This completes the box base.


                                Ladder stitch

 I had a wonderful diversion this week at the hands of talented machine embroiderer Suzette ‘one pin’ Smart. I created a bird using machine embroidery and this is the result. The most difficult part was getting it to stand up!! (ASIDE: the ‘one pin’ tag came about when I asked Suzette if I could borrow a pin. It took her about 5 minutes to find … 1 pin!)


                        Bow-legged chicken


                    Knock-kneed hen


Sunday, 1 September 2013

BLOG 164


Am I unusual in liking this time of the year, that slow but inevitable transition from summer to autumn? We have had a wonderful summer weather-wise this year so every flower, shrub and tree (and weed it has to be said!) has had its ‘time’ or season in the garden. I love the way they bristle with new growth leaves, bud, flower and bloom to the best of their ability and then produce seeds to make replicas of themselves before dying off, job done. And, thankfully, they will be back to do the same next year so the least I can do is to put them to bed to the best of my ability. And that’s what I have been doing for most of this week, hacking, slicing, dragging, sawing, scrapping and chopping. There have been umpteen trips with the trailer to the tip and there’s still a lot more to do. BUT, it’s also the time when the log burner is lit early evening to take the chill off the room, thus providing me with the excuse to sit down in front of it to sew. Curtains are drawn for cosiness, lights are lit and I settle down creatively my fabrics. I wonder what will materialise (excuse the pun!).


ELLA’S WALL HANGING

(ASIDE: This has to be one of the most joyous things I have ever done! It is simple to do and a wonderful project to try with any youngster. It is like freeze-framing a bit of their developmental history in fabric.)

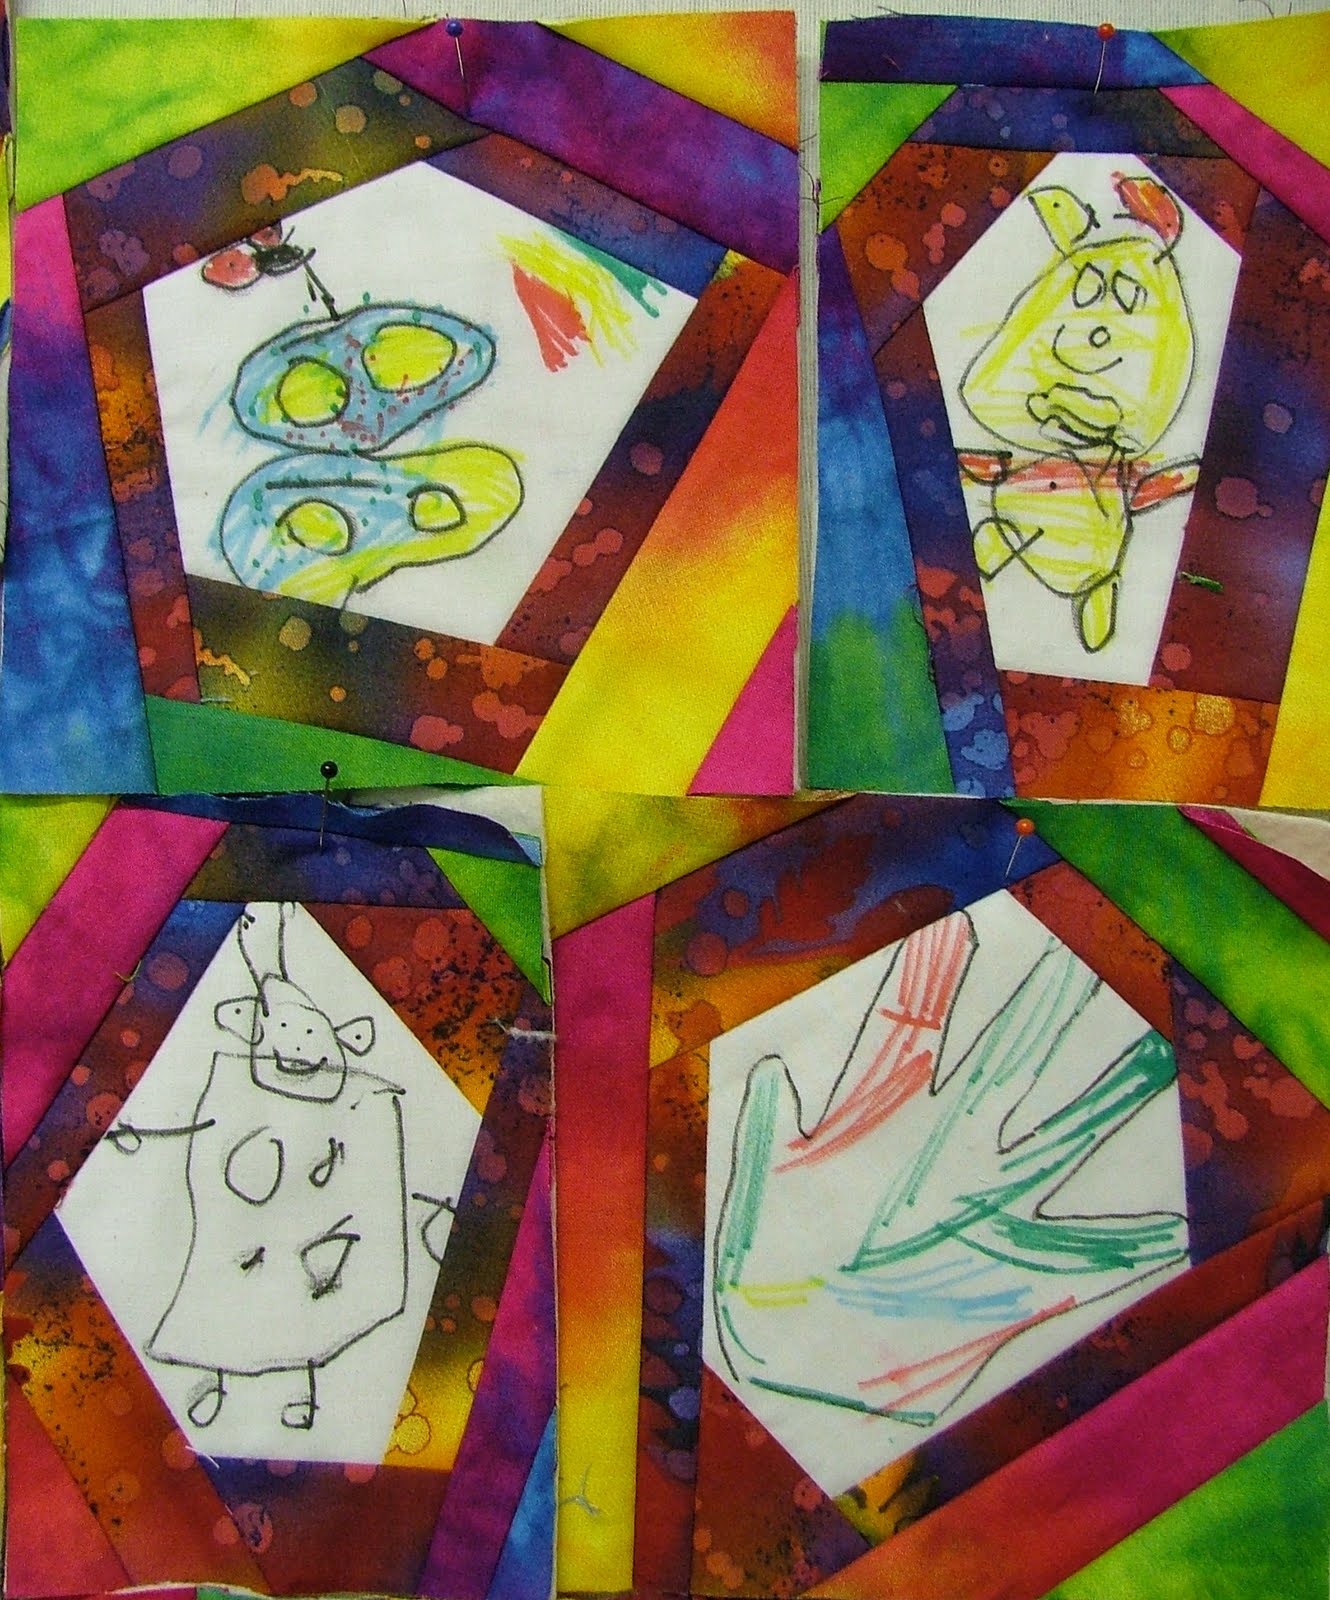
My granddaughter (and Jackie’s, hello)  Ella, who has just had her 4th birthday and starts full time school next week, did some drawings on white cotton fabric with ‘DYLON fabric painting fine nib pens’.  

                               Dylon pens


They were hot ironed, following the manufacturer’s instructions, to seal the colours. Here are some of her lovely spontaneous drawings.


                                Drawings

 Her latest one is a bee. This is so cute and has to be my favourite!!

                                 Bee


METHOD

Cut the pictures out randomly with 4 or 5 straight sides so there is not too much white fabric visible around the outer edge. Place a picture centrally onto a square of batting, the size will depend on the scale of the drawing. (I used 3”, 4”, 6” and 8” squares)

                        Picture onto batting


Cut some strips of colourful fabric for the borders. (I used 2 fabrics and I cut 1 ½”, 1 ¾” and 2” strips)

                               Fabric strips

Place a fabric strip, RS together, along one of the straight sides. Sew a ¼” seam with a neutral thread, starting and finishing at the edges of the white fabric.

                           RS together


Lift the strip away from the picture and finger-press it so that it lies flat on the batting.


                          Finger press the strip

 
Trim away the excess fabric from both ends of the strip, angling them to follow the line of the adjacent sides.

                         Trim at an angle


Work clock-wise around the centre, sewing, pressing and trimming as you go.

                    Work around the centre

                     First border complete


Continue adding strips until the batting has been covered.

                    Cover the batting


From the WS, the fabric extends beyond the batting.


WS of batting


Trim away the excess fabric from this side to the size of the batting.


                                   Trimmed square
 

Repeat for the other squares, making different sizes for added interest.

                Some completed squares

                             Detail