Sunday 25 September 2011

BLOG 69


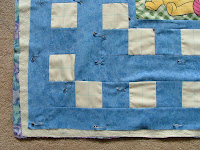
A new baby arrived in the family in August, another great nephew for us, so my attention has been focused on making a quick play mat as a gift. It took me an evening to put together, with a pre-printed picture in the centre surrounded by 3 ½” squares and strips. Now it needs quilting by machine (it’s not worth doing hand work on an item that you hope will be used well and laundered often) so here’s how I put the layers together in preparation.

I cut the backing fabric 2” larger than the quilt top and lay it, RS down, onto the carpet.

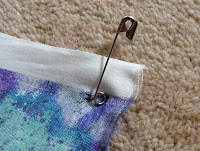
I use safety pins to anchor it to the carpet, to hold it firm without stretching it.

Pinned edge

The batting, and the quilt top marked ready for quilting, is placed on top to make the three layers.

Three layers

I start by safety pinning the 3 layers together around the outside edge, before pinning the centre at 5” intervals.

Quilting lines

The quilting lines are marked through the middle of the squares so that they appear fragmented. The first quilting lines are sewn on either side of the border surrounding the panel to stabilise it. A walking foot (even-feed foot) is essential as it grips and feeds the layers through together. The stretch stitch I have chosen adds a bit of decorative detail.

Lines of straight stitches are then sewn from the edges of the inner border to the outer edges to secure the layers together and then I sewed round the lines parallel to the centre panel, working towards the outer edge. Easy quilting by any standards. Small motifs were added onto the quilt top for interest and the binding added. I didn’t have enough of the pale blue for the binding so chose the WS of a navy floral fabric.

Fused motifs

All I need to do now is quilt the printed panel, which is held stable and flat by the decorative stitches. I need to hand sew the binding and add the baby’s name and date of birth. Seeeemples! It will be posted this week and, I hope, gratefully received.

Binding

Sunday 18 September 2011

BLOG 68

The good news this week is that my mother is being discharged from hospital. Although totally reliant on oxygen, her mobility has improved slightly after her broken hip and she is being allowed home. I’m sure that mentally this will do her the world of good, but we are naturally apprehensive about the situation. To that end, I am going there on Sunday for a few days to settle her in and to make sure that the systems put in place for her safety and well being, actually run smoothly.

Another pleasure for me this week was spending my Meerkat quilt prize money. I have to admit that I hate shopping but I enjoy spending money, if that makes any sense. The fact that I don’t hit the shops often means that I’m not in a position to spend! Anyway, after much pondering I have purchased an embellishing machine.

Embellishing machine

The germ of an idea was planted when I did a bit of needle felting with Suzette at the embroidery class so I am aware of the effects produced by (wo)manually blending fibres with needles. It was love at first sight and now I have one!

Needles

No thread is used at all. All it really consists of is a cluster of needles that go up and down to blend fabrics and fibres. The more open-weave the fabrics, the better it blends …. and that’s all I knew in advance of getting the machine. After a trip to Hobbycraft for fibres, here is my first attempt onto wadding. I can’t wait to experiment with it.

Fibres and flower

My fourth wall hanging has been quilted and bound. This was the first one I made in the series and it was by far the most spontaneous as you can probably tell from the joyful colours. I think I got a bit more careful and controlled by the time I made the following three. Anyway, all four will be sent off with other ‘Fabric Palette’ quilts to Grosvenor exhibitions this week to feature in their Autumn and Spring quilt shows.

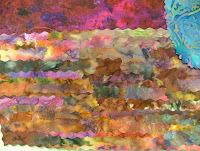
Landscape with setting sun

I am continuing to work on my flower vase wall hanging and I am starting to make flowers

It’s as easy as this:-

1 Cut a slightly larger centre and random sized squares for the petals.

Prepare the squares

2 Hold onto one corner of each petal and round off the remaining 3 with pinking shears.

Round off the corners

3 Working on baking parchment, overlap the petals around the centre, fusing them in place with an iron.

Fuse the petals

4 Complete the flower and press well. What could be easier?!


Finished flowers

Sunday 11 September 2011

BLOG 67

This week we have been looking after a pair of chocolate Labradors for my daughter and son-in-law whilst they had a holiday in the sun. Our two cats are reluctantly confined up the corridor to live at one end of the cottage and the dogs remain in the kitchen at the other end and never the twain shall meet …. That’s the theory! We have had fun and games, spats and skirmishes, thieving and destruction, but we have survived! They had their chums round for birthday celebrations and everyone knows that the way to a Labrador’s heart is through the stomach. Sit!

A love-in of Labradors

My sewing has progressed and my projects have continued to develop throughout the summer months. Working in a series has been an interesting experience for me. I have a grasshopper type of mentality, where I enjoy creative variety, and so I have found it difficult to apply myself throughout this repetitive process. I have had to be really disciplined and focused to complete all four wall hangings!

The main advantage of this creative repetition is that it made me focus my energy and helped me to improve and develop my ‘painting with fabric’ method. Another plus is that all the raw materials were strewn across my workroom so I didn’t have to tidy up between quilts! Many different threads were used for quilting, so I was able to do a lot of detailed texturing on all four quilts before changing colours on my machine.

I commented last week that I had one or two reservations about my completed wall hangings. After I had written that, not unlike saying the words out loud, I realised that I still had a choice as to whether I was going to put things right or not. If I didn’t do anything about it, every time I looked at that quilt, my eyes would always go to the problem area and I would always be disappointed with it. So the wrought iron archway had to come off! It was sewn onto a vanishing medium and added after it had been completed. It was the wrong colour and much too heavy for the scale of the landscape …. and it took ages to remove! I think this one is better.

Archway

The final landscape has been machine quilted and all that’s left now is the border and binding.

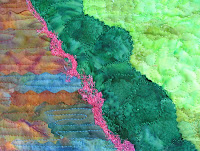
Landscape with setting sun

Detail

Whenever you start and stop machine stitching, there are always tails of thread to cut away. At the end of the series of landscape pictures, this is my bird’s nest of threads! I am quite appalled at the waste and need to find some creative way of using them.

Bird’s nest

The still life is progressing. I have decided to use one fabric for the upper background, as this will ultimately be covered with flowers. I found some more vases left over from past demonstrations and I have started to audition them on the background.

Still life

I have used fabric strips, in many different sizes and colours to prepare the ledge. Although they look a bit haphazard at this stage, I think they add visual interest and depth to the quilt. Once threads are used to add detail and texture, the colours will blend well together.

Still life detail

Sunday 4 September 2011

BLOG 66


Another week; another blog! I have come to the conclusion that writing a blog actually keeps me moving forwards with my quilting, just like teaching classes used to do. It’s many years since I taught weekly classes in my workroom in Sychdyn. My most annoying habit, according to the ‘good man I’m (allegedly) behind’ is leaving everything to the last minute. I used to teach projects at 3 different levels at each of my 7 classes: beginners, intermediates and advanced, over a 5-week course. The weekend before saw me slumped over books for inspiration, scribbling original work on the back of an envelope and trying to see if I could make it work in fabric or digging deep to find something unfinished that hadn’t seen the light of day for a few years!! The sense of panic never failed to concentrate my creative juices and I relished that seat-of-my-pants approach to my work. I still do, if I have to be honest, and find that working to a deadline focuses my mind beautifully! That’s the advantage of a weekly blog. QED

Attaching the flowers

Now, just what have I been up to? I have worked on the small wall hanging of the cow parsley, attaching the flowers with an undulating stitch round the edges. The background has been textured with free-motion machining and I have added silhouettes of cow parsley also to add interest to the background.

Background detail

Completed hanging

I have also finished quilting and binding 3 of the 4 landscapes, with reservations I might add! There are one or two things I would like to alter.

Landscape with arch

Detail

Landscape with pathway

Detail

Landscape with bridge

Detail

PAINTING WITH FABRIC

Here’s how to ‘paint’ a vase using fabric.

1 Draw a simple shape and select a fabric that has light, medium and dark values. Add fusible to the fabric and trace the shape onto baking parchment.

Fabric and pattern

2 Use a pinked rotary cutter to slice the fabric into random width strips (1” and above) and then into squares. You don’t need a ruler for this.

3 On a cutting board, sort out the shapes into light, medium and dark values.

4 Choose a light source and show where the light and dark values are to be placed.

5 Start to over-lap and fuse the fabric pieces randomly (ie not in orderly rows), placing the lights on the right.

6 Work through medium to dark and fill in all the spaces by overlapping and fusing.

7 Trim the vase from the baking parchment side where the pencil line is visible.

What could be easier eh?