Sunday 24 April 2016

BLOG 297


BLOG 297
Congratulations to those who noticed that I had skipped from Blog 295 to 396! And many thanks to Chris for letting me know! Perhaps I was celebrating my birthday a bit early in the day. And so it’s a week later now and I feel not the slightest bit different so I will stick by the old adage that you are as young as you feel. Although my body tells me differently if I choose to believe it, I feel positively juvenile in my head and that is how it will remain. Working with bright colours suits my present temperament so I have continued with the scrap quilt this week, snatching a half hour here and there to add more squares to the pile.

               Scrap quilt

And this really is a scrap quilt. I got to the stage this week when I had no pieces of wadding large enough to cut 7” squares so I got out my bag of bits.

                 Wadding scraps

I started to sew smaller strips together to make larger strips using a walking foot and a wide zigzag. I had to make sure that the edges to be sewn were straight so that I could butt them together without over-lapping which would cause a ridge.

               Zigzag

After a bit of self-satisfying effort, I had emptied a bag of wadding scraps and made them into usable squares. Smug or what!

              Wadding squares

Another sense of achievement has been gained by being determined to empty all those maddeningly small lengths of threads from the bobbins. I have 4 of these storage rings so you can imagine the quantity of bobbins I have in use at any one time!

               Bobbins

After a few sessions I have liberated lots of bobbins. When I have had a clear-out of threads in the past, I have used the bobbins on the top of the machine as well as in the shuttle. This was a step too far as I was forever running out of thread from one place or the other. Using a full reel on top and only having to change the bobbin in the shuttle periodically is a better way of working. It always surprises me how far bits of left-over thread will sew.

               Liberated bobbins


And here is a potential layout of the blocks so far. Seeing it through a camera lens I am aware straight away that there is a strong line along the lower edge where light squares goes into medium rather than into medium light squares. A lot of refining is needed before joining it up. Onwards and upwards!

              Potential layout
Aside: I am mad that I didn’t think to add a square of backing fabric behind each square of wadding when I was sewing the strips on. Then all I would need to do is join the squares together with strips. Now I have to think of an easy way to get round this.


Sunday 17 April 2016

BLOG 296


BLOG 296
Happy Birthday to me, Happy Birthday to me …… It is a gorgeous day today; the sun is streaming in the windows (reminding me to clean them!), the garden is burgeoning (requiring constant attention) and all’s well with my world. I have even seen a swallow fly past the window just now which is solid confirmation that spring has well and truly sprung! What more could a girl ask?!

 This week, I decided to work on my ‘zippy purses’ for the Quilters’ Guild Tombola stall which will be at the Festival of Quilts in August. Now I have a confession: I rarely put in zips because I don’t know how to and if I can avoid using them, I will. Thankfully though, on the Guild website there are several sets of instructions for different sizes/shapes of purses. I chose one of these and made a prototype by doggedly following the instructions step by step. I was rather proud of the finished sample and realised that I could put in a zip (I now know what that peculiar foot is in my sewing machine box!)

                Prototype

With renewed confidence, I started to consider making others as in ‘mass production’, but then it occurred to me, that there are lots of people doing just that already judging from the website. So I  decided that I would make some which were a little bit more special and what better fabric to use than the one I have been embellishing with thread for the last few weeks (a la Carol Ann Waugh). I have completed 2 long pieces which could make 4 bags.

               Detail 1

            Detail 2

              Detail 3

                 Detail 4

                  Detail 5

The prepared fabric has made the bags very ornate and special in my opinion. I even thought they were worthy of my signature on this occasion! These have been sent via the QG AGM to the reps of the Region running the Tombola. Job done!

               4 zippy purses

 Happy Birthday to me, Happy Birthday to me ……..


Sunday 10 April 2016

BLOG 295


BLOG 295

I had a rethink on the half-square triangle quilt and decided that the best and quickest solution for me was to add a 1” strip between the rows (finished ½”). This meant that I didn’t have the bulk of the 2 sets of triangular points to struggle with under the needle. (Aside: If this had been a competition quilt I would have persevered with trying to attain perfection with my seams but as it is a Linus Quilt, ease and speed are of the essence.)  

Question: What do you do with a bag of scraps?

              Scraps

Answer: You spend hours sorting them out, ironing them straight, cutting them into 1” strips for your project and discarding the left-overs. And then you feel self-righteous for having done just that!

           1” strips

              Joining strip

After I had sewn half the quilt, I was satisfied that the solution was going to work and that the essence of the pattern wasn’t going to be lost with the added line.

                Half completed

So, it was onwards and upwards (or downwards in this instance!) and I sewed until I had joined all the rows to complete the quilt centre. A couple of the squares must have been re-positioned during construction because I have ended up with 2 identical triangles next to one another. Damn!

             Completed centre

Next, an outer border had to be chosen because I didn’t have enough of the joining strip fabric. I found something similar and finished the quilt top.

               Finished top

This has joined the pile of quilt tops that will need quilting in the near future. I think I may have got the triangles out of my system for the time being so now I want to do something creative. Watch this space.

               A pile of tops

Sunday 3 April 2016

BLOG 294


BLOG 294
Hand sewing has been added to the panel I was showing last blog. After doing so much on the machine, I spent a relaxing time in Gresford, chatting to chums and sewing by hand. And it was whilst I was struggling to do a French knot there that I learnt how to do one properly! Thanks to Jennifer.

 
                Detail 1

                Detail 2

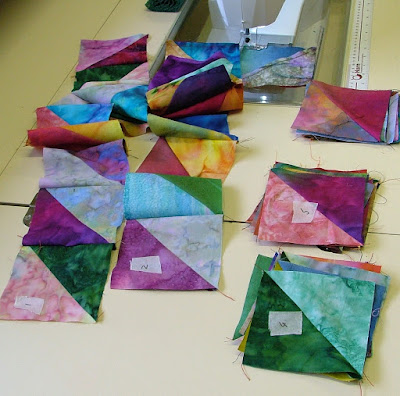
 I also started to put together the half-square triangles from the design wall. Easy peasy, thought I! I collected the rows together into piles and labelled the top square. Then I sewed them with my new Husqvarna machine. It was a constant struggle to cross any seam, the machine/foot didn’t like to negotiate the bulk of several layers of fabric and I found myself pulling the fabric through. This in turn caused the joins to distort and slip. And then I had to reverse sew (or unpick) which I hate doing with a passion! Maddening!! I need to rethink the construction of this quilt or use my beloved Bernina!

               Sewing rows

               Labelled rows

             Reverse sewing

PS: I meant to show these pics last blog, after I had spent the day with my machine embroidery chums. What do you do with a pile of sheers, all cut into snippets? You paint a dragon! And what a dragon this will be when it is finished!

               Snippets

                 Painted dragon

And these are thread-painted pansies sewn through plastic bags rather than on a wash-away foundation layer. The plastic is trapped in the flower and gives body and form to the petal. The plastic layer allows the petals to be manipulated, stretched and fluted. (Note to self: give this a try)

              Pansies