Sunday 29 April 2018

BLOG 394

Blog 394
A lot is going on in my sewing world as usual but much is repeated processes as I continue to prepare exhibits for the Gresford show in June. As we are just still in April, it seems a long way off but in two days’ time, I will be able to say that the show is next month. EEK! Panic on! So I have started to join together some of the quilted squares of my scrap quilt. I am using a bright strip on the top and a patterned black on the back. I just have to be vigilant not to have colours repeated too close together and make sure that I create a chequer board effect on the back as I am using 2 backing fabrics. What could possibly go wrong! And I make no apologies for going over this method (again!) of joining ready quilted squares; everyone needs to know about it!
              The Block
 
 
The block is trimmed to 13 ½”. The front joining strip is cut at 13 ½” x 1” and the back joining strip at 13 ½” x 1 ½”.


                Joining strips
 
 
To join two blocks together you will need one front and one back strip and these will be sewn onto the lower edge of the first block. Place the front strip (1”) RS together onto the RS edge of the block with edges aligned and, AT THE SAME TIME, place the back strip (1 ½”) RS together onto the back of the same edge. Secure the strips with the pins placed at right angles to the edge for easy removal. Sew through all the layers with an exact ¼” seam allowance (the first) to attach both strips.


                  2 blocks and 2 strips


             Placing the strips
 

               Pinning the strips RS


Pinning the strips


                 First ¼” seam allowance
 
Leave the back strip lying where it is but press the top strip over to cover the seam. Place this block onto the second block with RS together, aligning the edge of the strip with the raw edges of the block and secure with vertical pins. Sew a second accurate ¼” seam to attach the strip to the second block. (In the picture my sewing foot is ¼” on both sides and it fits perfectly into the space. Accuracy is essential with this method!)


                Front joining strip


                Blocks RS together


               Aligned and pinned


                Second ¼” seam allowance
 
 
The 1” strip brings both of the raw edges together and they should fit perfectly (too large a seam allowance would make the edges overlap and too small would leave a space between the edges). On the back, fold the edge of the strip to the stitches and then fold it again to cover the joining seams. Hand-sew along the folded edge to hold it in place. I hope to make good progress on this over the next few days when I can’t get out into the garden.


                  WS raw edges level


                First fold


                 Second fold


 RS joining strip


Sunday 22 April 2018

BLOG 393


Blog 393

                  Tess with daily squares
 
This week I have had quality garden time because the weather has been superb! I have been finishing the autumn cut-back, removing weeds, replacing lost plants, digging in compost and adding decorative bark. Exhausting but also very satisfying! The neighbour’s ewes are grazing the paddock … and wandering around the garden after they leaned on a gate that wasn’t fastened securely … and all’s well with my environmental world.


My creative world is a bit more frantic with the Gresford show very much in the front of my mind. Last week I made significant progress on my scrap quilt so this week I have dug out the wedding signature quilt which I started last November. All the names have been embroidered and I am now adding 1” strips to form a narrow border round each square. The gold stars will have maroon borders (all different) and the maroon stars gold.

                  Strips 


              Wedding stars 


               Ironing surface 

I am sewing a scant ¼” seam, placing the WS of the blocks uppermost against the strip so I can see exactly where the needle is sewing. There is an exact place where two construction seams cross and I aim to sew a smidgeon clear of that place to make sure all my points are sharp! I am also trying to make sure no border fabrics are duplicated. Errors are easily made! I have yet to decide whether I will join these bordered blocks together with more background strips. This is indeed a work-in-progress and I hope to make steady progress this coming week.


              Sewing strips 


              Accuracy 


               Error 


                    Bordered stars 


               Work in progress


Sunday 15 April 2018

BLOG 392


Blog 392

I have a feast of colour for the eyes this week as I have been sewing at Suzette’s with other machine embroiderers. I learn so much and I love seeing their work develop over the weeks. Occasionally I ask if I can take photos for my blog and they generously agree. Pat, who owns three large boxes of embroidery threads, (organised by colour!) is working on a pair of grebes. I suspect that she needs so many threads to be able to ‘thread-paint’ her birds so exquisitely. Peggy, who must surely have the same amount of threads if not more (carried in large plastic bags!), is creating an lifelike owl, stems and ivy leaves to add to her textured portion of tree trunk. There is a mind boggling amount of detail and effort in all her constructed embroideries. And Suzette, an incredible thread artist, is working on a very large competition piece in her own inimitable style. I applaud you ladies!


             Thread envy


    Grebes


      Owl


 Tree trunk


                 Blue tit


  Machine embroidery
 
 
And what did I do this week during my day at Suzette’s? I sat at my machine to complete all the foundation strips that I need for my Gresford quilt! It was a heaven-sent opportunity to catch up on myself and break the back of this quilt and I was grateful of the time away from home and other distractions to make valuable progress. And with the wet weather still keeping me from the garden, I spent more time constructing the block and adding borders. I am confident that this quilt will be completed for the June show now!


                Foundation piecing


             Block construction


 Progress


  Border strips


             Sewing borders


I have also completed the 3 ½” daily squares for my daughter. They represent every day (and then some) from her initial diagnosis, through her operation and treatments until she was signed off this week. I said to her when she was diagnosed ‘When life deals you scraps, you make a quilt’. I rather hoped that she would do it! but she was very poorly a lot of the time and patchwork is really my chosen means of expression. So she was totally surprised and bowled over when I gave them all to her this week. What we are going to do with them next remains to be seen ……


             Daily squares


                   Tess


Sunday 8 April 2018

BLOG 391

Blog 391

 
I was at the Gresford craft group this week and they have already started to hand out the forms for items that will be on display at the Gresford show in June!! Gulp! This means that I have to get a wriggle on with many of my exhibits as they need to be (started and) finished. Now that I have completed all the Linus quilts, I feel quite liberated and happily able to move forward again.
Scrap Quilt. (I will have to find a suitable name for it; one of the hardest parts of exhibiting your work in my opinion!) I met up with quilting friends recently for lunch and took samples along from this scrap quilt. I laid out one sample with a black centre and another with a coloured centre and asked them for input. Without hesitation, they both said the coloured centres looked the best 
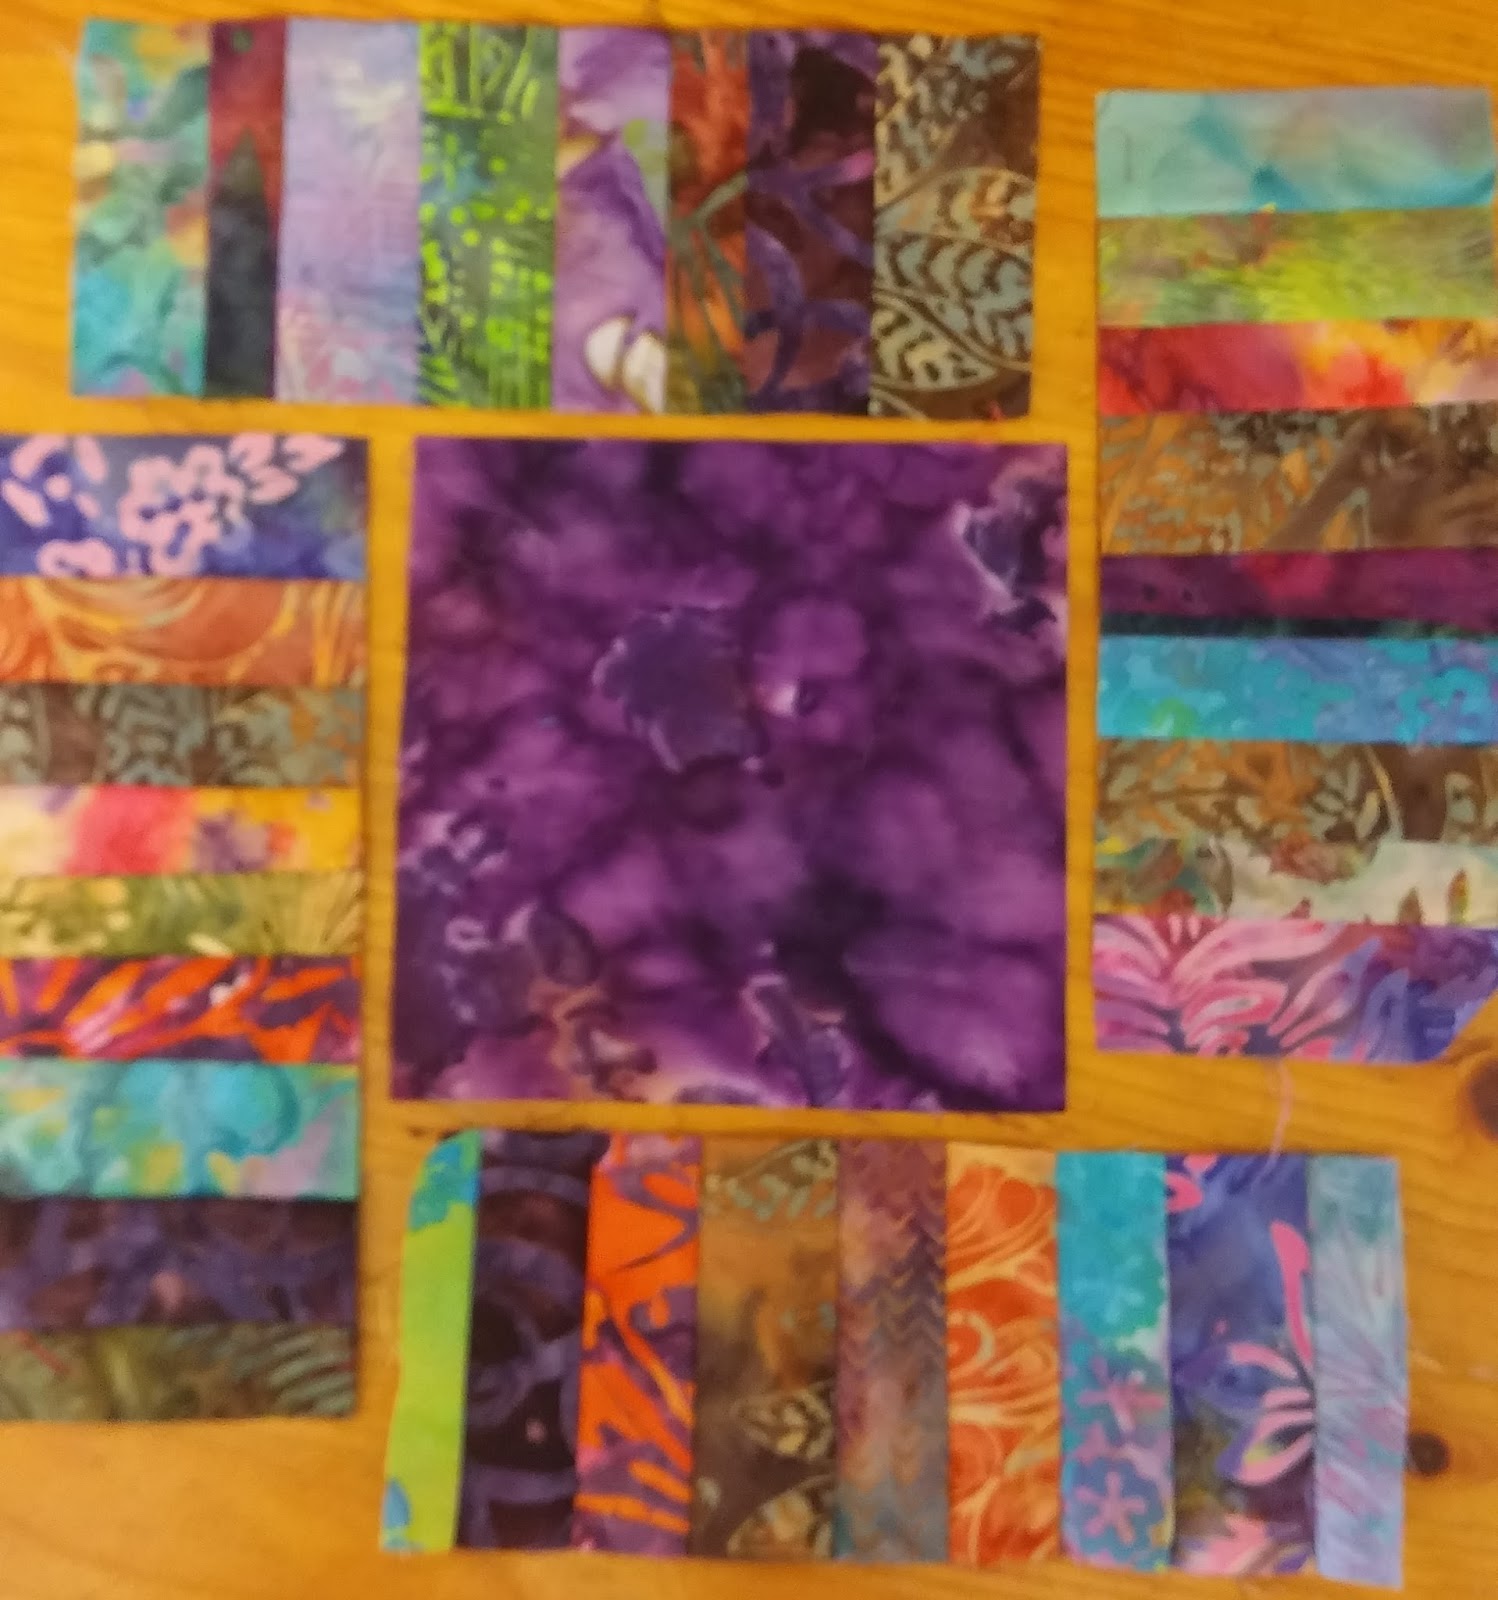
and so the decision has been made; coloured centres it is.
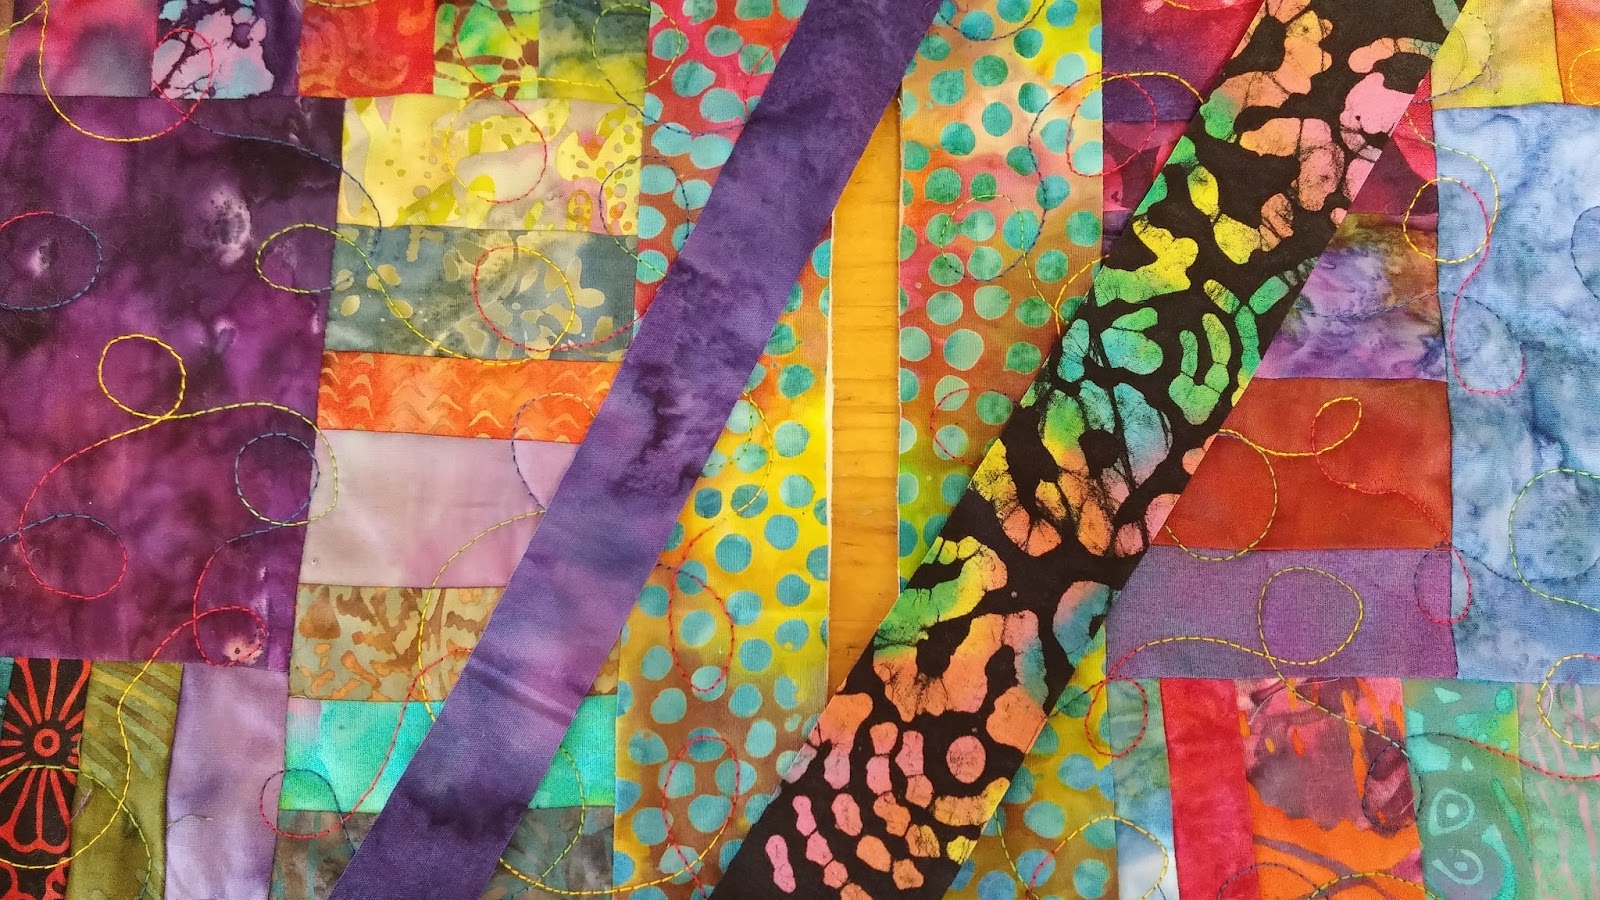
Each constructed strip measures 8” x 3 ¼” and I worked out that the centre square needs to be cut at 5½”. Here is a practice construction. I laid out the block beside the machine. The first strip has to be part-sewn to allow for the rest of the sides to be added, in full, working in a clock-wise direction. Once the final strip has been added, the rest of the first strip can be sewn to complete the block. I ironed these joining seams towards the middle because that was the way the heavily seamed strips were pushing it.

              The block


                 Part seam


            Next side


               In sequence


            Complete first seam
 
            
             Wrong side

 
               Right side


I wanted to add a border to this block and then put it onto wadding and a backing square. This quilt is going to be constructed using a ‘quilt-as-you-go’ technique. I trialled a couple of fabrics, ones of sufficient length, and quickly plumped for the brighter of the two. Once the borders were added, the square measured 13 ½”. I still have a lot of scrap strips so I will continue making blocks until I have sufficient for a single quilt to hang in the Gresford show!.


               Bright border


           Dark border


               Bordered blocks
 
It is very satisfying to be able to get rid of scraps and create something beautiful in the process.