Sunday 29 March 2020

BLOG 489

Blog 489

 
There are new and well used phrases in our language now - ‘social distancing’ and ‘self-isolation’– which are strongly and constantly recommended because of the grave threat of coronavirus. We have been distancing ourselves for a couple of weeks now but on total lockdown for the last week. We are fortunate to be ‘distanced’ anyway because of where our home is situated and we are surrounded by deserted countryside and great walks which makes life easier for us during these trying times. When the sun is shining we are outside knocking the garden into shape; it has never had so much attention so early in the year! Indoors, we both have plenty of hobbies and interests and we both enjoy our own company as well as our time spent together. So far so good but, with the prospect of many more weeks of isolation, I do wonder how we will fare. By nature I am also a sociable creature so I have to resort to chattering more on-line and talking more on the phone. My crafting is a life-saver! There are so many things I can do now in my playroom and I have all the equipment to do it with. I can now try all those techniques I have wanted to do but never had the time; complete all the projects I started and never finished; I can experiment to find out if there is something that will enhance my present way of working. I now have the time and I just hope that I the inclination to use this precious time well, to survive this enforced isolation.


                Social distancing
 

 Last week I mentioned making a small house block for every day we were in isolation. I tried a couple of blocks with fabric but eventually chose to felt them so that I could be freer with design and depth of colour. I machine-felted several layers of colour, mashing up the fibres so that they mixed and blended. I then added a free-style house on top and added detail with black machine thread. They are 3” when trimmed and will be a pretty reminder of these uncertain times.


              Felting


              Template and layers


             House 1


             Stitch detail and trim


               House 2


             House 3


             House 4


            House 5


              House 6


                House 7


FABRIC MANIPULATION Part 2
 

Here’s the next instalment of the fabric manipulation project for my friends at the Nercwys craft group.  


    Measure …. and mark 4½” along the diagonal from the centre cross.


 Stitch …. a small stitch on that mark to anchor the calico layers onto the foundation fabric.


Lift ….  and fold back the corner point as shown so the raw edges are parallel to the foundation square.


Repeat …. for the second corner point.


Adjust …. all the corners in the same way.


Tack …. to hold the folds in place and press.


Trim …. away the points as shown to leave a square in line with the foundation fabric.


Stage 2 …. Next week the corner squares and border strips will be added.


Sunday 22 March 2020

BLOG 488

Blog 488
In May last year we were holidaying in China, with the city of Wuhan on our itinerary; what a difference a year makes doesn’t it! With the Coronavirus, we are living in unusual and unsettling times and it makes me wonder whether history will look back on this period as life before Coronavirus (BC) and life after (AC); I think it will prove to be a defining moment in the history of the world! Today is day 6 for us of the recommended 12 weeks of self -isolating and, here in N Wales, we are fortunate to be living up a farm track on the periphery of our nearest village. We are isolated anyway. So, it’s a case of keeping our heads down and finding pleasure and interest in the small things in life. I have decided on two courses of daily action in this regard. Firstly I am going to make a wall hanging of small houses, making one daily to represent each day we are encouraged to stay at home. (More about that next week). And secondly I am going to find something simple that makes me smile daily and take a picture of it because, when all is said and done, it’s the little things in life that are most important. Here’s the first batch.


              Smile 1 (Katie’s impression of Covid-19)


            Smile 2 (This references our obsession with toilets rolls!)


            Smile 3 (Pheasant tail feather found on a walk. It is was shining an iridescent purple in the sun)


             Smile 4 (Completed jigsaw of Burano in Italy which we have visited in the past)


             Smile 5 (Snakehead fritillary given to me a few years ago by a dear friend who has had a stroke)


            Smile 6 (A pond full of frog spawn to tell me that spring is on its way!)


PROJECT: Fabric Manipulation
This project is especially for my sewing friends at the Nercwys craft group. I promised them that I would do a mini workshop on fabric manipulation. As we can no longer meet as a group for the foreseeable future, I suggested that I would do it via my blog. So here is the first instalment for a 
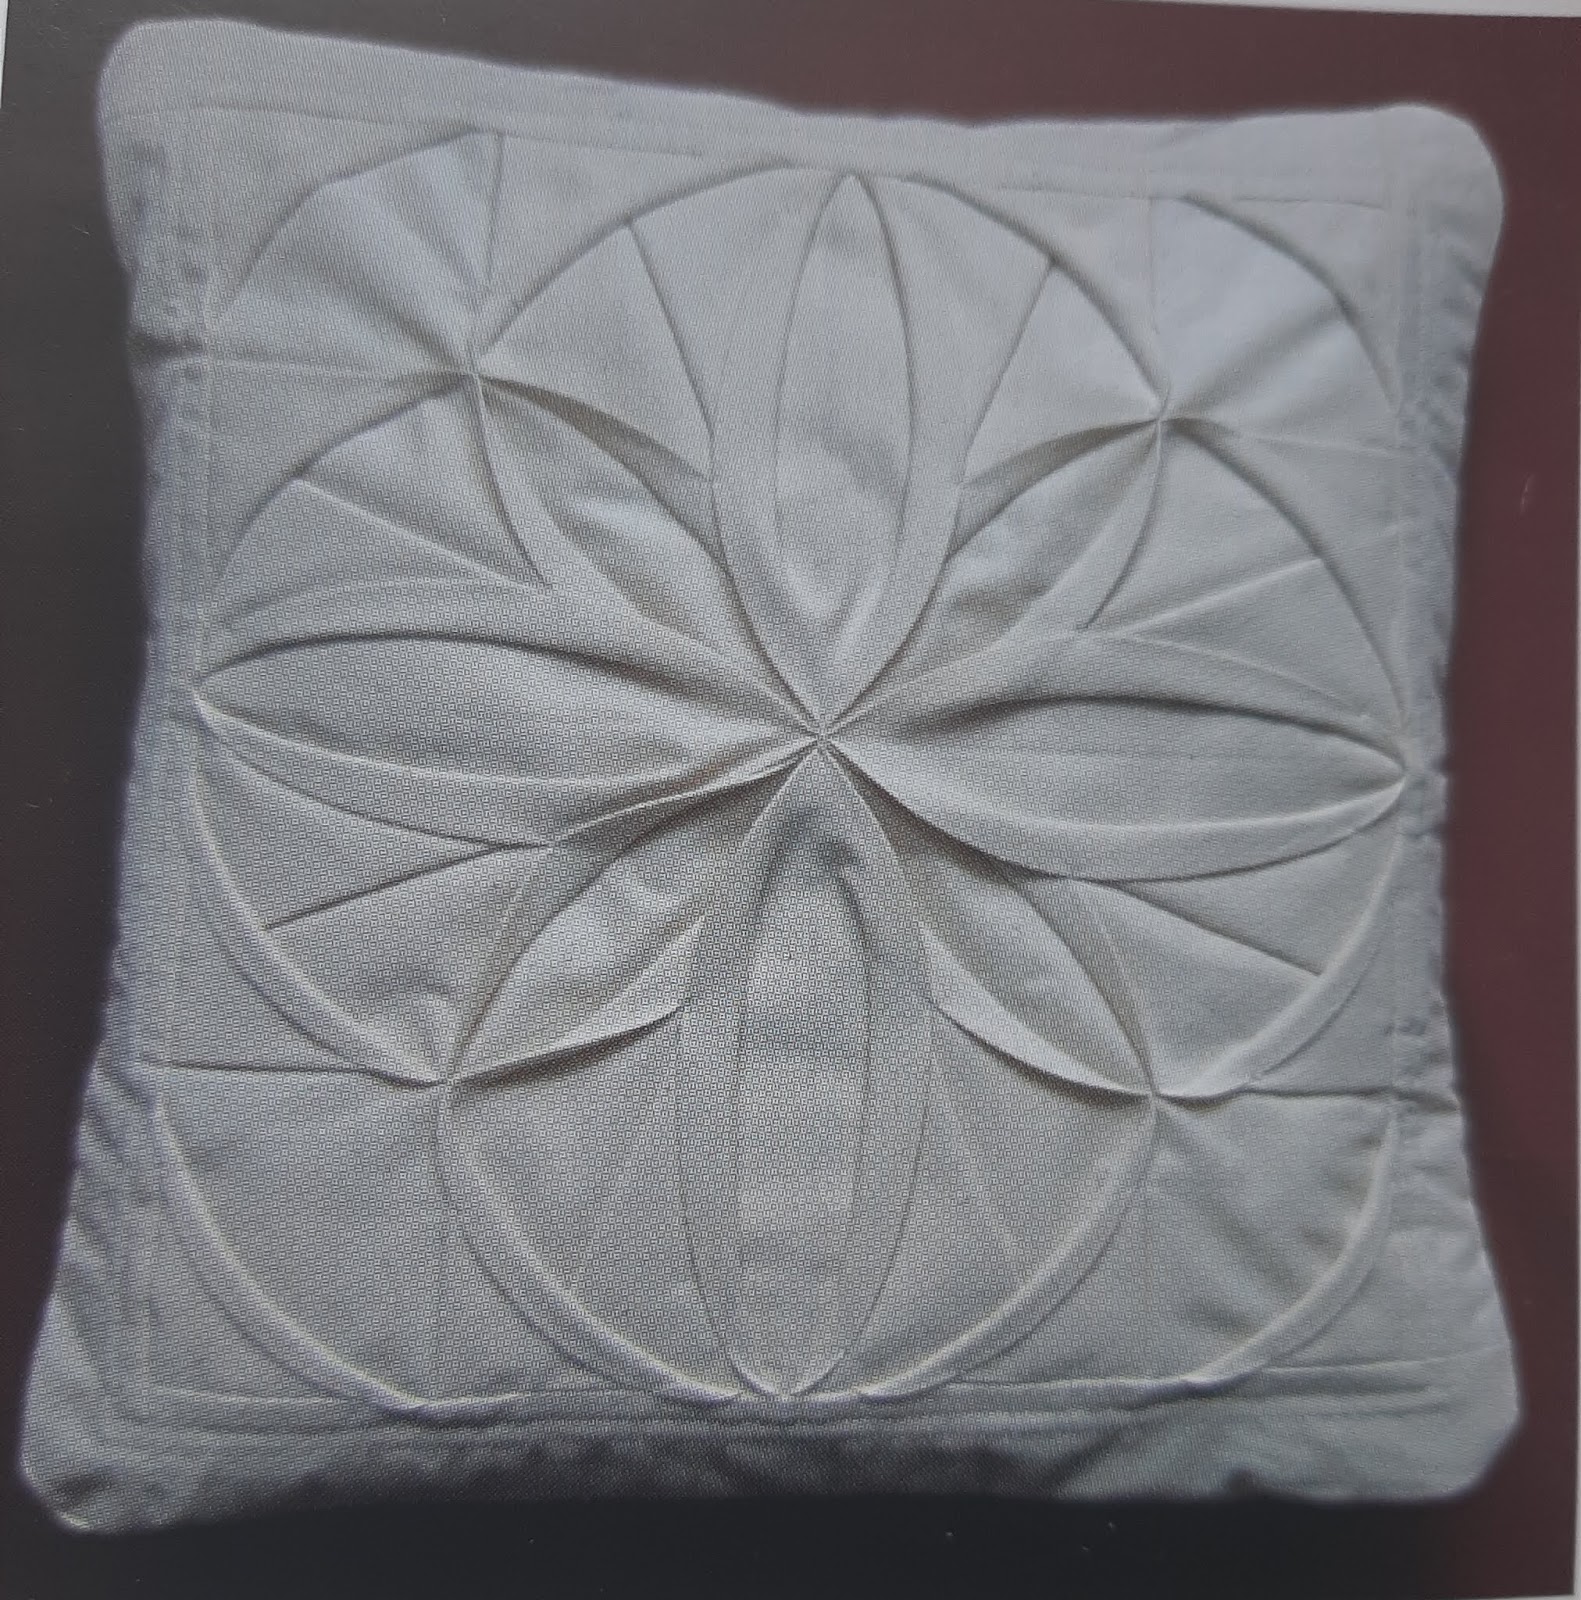
cushion inspired by Jenny Rayment’s book.


           Inspiration


              Book sample


REQUIREMENTS for a 16” cushion
You will need 1 metre of calico. Cut out the following pieces for the front of the cushion; the rest will be used for the back.
4 squares cut at 12½”
1 foundation square cut at 13”
4 squares cut at 3½”
4 border strips cut at 2½” x 14½”
1 square of wadding cut at 18”

 
METHOD
1 Fold a 12½” square accurately from corner to corner in both directions and press the diagonals.


                Diagonals


2 Fold and press it in half across the middle to form a rectangle.


           Press in half


3 Lift the bottom corner of the top fabric only and fold the corner in on itself. Press and repeat for the other side.


           Tuck in the corners


             Press and repeat
 

 4. Carefully arrange the four triangles onto a 13” calico background. Align the raw edges and pin the layers firmly. (NB I have used a contrasting fabric so that the pale shapes show up for photography).


              Place on foundation fabric


          4 squares on foundation


5 Secure the centre points with a cross stitch


           Cross at the centre


6 Pick up one layer of a corner and fold it towards the centre point of the straight edge (it helps to pin the underneath corner to the foundation.) Fold the other corner over in the same way to meet centrally. Secure and repeat for all triangles before pressing well. To be continued next week ….


 Fold one corner to the centre


                Fold the other corner to the centre


              Secure


               Repeat for all triangles


Sunday 15 March 2020

BLOG 487

Blog 487

This blog is a celebration of a finished piece of work! Do I hear you say ‘At long last’? It’s certainly what I am thinking!! That’s not to say that I haven’t enjoyed the whole creative experience but I sometimes just wish I could just make a quilt from beginning to end without being distracted by other things. I just might try it one day and surprise myself. In fact, in this present atmosphere of the coronavirus and voluntary self-isolation, I would be perfectly happy to ‘hole up’ in my playroom. And as far a washing my hands in alcohol is concerned, I’d rather drink it thanks very much!! I know I am being flippant here, that’s just how I deal with things, but I also take comfort from the fact that we are all in this together and, like all things, it will pass.  Be safe everyone!
 

There is loads of free- motion quilting on this wall hanging. The first layer was done extensively through the front and wadding. I then added the backing by placing it RS together on top of the front and turning it through a hole which will be covered by the hanging sleeve. More free-motion texture was added at this stage to give the impression of thread blending.
 

              Glove (for gripping)


            Palm of glove (grips)


             Detail 1


                Detail 2

            Detail 3


            Detail 4


            Detail 5


              Detail 6


            Edge detail (turned through and overstitched)


           Signature


And here we have it: Pansy Patch. And the colours are much more intense than those you see in the following picture. I Love it!!


                Pansy Patch