Sunday 31 July 2016

BLOG 310

BLOG 310


I have made some good progress on the baby’s floor quilt. I satin stitched around the applique shapes through the batting layer only and used black thread for eyes, noses, tails etc. Then I added the third layer, the backing fabric, to free motion quilt the background and I used a decorative stitch on my machine to add interest to the narrow bright strips surrounding the block.

           
                  Applique and quilting

            Detail

                  Stitched features

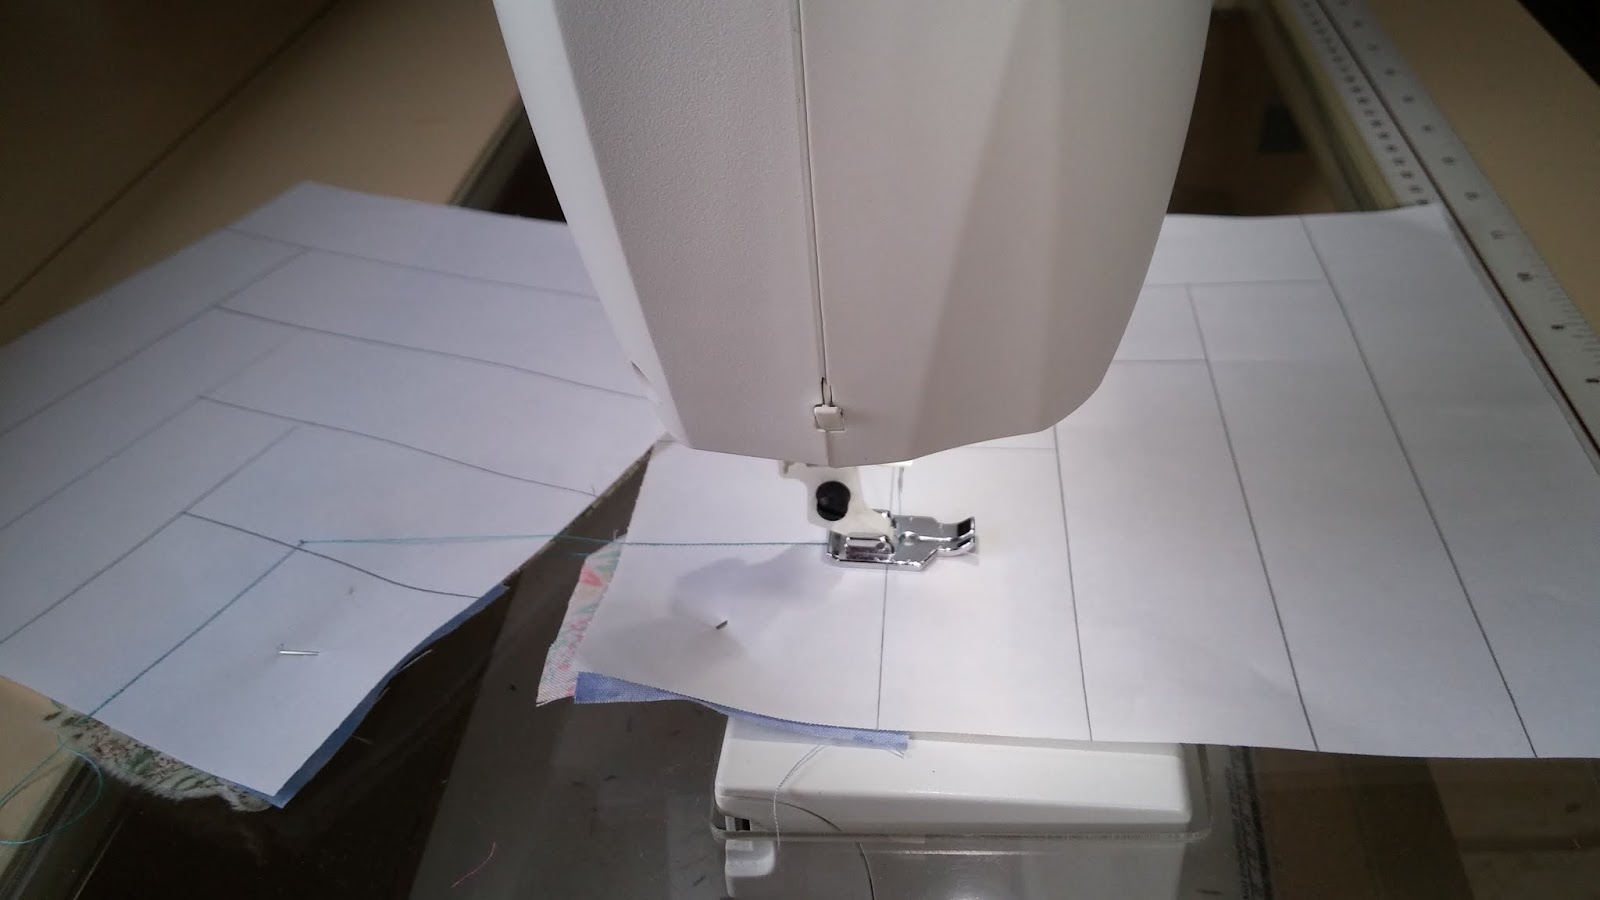
Then I started to join them together. I placed the top strips RS together onto one of the batting and backing layers; the other I folded back out of the way.

                  RS together

When I had sewn the seam, I placed the blocks RS down on a flat surface. The other edge is still folded back at this stage.

                    Sewn seam

I then brought the batting only back from the folded side to cover the sewn seam. I wanted the batting edges to be butted up to one another so the free batting needed to be trimmed. By folding it back where it touched the sewn seam, I was able to trim with my scissors held flat as you see them below. The edges of the batting were then over sewn to hold them together.

                  Trimming

                 Over sewn

 Finally, on the back of the quilt, the edges of unsewn backing fabric was turned under and pinned for hand sewing.

                 Pinned edge

And then, after all the effort, I turned it onto the front of the quilt ….. and I didn’t like what I saw! The border fabric was too busy to be clumped together and needed to be separated with a joining strip. So it was back to square one! I did some reverse sewing, re-joined the blocks using a 1” strip in the front and 1 ½” on the back, and I was better pleased!

 
                       Not happy

                 Joining strip front

                Joining strip back

After binding, it was signed and it is ready for the lucky recipients who don’t yet know it is coming their way!

                Floor quilt

                   Signature

Sunday 24 July 2016

BLOG 309


BLOG 309

I don’t know about you but I’m inclined to wear a black arm band when my washing machine plays up. Usually it is given a good talking too with a modicum of reasoning … and a hefty kick … and it comes to its senses. But this time it wasn’t going to play ball at all and continued to trip the electricity supply every time we tried to start it. Enter stage left one electrician who pronounced that the problem was terminal for a hefty fee! The machine owed us nothing as it was left with the house when we bought it 10 years ago and it has given sterling service during that time. It was probably too intelligent for its own good actually and over-designed for people like me who habitually use 2 washes, three at a push! A couple of days later, my new machine was delivered and we have watched it as you would a TV to get to know how it works and what it does. The line outside is now groaning with washing and there is a mountain of ironing to climb through tomorrow. O alas alack!

Although this has obviously been a momentous event in my life this week, it hasn’t stopped me sewing. I have had a good run on my Garden Trellis quilt and can now safely say that I have completed all the blocks I am going to do. A messy job but someone has to do it! Here’s the final block being trimmed.

                 Final block

 There are 6 blocks across and 7 down. These measure 11 ¼” from point to point and there is another row to add to each block yet (this may be the joining strip). This final row will be the darkest fabric and it may be the same fabric throughout or it may be many different fabrics of the same tone; it depends what I find when I go to the NEC. I just needed to get to this stage so I could estimate the amount of fabric I need to fill in the triangular edges and corners. At this stage I think I will be quilting each block independently rather than joining the whole quilt together before quilting. I will need to review the position of the blocks eventually to make sure that similar fabrics are not next to each other. I really like it so far.

                 Completed blocks

 I have completed 2 more blocks for the baby’s floor quilt, an elephant and a dog. At this stage the shapes are just fused onto the background.

              Elephant

               Dog

Here they are with their colourful borders (finish ½”) and the bright fabric for the next border. I intend to add a 2 ½” border and then pin the blocks onto wadding to satin stitch the edges of the applique with a variegated thread.

                   4 blocks

                  Bordered

                    Wadded

                   Variegated thread


                     Satin stitch

                 Detail

One down, three to go!

Sunday 17 July 2016

BLOG 308


BLOG 308

……….. And that was the last time I saw the thread butterfly. I don’t know where it went but suspect that it was thrown away by mistake! Not a good idea bearing in mind all the time and effort that went into it.

………….. I have also been working on our latest group quilt for the Festival of Quilts but I can’t tell you anything about that as it is top secret and all will be revealed at the show next month.

So I have made a start on another small project that I need to get done for a child. I once designed 20 blocks for a child’s quilt and I am going to use these once again. The original quilt was done by hand but this will be done by machine for speed.


             Pattern

I selected a pattern and traced the individual shapes onto a fusible (I prefer Bondaweb). Once they were roughly cut out, they were ironed onto selected bright fabrics. They were then cut out on the line, apart from the edges that were to be over-lapped. A small seam was added there.

            Fused pieces

 Because I traced from the RS of the pattern onto a fusible, I needed to use the reverse of the pattern to help with the placement of the pieces. I placed this onto a light box and put the background fabric (calico) over the top.

                Lightbox

                  Construction

             Teddy

                Tortoise

These will be machine appliqued around the edges when I have put them onto wadding. I will probably do 4 pictures in total to make a play mat. More next time!

 I continue to make steady progress on the Garden trellis quilt; this is an on-going project.


Sunday 10 July 2016

BLOG 307


BLOG 307

And now for something completely different as they say! I often buy lovely cards for inspiration, there are so many in the shops these days. Here is such a card.

            Card

I thought I would use the butterfly for a piece of machine embroidery so I traced it first onto a layer of Utrasolvy, a medium that washes away when submerged in boiling water.  I started by going round the shape and colouring in the body with a circular scribble stitch. (HINT: When you do this method, it is important that the threads join together so that they don’t come adrift after the soluble medium is removed. This compact scribble stitch makes an excellent base.)

              Outline

            Progress 1

              Progress 2

                Progress 3

Over the scribbled base layer of stitches, thread detail is added so that it follows the lines in the original picture. When you are happy with your image, place it in a heat proof container and pour boiling water over it. The soluble layer will start to dissolve but you may need to help the process by carefully moving the embroidery about in the water; rubber gloves are necessary for this.

              Dissolving

               Drying

When the embroidery is dry, it can be used in whatever way you want it. I want to mount it onto the front of the card.

               Mounted card

 Another task I was involved with this week was helping school children to make applique pictures. There will be a Harvest Festival and quilt show in our local church in October and, as the village school is a church school, it was decided that they should also have fabric work on display. The older children made designs on paper first before interpreting them into fabric. The adults sewed on the borders ready for the children to quilt. They will hang at the end of the pews.

             Samples

Now the children need to sew their masterpieces by hand or by machine and judging by this boy’s practice piece, I am full of hope! Next are the little ones and we are doing printing and stamping and transfer colouring … heaven help us!

                 Sewing practice

And for the dog lovers amongst you, here are a couple of pics showing two of the dogs from our ‘dog-days’ which end this evening. The cats will be ecstatic as they will be able to come down the corridor to the lounge again!

               Bonnie

                Melyn

Sunday 3 July 2016

BLOG 306


BLOG 306
Since I last posted my blog, we have entered our dog days. Not as in the Winston Churchill/depression/black dog days, but as in Tam and Nicks/bouncing/Labrador days. Jasper and Bonnie are here to stay for a week whilst their ‘people’ go on holiday. This means a certain amount of disruption at home as the cats have to decamp and go and live at the top of the corridor in our bedroom, bathroom and utility room. This in turn necessitates that we move down the corridor to the guest room so firstly, we can hear the dogs at night (24” thick walls tend to dampen noise!) and secondly, we don’t get disturbed by the night time wanderings of the cats! What a palaver. That said, they are great fun to have around and the regular walks have been great. They are enthusiastic whenever they see you, unlike cats that barely raise an eyelid!

 I have decided to name the latest scrap quilt ‘Flower Power’ as I will be using all my floral fabrics throughout. The design is corner log cabin sewn using a paper foundation method and it will be set on point to make it more interesting. And how do we do it? … here goes!
 

PATTERN: this was drawn on cheap computer printing paper cut into a square. The corner square is 2” and the strips are 1 ½”.

             Pattern


FABRIC: All my florals have been cut into 2 ¼” strips and the corners are cut at 2 ¾”. (They are cut larger than necessary to give a bit of wriggle room with this method.)

             Fabric strips

                 Corners

FOUNDATION METHOD: pin the corner square on the unmarked side of the paper so that 2 edges are level with the paper and cover it with the first strip. Pin through the paper to prevent any slipping.

              Row 1

On the marked side sew on the line from beginning to end using very small stitches (these need to be small so that they perforate the paper, making it easier to remove afterwards.)

              Sewing
I like to sew two at a time to save thread. Once I have the second square under the needle I can release the first one (I call this leap frogging!)

                 Leap frogging
On the unmarked side, fold the paper pattern out of the way and reduce the seam allowance to ¼” using a rotary cutter and ruler or scissors.  

               Trim

On the unmarked side fold the fabric over so the right side of the strip is visible ready for the next strip of the same fabric.

                Strip 1

On the same side, pin on the next strip of the same fabric so that it is roughly level with the edges of the other two pieces of fabric. Turn to the marked side and sew on the line to complete the first row.

            Strip 2

            Row 1/next fabric

 Continue adding 2 strips to each edge of the square trying to go from light through medium to dark. (HINT: There are two sides to a fabric and sometimes it helps to use the WS to create a smooth transition between rows). There are 4 rows in total.

                 2 Sides

                4 rows

When complete, place the block fabric side down and use a rotary cutter and ruler to trim away the excess fabric to the size of the paper. Hold opposite corners and tug to tear the paper and repeat on the other two corners. Remove the paper and place the block on a design wall and watch the quilt grow.

                Tug to tear

                WS and RS

                 Design wall

                 A busy bin!