BLOG 306
Since I last posted my blog, we have entered our dog days.
Not as in the Winston Churchill/depression/black dog days, but as in Tam and
Nicks/bouncing/Labrador days. Jasper and Bonnie are here to stay for a week
whilst their ‘people’ go on holiday. This means a certain amount of disruption
at home as the cats have to decamp and go and live at the top of the corridor
in our bedroom, bathroom and utility room. This in turn necessitates that we
move down the corridor to the guest room so firstly, we can hear the dogs at
night (24” thick walls tend to dampen noise!) and secondly, we don’t get
disturbed by the night time wanderings of the cats! What a palaver. That said,
they are great fun to have around and the regular walks have been great. They
are enthusiastic whenever they see you, unlike cats that barely raise an
eyelid!
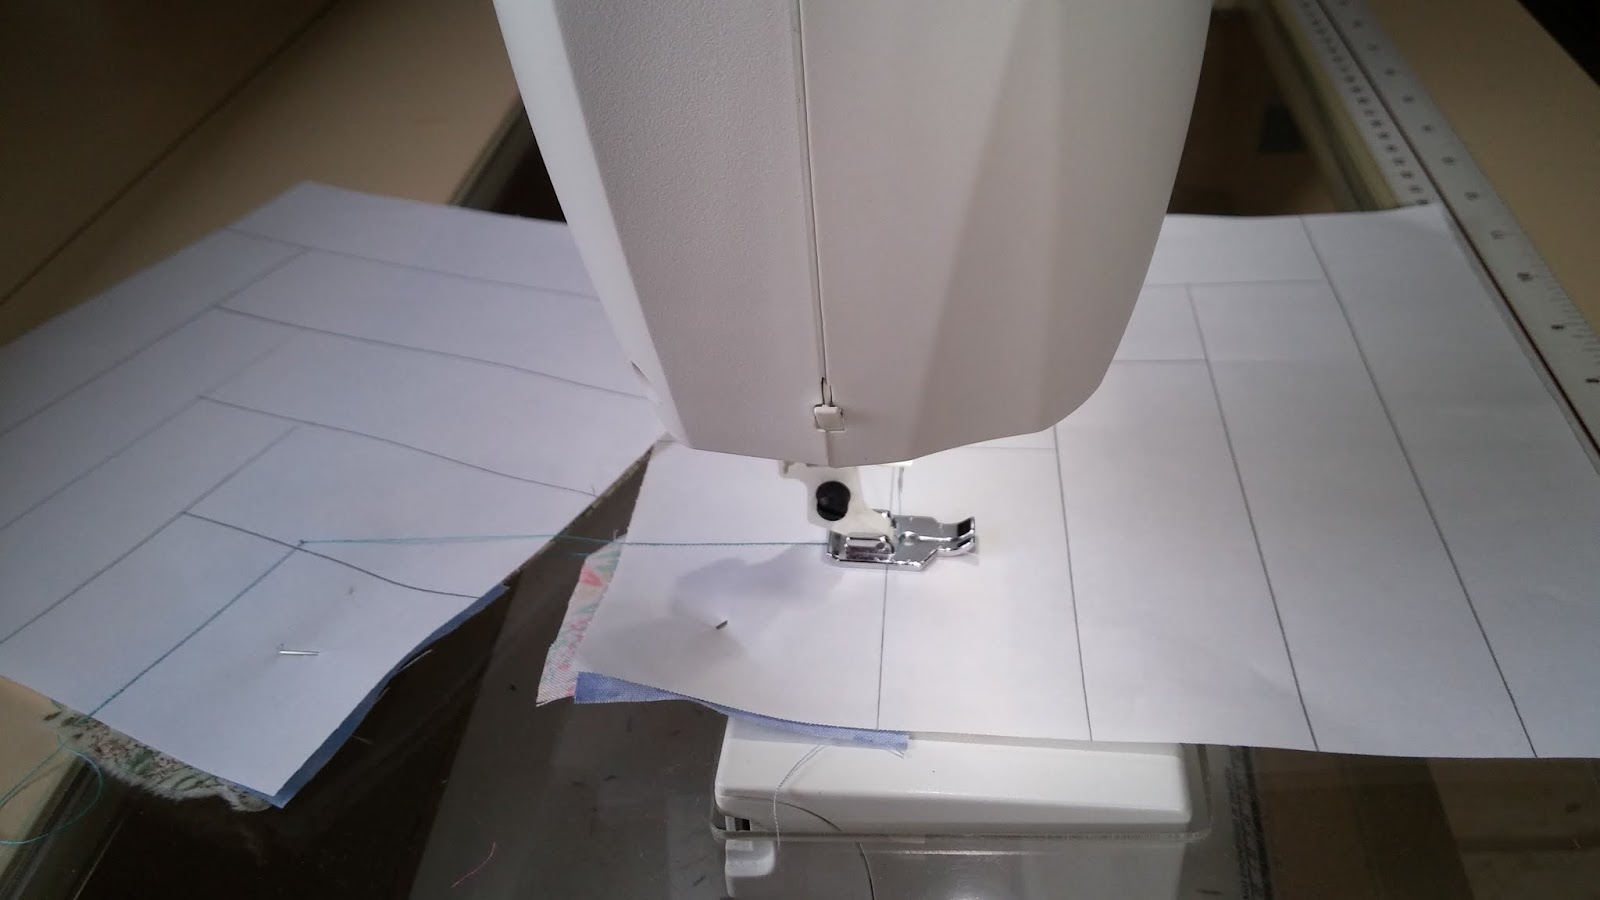
PATTERN: this was
drawn on cheap computer printing paper cut into a square. The corner square is 2”
and the strips are 1 ½”.

FABRIC: All my florals
have been cut into 2 ¼” strips and the corners are cut at 2 ¾”. (They are cut
larger than necessary to give a bit of wriggle room with this method.)


FOUNDATION METHOD:
pin the corner square on the unmarked side of the paper so that 2 edges are
level with the paper and cover it with the first strip. Pin through the paper
to prevent any slipping.

On the marked side sew on the line from beginning to end
using very small stitches (these need to be small so that they perforate the
paper, making it easier to remove afterwards.)


On the unmarked side fold the fabric over so the right side
of the strip is visible ready for the next strip of the same fabric.

On the same side, pin on the next strip of the same fabric so
that it is roughly level with the edges of the other two pieces of fabric. Turn
to the marked side and sew on the line to complete the first row.


When complete, place the block fabric side down and use a
rotary cutter and ruler to trim away the excess fabric to the size of the paper.
Hold opposite corners and tug to tear the paper and repeat on the other two
corners. Remove the paper and place the block on a design wall and watch the
quilt grow.


I love foundation printing, although it does tend to blunt the needle quite quickly.
ReplyDeleteHiya Jayne. You are right about that although I have to say that I only change my needle when it breaks!!! Did I really just admit to that.
DeleteWe did well raising over £6000 for charity at the Gresford show this year didn't we. It makes it all worth the effort. Dilys