Sunday 29 December 2013

Blog 180


Traditionally, at this time of year, many people look back over their year and reminisce about their time and how they have spent it. I am no exception to this tradition and it is part of the reason I write my weekly blog; it is as much for my benefit as for your interest. For me, it is a weekly diary of my creative endeavours, a diary I can look back on to satisfy myself that the grass hasn’t really grown under my feet, despite the fact that I feel it must have. So enjoy my creative year (you can always look back on the specific blogs as tutorials) with fingers crossed for another productive year in 2014. Happy New Year!

                                            Katie's Quilt
 
 
                                        Ella’s quilt in exhibition


Tissue box with embroidered top

 
                                Gwyneth’s Memorabilia box

 
                                Crazy patchwork book coved

 
                 Square within a square workshop samples

                          Alzheimer’s apron project

 
                                           Hugo’s quilt

                                        Felt picture

     Mixed media pictures

                                          String of diamonds

                                        1 metre quilt

                                             String quilt

                                     Embroidered plate

                                 Embroidered chicken

                  Ella’s wall hanging of her drawings

          Delectable Mountain wall hanging

                                             Group quilt

                    Shaded background fabric

 
                  Christmas wallhangings

Monday 23 December 2013

BLOG 179


Since I have been retired, I have had no idea of the date and if someone asks me, all I can say with any conviction is that it is December! I like to be without my watch because I don’t have to work to a timetable anymore and being aware of the time is not that important now. Time is still very precious to me though but it is mine now to do what I like with it. So I hadn’t realised that it was Sunday yesterday and I can only apologise to my regular visitors for not posting my blog as usual.

I admit to being feather-brained and this year is no exception. I mentally logged Christmas Day to be on a Tuesday this year so it came as a bit of a surprise to discover that I had an extra day to play with before the ‘cooking of the turkey day’. We had the neighbours in for an open house evening last night so Sunday became known as ‘Open house day’. Monday became ‘pick up turkey and stilton day’ and Tuesday has now become ‘picking up outstanding present day’! I should have looked at the advent calendar because it was keeping the time quite well and now it is telling me that there is just 1 more day before Santa is due to arrive!

                Advent calendar
 

The Robin is on the wall with the cards.

                                Robin and cards


The angels are on the rafters

                                             Angels


A Christmas quilt is on the pew.

                                       Pew and quilt


The patchwork tree is laden in the hallway.

                 Patchwork tree


The fireplace is dressed.

                                           Fireplace

The cracker quilt is on the settee.

                                         Cracker quilt


And Willow has taken up residence on the back of the other settee.

                   Willow and quilt

The kitchen table is covered.

                                         Kitchen table


And the windows are dressed.

                                                     Windows


I just love Christmas, it is not only for children; it is for me too! It appeals to the child in me and I love the redness and greenness of it all. A very happy Christmas to you all! Why don’t you send a greeting to my blog, (click on ‘comments’) I would love to receive them.


Sunday 15 December 2013

BLOG 178


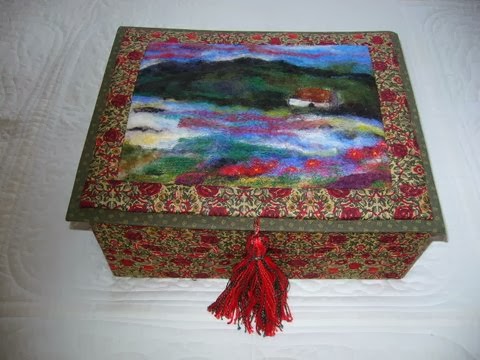
I have been indulging myself this week by playing solely with threads and this has been a complete diversion to my usual preference of working with fabric. I suppose that these days, when I make a quilt, I generally have to have a bed or a wall for it to go on or an exhibition in which to enter it. Not like in my teaching days when I made quilts at the drop of a hat, usually with the excuse that it was for teaching purposes, when it was really that I just needed to make something; I just couldn’t stop myself. I still have vast collections of fabric but not the excuse now to knock out quilts. So diversions like playing with threads give me time to ponder on my next piece of fabric work.

As you may have read in earlier blogs, I go for a sewing day to machine embroiderer Suzette Smart in Shropshire. These fortnightly get-togethers aren’t lessons as such; 3 of us just sit at Suzette’s table and do our own thing. But that said, I certainly couldn’t do my own thing without having Suzette’s samples for inspiration and the advice of the other two very experienced embroiderers. It was from Suzette that I got the idea to make decorative plates with threads. I am toying with the idea of combining thread painting with my painterly quilts, I just don’t know how yet.

And here is my paint palette of threads. There are many different types of thread and just looking at them makes my mouth water!

                                          Thread palette


To make the plate, I placed a square of ‘Ultra Solvy’ onto my embroidery ring. (This layer does just as it says on the packet: Extra strong, transparent, water soluble film). It dissolves in warm water to leave just the threads.

                          Water soluble film

  I then teased a thin layer of fibres around the embroidery ring in the colours I have selected for the project.

                                   Solvy and fibres


I added another layer of ‘Ultra Solvy’ over the top and held it all in place tightly with the inner ring of the embroidery frame.

                                     Extra Solvy layer


I put a free motion foot on my sewing machine and the same thread in the spool and on top. I started by scribbling with the thread in the areas where the inserted fibres of the same colour are positioned. I made sure when I was scribbling that the threads overlapped one another so that they would form a mesh when the soluble was washed away.

                                        Scribbling with thread

 I tried to get as close to the edge of the embroidery ring as was possible with my machine foot, in order to define the most accurate circle. I changed colour often, both in the bobbin and on top, and continued to scribble over the fibres of the same colour.

                                       Colour changes


 Once the colours have been laid down, I add some decorative floral detail over the top of the mesh of threads.

                                      Decorative detail

I took the layers out of the embroidery hoop and followed the directions on the water soluble packet. Once the soluble has been removed I placed the embroidery onto a deep plate and left it to dry overnight.

                                  Shape over a plate


And that was it! I got such a sense of achievement from the process, now I need to work out how to adapt the idea in relation to my quilts.

 
                                       Finished plate


Sunday 8 December 2013

BLOG 177


CHRISTMAS WALL HANGING continued

FINISHING

The cut edges of the black fabric need to be sewn. This can be done by hand using a blanket stitch, or by machine using a zigzag, blanket stitch, stippling stitch or straight stitch. (TIP: I usually place my batting and backing fabric behind the prepared panel to machine-stitch the cut edges. This gives body to the panel so that the stitches don’t distort it.) Here are some samples.

                                                         Satin stitch

                                               Buttonhole stitch

                                       Stippling stitch

 Quilt the wall hanging to your personal satisfaction. The samples above show three different approaches to machine quilting: a marked 1 ½” grid, a curly stitch with a thread to match the background and a loopy stitch in a variegated tread. Anything goes really, but as this is only going to hang for a few days over Xmas, you don’t want to spend masses of time quilting it.
Cut away the excess batting and backing from around the outside edge. At this stage you can shape one end or both ends to a point, using the line on the pattern or the 45 degree line on your cutting ruler. Or you can leave it as a rectangle, as you prepared it.

                                      Finished samples

The edges of the wall hanging need to be finished with a binding fabric. You can bind with a 1 ¼” straight strip remembering to mitre the corners (above left). Or you can round off the corners for a softer edge and use a 1 ¼” bias strip (above centre). Here is the speed method used for an unshaped rectangular hanging (above right). Back a 22” x 4” strip of your chosen fabric with fusible web. Cut it in half down the middle with an ordinary cutter to give 2 strips at 2” x 22”. Cut down the middle with a pinked cutter or pinking shears to give 4 strips at 1” x 22”, each with 1 straight edge and 1 pinked edge. Use a pin to start to release the paper and remove it.

                                                    Remove the paper


Cut 2 strips at 7” and iron them (make sure you have used cotton batting) along the top and bottom edges so that ½” of the pinked edge is seen on the RS of the hanging and ½” of the straight edge is seen on the WS.

                                               Fuse the short edges

Trim away the excess. Overlap at the corners and cover the long side to complete.

                                               Fuse the long edges
Add an optional tassel and a hanging ring to the back to complete. And now I have 3 wall hangings completed to give as presents; all that’s needed is wrapping paper and a label. Job done!


Sunday 1 December 2013

BLOG 176


What a day I had yesterday at Thornton Hough! I had a dreadful stomach pains the night before and was violently sick a few minutes before my departure. As I left, I didn’t even know whether I could manage my talk or run the workshop with the waves of nausea that I was experiencing. But all I could think of was the 50+ quilters who were making their way to the village hall. In what I can only describe as a feat of human endurance, I just about managed. Once I started to show my quilts, I just rattled on with enthusiasm. After a bit of fresh air in the late November sunshine, I returned to run the workshop. It was so well received that my job as a teacher was made much easier and I managed to quell the waves of nausea throughout. When I got home, all weak and feeble, I wrapped myself in a quilt and cuddled in front of a log fire for the rest of the evening. Marginally better today and on the mend. Here is the workshop.  (If you want a pattern, email me at dilys.fronks@btinternet.com)


CHRISTMAS WALL HANGING 6 ½” x 22”

REQUIREMENTS

Fusible: 6” x 16” (eg Bondaweb) Mark the vertical and horizontal centre lines with a suitable marker.

Foundation: 6 ½” x 16” (eg calico, you must be able to see through it to trace a pattern line)

Black cotton fabric: 6 ½” x 22” Mark the vertical and horizontal centre lines on to WS with a suitable marker

Candle: 2 ½” x 8 ½” Xmas red

Words: 2 ½” x 9 ½“ Xmas white

Holly: 6 ½” x 6 ½“Xmas green

Flame: 2” x 2 ½” of gold


METHOD Press the fabrics ready to start.

1 Trace the pattern centrally onto the WS of the calico and onto the paper side of the fusible. Add centre lines onto the fusible.

Trace the pattern onto calico and fusible


2 Centre and press the fusible onto the WS of the black fabric. Allow it to cool.

              Stick the fusible
 

3 Cut out the shapes on the line, remembering to keep the centre of the ‘O’’.

              Cut out the shapes

  Place the Xmas white for the letters, RS uppermost, onto the RS (unmarked) of the calico. Move it to lie over the tracing of the letters on the WS. (TIP: Hold it up to the light to check the position of the fabric against the pattern lines.). Pin at the 4 corners on the RS and sew around the outside of the marked lines on the WS. Sew about ¼” from the lines, to hold the fabrics together.

 
                         Sew outside the lines

 
5 On the RS, trim the excess fabric on the outside of the stitched line. Repeat for the candle, flame and letters.

 
               Trim excess fabric
 

6 Peel the paper from the WS of the black fabric and place it over the prepared calico strip. Move it about to make sure that there are no tacking lines visible before ironing the layers together.

                           Iron the layers together

To be continued …. And a Happy December 1st … for the ones who requested it ….

                                                      Robin