Sunday 23 September 2012

BOG 117


I have continued with the vases wall hanging this week and, rather than bordering and binding it, I decided to do the turn-through method again. This gives a really tight and tidy edge and means that I don’t have to prepare and hand sew a binding strip which has to be good! No stitches are seen on the back of the quilt unless you add more after the backing has been added. It is a great way to finish smaller quilts.

To recap on this brilliant method, I cut a backing piece exactly the same size as the trimmed picture. About 2” from the top edge and 3” in from each side, I stick a strip of 1” fusible to the wrong side of the backing fabric. I use a rotary cutter to cut down the middle, leaving about 1” at each end. The backing fabric is then pinned right sides together on top of the picture.  


                        Prepared backing
Sew round the outside edge with a constant seam allowance (I use 1/2”), trim across the corner and turn right sides out.


                                   Turn RS out

Use an iron to settle the edge (this only applies to cotton wadding!) so that none of the backing fabric shows on the front.


                                     Iron the edge

Remove the paper backing from the strip of fusible and match the cut edges of the fabric (it helps if it is a patterned backing). Use an iron to stick the fusible to the batting and to hold the cut edges together. 


                                    Fuse the edges

Prepare and hand sew a sleeve over the fused edges on the back.
 
                                       Add a sleeve
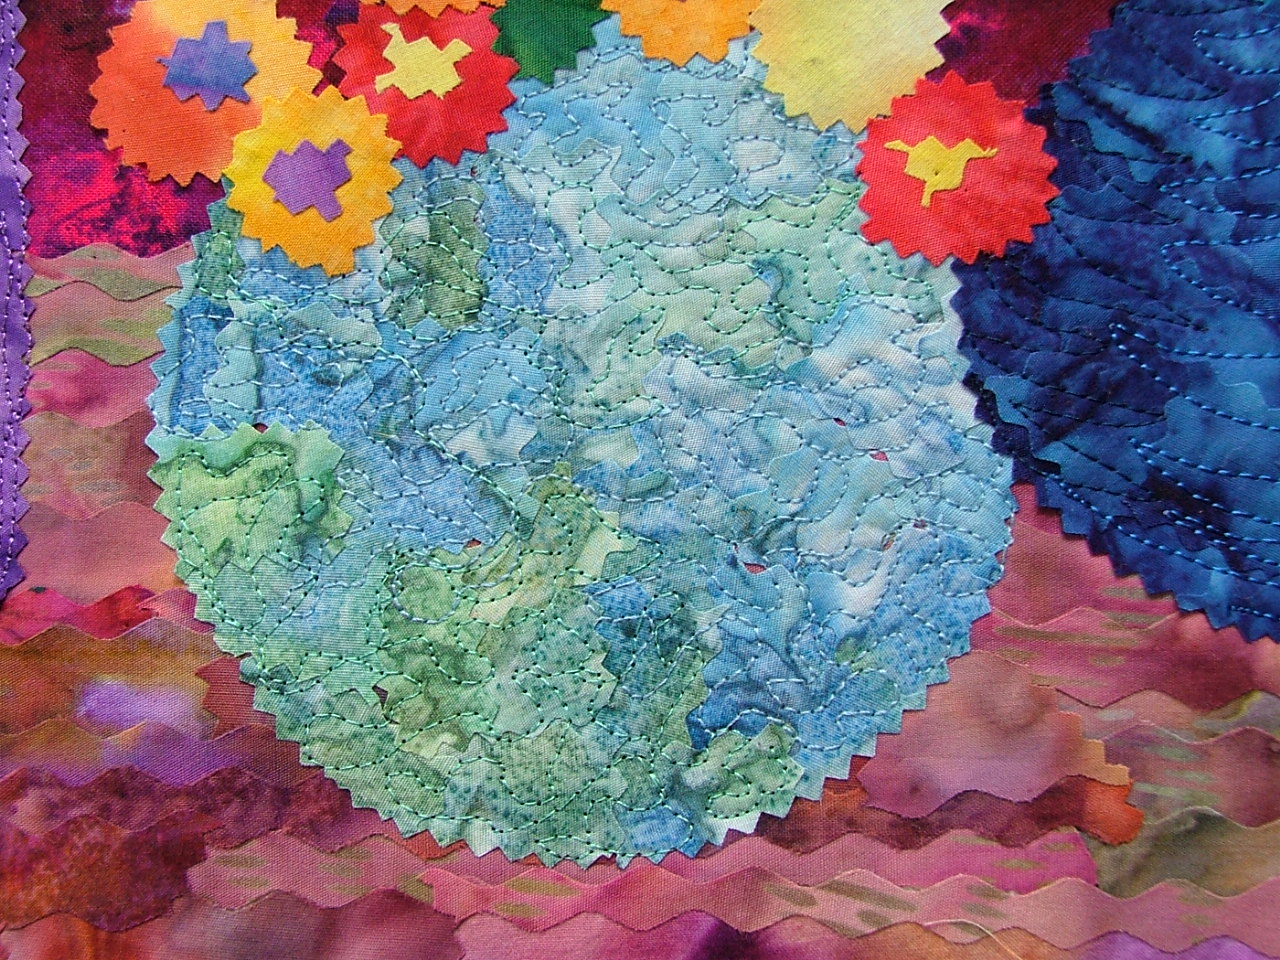
And here is the completed picture.


                               Wall hanging
At Chester Ps & Qs this week we were reminded about our planned exhibition next year in Chester Cathedral. This has given me a sense of purpose for my creative skills and I am now anxious to plan and create something relevant for this exhibition. The first step is a visit to the Cathedral to collect some images by drawing and with photography. I had a wonderful couple of hours there and here are some examples of what I came back with. Next week I will try to talk my way through my creative process from pictures and sketches to a workable design. No pressure there then!


                                             Stone

 
                          Marble


                                            Metal

       Traditional glass


                             Modern glass

 
                    Wood

It always helps when I get feedback after a project I have taught on my blog. It shows that I must have done things right! Lin Beagley sent me a picture of a lovely memorabilia box she made for Paige as she turns 21. Lovely! 


                     Paige and her box


Sunday 16 September 2012

BLOG 116


This week, I have spent some of my creative time continuing to quilt the flower vases wall hanging. You may recall that I chose to sew the quilting stitch through a batting layer only and I am doing this purely for speed. This way I can leave the threads joined or untidy on the back knowing that they will be covered but, if I was doing a competition piece, I would opt to sew through a backing layer as well and make a feature of the stitches on the back.

Here is some detail of what I have sewn on each of the flowers. I felt that the petals of the daisies just needed simple definition but chose to do close circles on the centre. I usually try to match the thread with the fabric so that a texture is produced rather than a defining line.

 
                                      Daisies
 More detail is sewn on the Primulas, matching thread to the colour of the fabric.


                                    Primulas
I have referred to organic applique/quilting before and this is a stippling stitch around the edge of a shape. It is easy to do when sewing in a free-motion way and it adds definition and holds down the edges of the individual shapes. I have done this around the petals below.


                                       Detail 1
The flowers in the next bowl were cut from a printed fabric so all I had to do was follow the lines with a variegated thread.


                             Printed flowers

The final bunch of flowers was also organically quilted around the edge with more detail added in the centre.


                                        Detail 2
 
This is how the finished piece looks from the back. I used a lilac thread on the spool throughout for expediency but, if I was making a feature of the stitches on the back, I would have had to change spool thread to match the top thread each time! You will be able to see that I completed the shelf with undulating lateral lines but I chose to do a series of vertical decorative machine-stitched lines to complete the background wall. All this needs now is a backing, binding and sleeve.


                                    Back view

 
                                Back view detail

Sunday 9 September 2012

BLOG 115


As mentioned in my last week’s blog, I went to the Great Northern Quilt Show in Harrogate. It was a great day out and the quilt show lived up to my expectations. You may recall that I entered my quilt Dual Image Jacobean.


                      Dual Image Jacobean
 I was thrilled to learn that I had won the Sue Belton Cup which is a perpetual award for the best quilt in Region 13 of the Quilters’ Guild. My name will eventually be added to the list of illustrious quilters from this region who have won it before me. I am also quietly satisfied that this pair of quilts has been acknowledged in a competition.

ASIDE: It was rather poignant reminder of the time that I judged my first quilt show with Sue Belton and Irene MacWilliam in marquees in the grounds of Nostell Priory. Sue had just been diagnosed with cancer. Being new to judging, we were all petrified beforehand but were able to put each other at ease and eventually enjoy a very strenuous day.


                                        Sue Belton Cup

Annoyingly, I forgot to take my camera and I only bought one piece of amazing batik fabric because I wasn’t looking for anything in particular for a project. There was so much to view quilt-wise that shopping time was limited anyway. I particularly loved the Gail Lawther quilts from her new book ‘Glimpses of Britain’; there are many techniques involved and lots of original ideas.


                                         Batik
Texturing continues on the Vases wall hanging. As this is a practice piece, it gives me the freedom to play so I am trying different textures on the vases, changing the value (lightness/darkness) and the colour of the thread as appropriate.


                                              Stippling

 
                                    Vertical lines
I have covered the largest vase with scrolls, working one side turquoise and the other blue, as dictated by the fabric. Then, in a bid to add further depth to the blue, I have added more scrolls with a variegated thread. Finally, across the whole vase, I have added extra scrolls with a purple thread to bring out the colour in the fabric. More next week.


                                               Scrolls

 
                                           Threads

 
                                      Detail

ASIDE: A momentous event in our family life this week has been the arrival of a new Granddaughter on the 5th.  Weighing in at 6lb 2oz she is called Katie Eve. (She’s a little poppet, isn’t she Jackie?) Her parents opted not to know in advance what they were having so it was a lovely surprise for them and for us. Naturally I feel a quilt coming on now … just what, I’m not sure yet.

 
                                 Katie Eve Anderson

Saturday 1 September 2012

BLOG 114


This is an early blog because on Sunday I will be driving with a friend to the Great Northern Quilt Festival in Harrogate. I really like this show because it is fairly local and there is lots of room to appreciate all the quilts and space to enjoy the numerous traders. I didn’t look for quilting supplies at the NEC’s Festival of Quilts because it was over-crowded and there were queues at the most popular stalls. It will be a more pleasurable and tranquil experience to buy ‘stuff’ at this show.

ASIDE: My husband has just gone out to practice bowls with one of his friends. He popped on his hat and was oblivious to his passenger until I started laughing. I told him to hold still until I had photographed it. It was huge and it would probably have enjoyed an outing!!


                              Rog with passenger!

 This week I decided to carry on with my still life wall hanging. This was the last picture I posted of it, pointing out that there was a space yet to be filled on the right hand side.


                                             Still life

 I resolved this problem by adding some extra blooms on the ledge beside the blue vase. I chose red because I felt that that colour would encourage the viewer’s eye to follow through to the right of the composition.


                                          Space filled

 I am happy with this now and so I need to remove the baking parchment from behind the picture. It was put there to protect the ironing surface from the fusible on the background fabrics whilst I was adding vases and flowers to the foreground.


                     Remove the baking parchment
The completed picture is ironed onto cotton batting (it must be cotton to take the heat of the iron) in preparation for quilting/texturing. Fusing the layers means that I don’t need to use pins to hold the layers together.  I have not put a backing on at this stage because I don’t want to be too fussy about my stitches on the back of the wall hanging. I have chosen a fine lilac thread for the bobbin and I will use gripping gloves to get maximum control of my quilt during free-motion stitching.


                     Gloves and bobbin thread

 I have started at the right hand side and gone round the red flowers with an organic’ applique stitch. This is just a posh name for a wiggly stitch round the edge of the shapes! I jump from one flower to another and I have yet to snip off the ends of the thread on the front.


                        Organic applique stitch
Moving to my left, the next shape is the blue vase. I have selected three shades of blue thread to correspond with the shades in the vase. I have sewn an undulating line, to and fro, to texture the shape and to secure the fabric pieces.

 
                              Vase and threads

More of the next week…..Harrogate here I come!