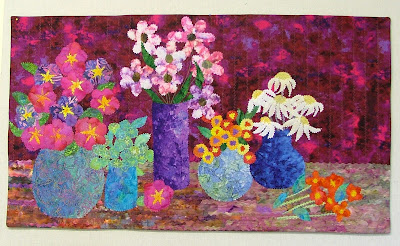
I have continued with the vases wall hanging this
week and, rather than bordering and binding it, I decided to do the
turn-through method again. This gives a really tight and tidy edge and means
that I don’t have to prepare and hand sew a binding strip which has to be good!
No stitches are seen on the back of the quilt unless you add more after the
backing has been added. It is a great way to finish smaller quilts.
To recap on this brilliant method, I cut a backing
piece exactly the same size as the trimmed picture. About 2” from the top edge
and 3” in from each side, I stick a strip of 1” fusible to the wrong side of
the backing fabric. I use a rotary cutter to cut down the middle, leaving about
1” at each end. The backing fabric is then pinned right sides together on top
of the picture.
Turn RS out
Use an iron to settle the edge (this only applies to
cotton wadding!) so that none of the backing fabric shows on the front.
Remove the paper backing from the strip of fusible
and match the cut edges of the fabric (it helps if it is a patterned backing).
Use an iron to stick the fusible to the batting and to hold the cut edges
together.
Prepare and hand sew a sleeve over the fused edges
on the back.
Add a sleeve
And here is the completed picture.
Wall hanging
At Chester Ps & Qs this week we were reminded
about our planned exhibition next year in Chester Cathedral. This has given me
a sense of purpose for my creative skills and I am now anxious to plan and
create something relevant for this exhibition. The first step is a visit to the
Cathedral to collect some images by drawing and with photography. I had a
wonderful couple of hours there and here are some examples of what I came back
with. Next week I will try to talk my
way through my creative process from pictures and sketches to a workable design.
No pressure there then!Stone
Marble
Traditional glass
Wood
It always helps when I get feedback after a project
I have taught on my blog. It shows that I must have done things right! Lin
Beagley sent me a picture of a lovely memorabilia box she made for Paige as she
turns 21. Lovely!


No comments:
Post a Comment