What a day I had yesterday at Thornton Hough! I had a
dreadful stomach pains the night before and was violently sick a few minutes
before my departure. As I left, I didn’t even know whether I could manage my
talk or run the workshop with the waves of nausea that I was experiencing. But all
I could think of was the 50+ quilters who were making their way to the village
hall. In what I can only describe as a feat of human endurance, I just about
managed. Once I started to show my quilts, I just rattled on with enthusiasm. After
a bit of fresh air in the late November sunshine, I returned to run the
workshop. It was so well received that my job as a teacher was made much easier
and I managed to quell the waves of nausea throughout. When I got home, all
weak and feeble, I wrapped myself in a quilt and cuddled in front of a log fire
for the rest of the evening. Marginally better today and on the mend. Here is
the workshop. (If you want a pattern,
email me at dilys.fronks@btinternet.com)
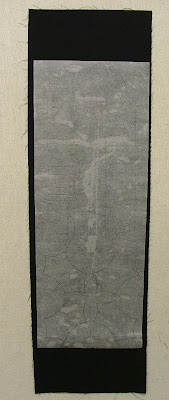
CHRISTMAS WALL HANGING 6 ½” x 22”
REQUIREMENTS
Fusible: 6” x 16”
(eg Bondaweb) Mark the vertical and horizontal centre lines with a suitable
marker.
Foundation: 6 ½”
x 16” (eg calico, you must be able to see through it to trace a pattern line)
Black cotton fabric:
6 ½” x 22” Mark the vertical and horizontal centre lines on to WS with a
suitable marker
Candle: 2 ½” x 8
½” Xmas red
Words: 2 ½” x 9
½“ Xmas white
Holly: 6 ½” x 6 ½“Xmas
green
Flame: 2” x 2 ½”
of gold
METHOD Press the fabrics ready to start.
1 Trace the
pattern centrally onto the WS of the calico and onto the paper side of the
fusible. Add centre lines onto the fusible.
Trace the
pattern onto calico and fusible
2 Centre and
press the fusible onto the WS of the black fabric. Allow it to cool.
3 Cut out
the shapes on the line, remembering to keep the centre of the ‘O’’.
5 On the RS,
trim the excess fabric on the outside of the stitched line. Repeat for the
candle, flame and letters.
6 Peel the
paper from the WS of the black fabric and place it over the prepared calico
strip. Move it about to make sure that there are no tacking lines visible
before ironing the layers together.
To be
continued …. And a Happy December 1st … for the ones who requested
it ….


Dilys, what a star you are. I was one of the lucky audience on Saturday, and would not have realised your problems! It was such a lovely day, seeing all your wonderful work again. I do hope you are starting to feel much better now. Judith from Liverpool
ReplyDeleteThanks for the comments Judith, glad to know that I kept my problems well hidden. I just couldn't have let everyone down! Feeling much better now although food is still a bit of a struggle!
DeleteDilys