If you are visiting the blog for the first time, you will see that there are 3 sections to each entry. Life Before Quilting documents my early years up until the time I started to quilt. My Quilting Journey covers my 25 years of teaching and the quilts that I have made during that period. Quilting 2010 addresses what’s happening in my quilting life now. Just enjoy what you are interested in and visit often!
LIFE BEFORE QUILTING
My initial VSO destination was to have been Mauritius but some problem arose with that posting during my final days at college, forcing me to rapidly apply for jobs for the coming September (1970). I left college to go to a school in Stafford where I filled in for 3 weeks for a PE teacher who was on maternity leave. I half-heartedly attended a couple of interviews in schools in the Midlands but then I was contacted by UNA International Services (a branch of the British Volunteer Programme) and asked it I was willing to go to the Gilbert and Ellice Islands Colony (GEIC) in September. Not half I thought! I posted my acceptance letter, looked on the map to see just where these islands actually where and then told my parents of my intention. I can vividly recall the conversation now:
"Hello Mam, I’ve got a job."
"Oh lovely dear! Is it the one in Leamington Spa or are you staying in Stafford?"
"No, I’m going to Tarawa."
"Tarawa dear? Which county is that in?"
"Actually it’s in the middle of the South Pacific!"
At this point I hear the phone clunk and my mother shouting ‘Dick, come and talk to your daughter!’
And where was my destination? I had to fly from London to New York, then to Los Angeles for a flight to Hawaii and on to Fiji. The Gilbert and Ellice islands (now called Kiribati and Tuvalu since independence) are located vertically north from Fiji, where the International Date Line crosses the Equator. If I had gone any further, I would have been coming back home!
MY QUILTING JOURNEY
So, just to recap, there I was in 1984 in Sychdyn (Soughton in English), N Wales, with a husband travelling to and fro to Bootle daily and 2 daughters at the village school next door to the house…..and still pondering what to do career-wise! It’s fair to say that we had a lot to do to get the house in order but there was plenty of space for creativity.
There was an extra lounge along one side of the property and one day I stood in there and just wondered if I could get home-based classes running in that. I put my 3 quilts on display in a shop in our nearest market town of Mold, with a poster saying ‘If you can sew along a straight line, you can make these!’ I got so many enquiries that I was able to establish 3 classes immediately and over the next few years built up to 7 classes a week. That equated to 12 ladies per class, and 84 per week. I used to teach 3 classes on both Monday and Tuesday (10am – 12 noon, 1 – 3pm and 7 – 9pm), and the final class on Wednesday evening. I just loved it! As I began to stock and sell fabric and supplies, I nominated Thursdays as my ‘At Home’ day when quilters from miles around knew I was there for chat, coffee, fabric and advice. And that’s what I did for 20 years, fitting my own work in between the essential teaching samples.
Few people realise just how much conscientious teachers give up of themselves. They have to put their interests and creative needs on the back burner and devote time and technique to their students. Any particular technique I was interested in was filed in the recesses of my mind to be unwrapped when I had the time and space to attend to it.
Here is a quilt from that early teaching period, inspired by a paper doyley and sewn using a hand reverse appliqué method and needle-turning technique.

Doyley Art
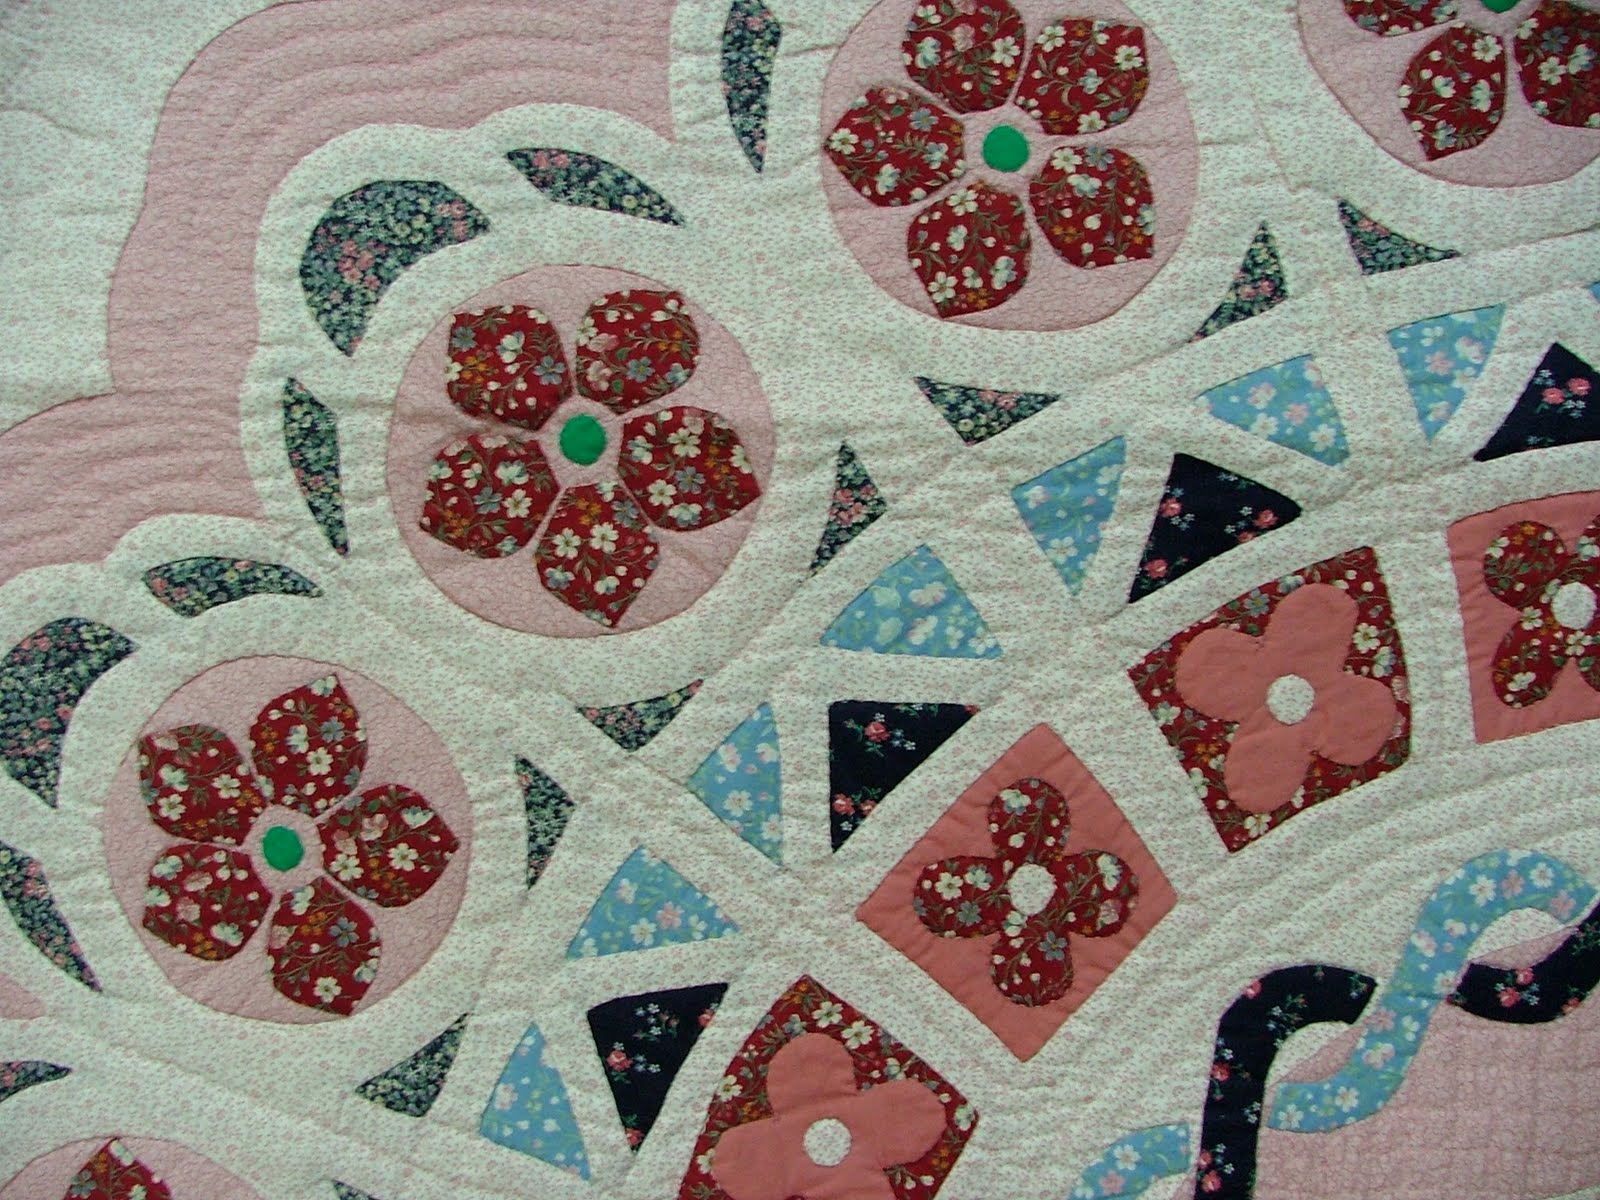
Doyley Art (detail)
QUILTING 2010
I have now managed to get my Prancing Horse picture together but it needs more fine-tuning before it is ready for the quilting process. It is often difficult to control the size of a hanging when you work freely as I do, so it is larger than I anticipated (famous last words). It just grew to fill the space! The fields around me are full of horses and ponies during the winter months so there is always plenty of visual inspiration. Add to that the resources of the Internet and pages of poster art and you can’t go wrong!
I have now managed to get my Prancing Horse picture together but it needs more fine-tuning before it is ready for the quilting process. It is often difficult to control the size of a hanging when you work freely as I do, so it is larger than I anticipated (famous last words). It just grew to fill the space! The fields around me are full of horses and ponies during the winter months so there is always plenty of visual inspiration. Add to that the resources of the Internet and pages of poster art and you can’t go wrong!
The wall hanging is made from squares of bonded fabric, each square being constructed with fabrics bonded on the diagonal to give a sense of movement. This part of the project is the problem solving, the part I particularly like. The next step is to place the picture onto wadding (batting) and a background ready for quilting. This will be done by machine.

Prancing Horse: unquilted

Prancing Horse: detail 1

Prancing Horse: detail 2

No comments:
Post a Comment