Sunday 26 January 2014

BLOG 184


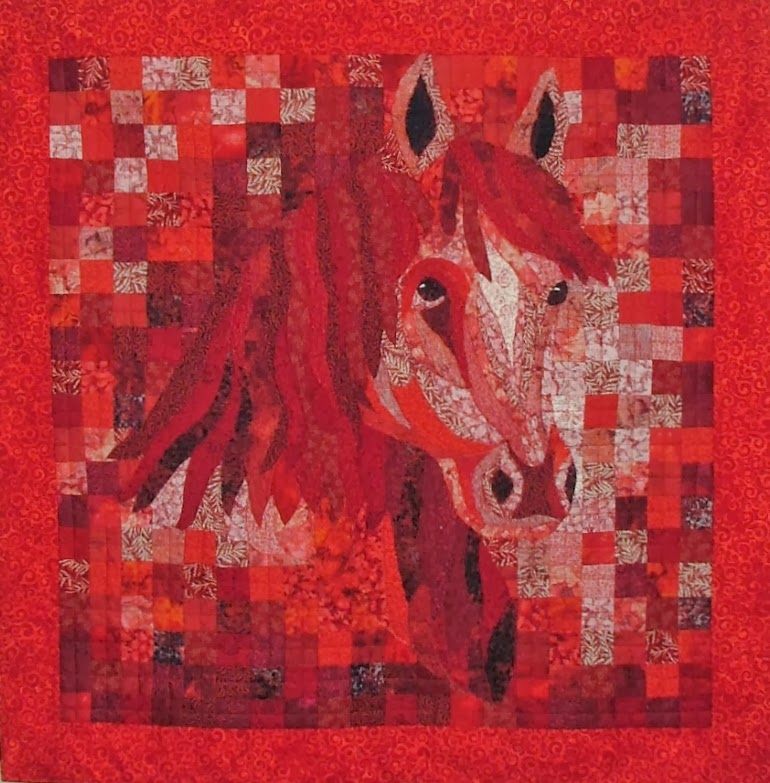
Once I started along the creative pathway on the horse wall hanging, I really needed to see it through to the end. My thinking was that if it didn’t work, I would need to make something else. Perish the thought! But since last week, visual problems have been solved and progress has been good. Because 
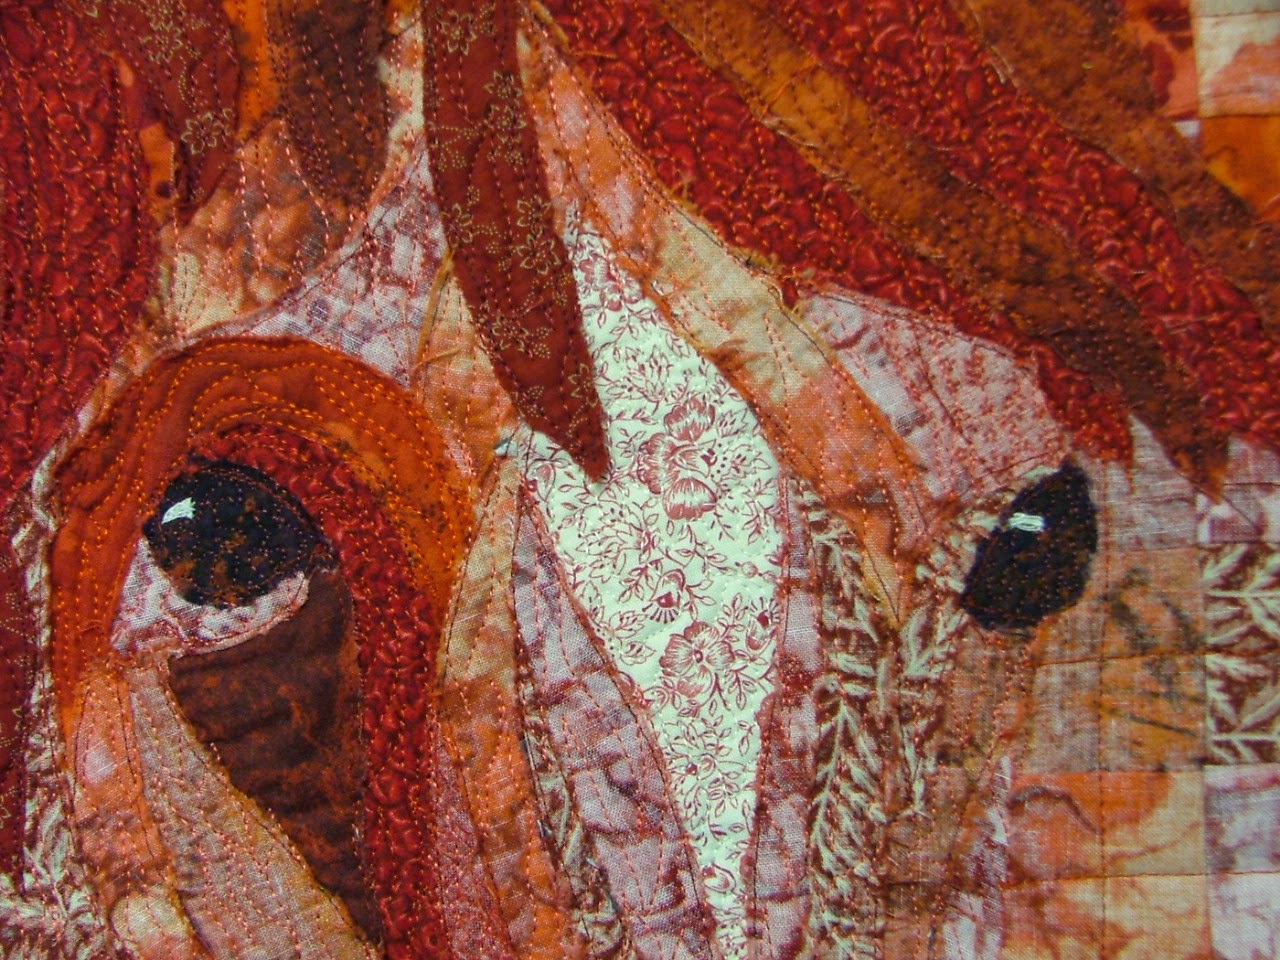
I have chosen to do raw edge applique, I have had to do copious free-motion quilting in order to prevent further fraying. Generally, I used light threads on light fabric, medium on medium and dark on dark.

 
                                   Free motion quilting

 I decided to quilt the background patchwork squares in vertical and horizontal lines down the middle of the 1 ½” squares, thus fragmenting the squares. The severity of the straight grid contrasted well with the organic free motion quilting. I used a walking foot and medium red thread.

                                            Quilting lines


I purchased a vibrant red batik from a local shop and added 4” mitred borders. To do this, I placed one strip RS down along the edge, holding it in place with pins that were placed at right angles to the edge for easy removal. I also made sure that there was an extra 5” (for 4” strip) of fabric beyond the corner to make the mitre.

                                             Border strip


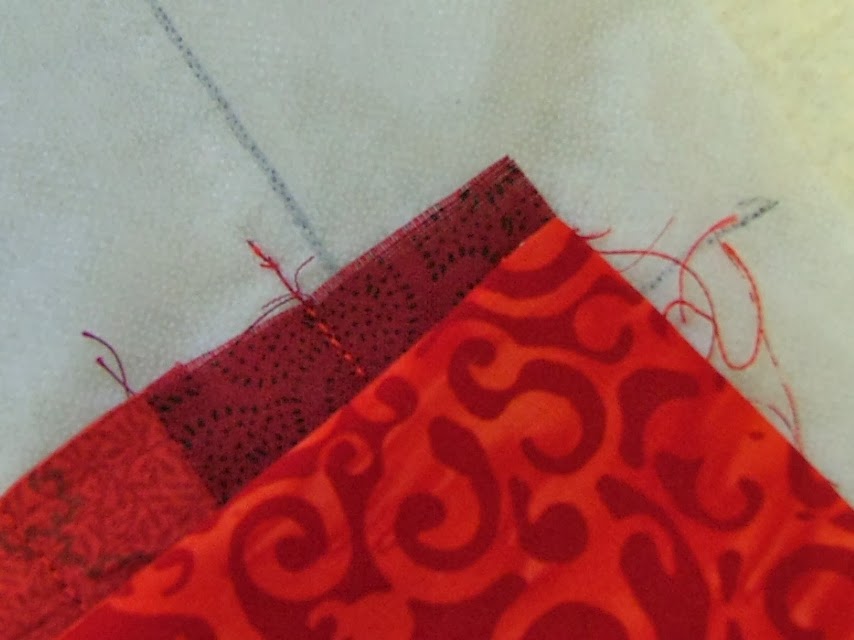
I started sewing the seam ¼” in from the corner with a couple of secure stitches and I stopped sewing ¼” in from the other corner with a couple of secure stitches.

 
                           ¼” in from the corner

 I repeated this process for all of the borders so that all the strips were free at the corners.

                                            Corners free


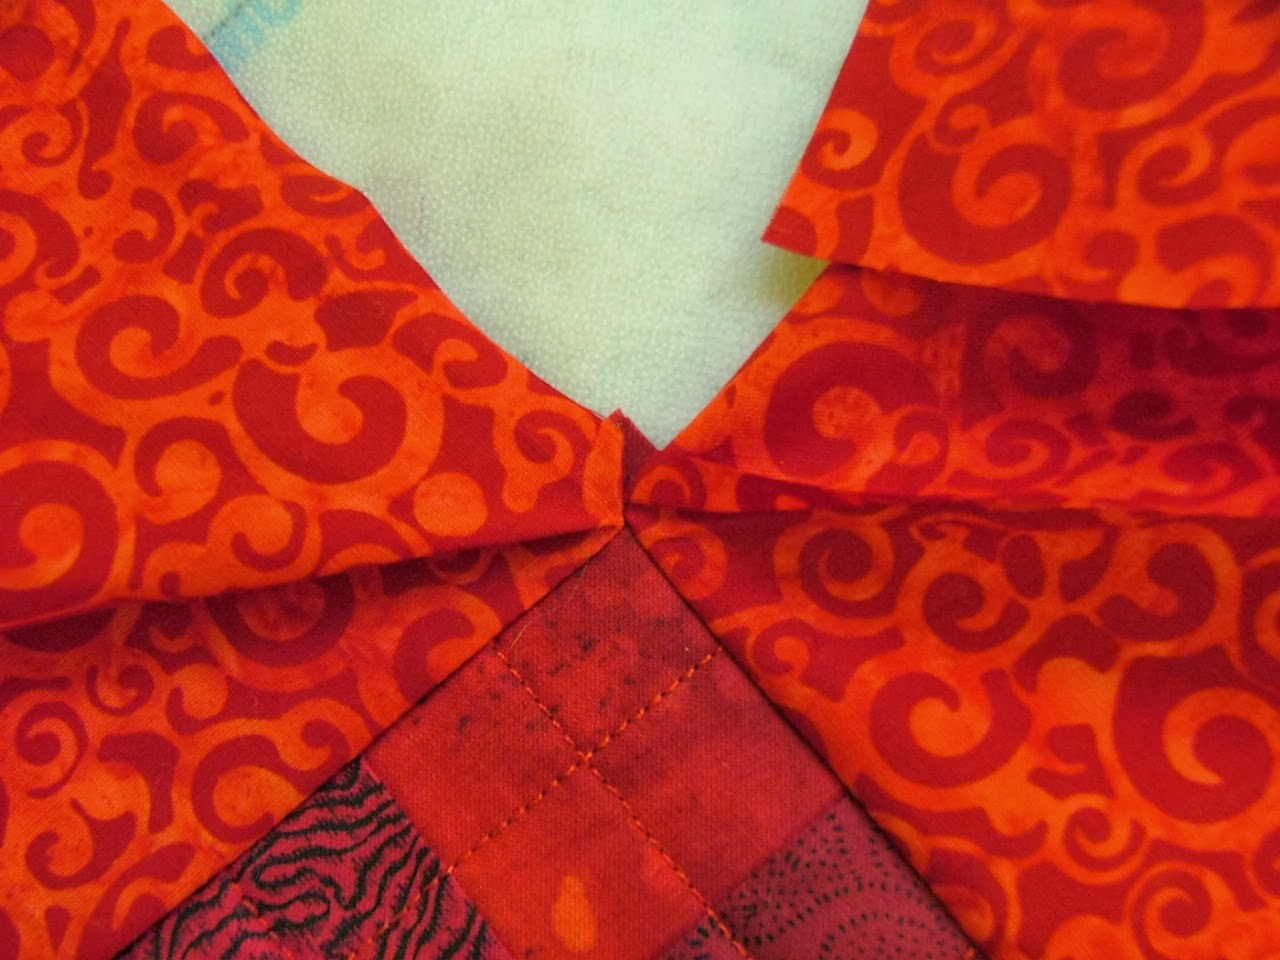
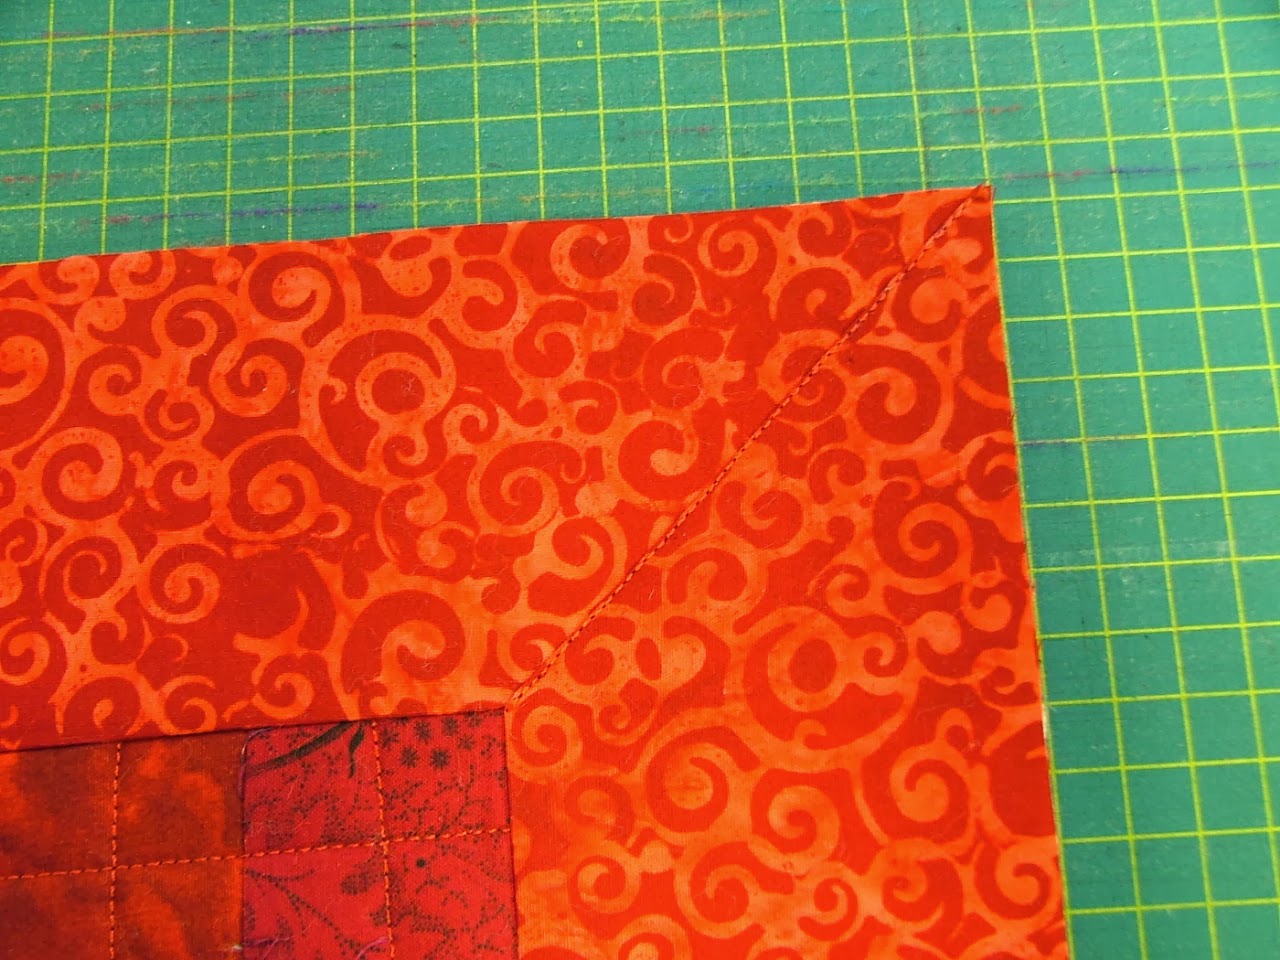
On the ironing board, I folded the top strip underneath itself, so that its raw edges were level with those of the strip underneath. This created a perfect mitre on the corner.

                             Fold under the top strip

I pressed the fold to sharpen it and pinned it in place. I repeated the process for the other corners.


                                               Press and pin

 
On the sewing machine I sewed a line of stitches right on the fold to hold it in place. I then trimmed away the excess fabric from underneath the corner. The wall hanging was trimmed to make it 36” square as required for the challenge.

 
                                           Trimmed edges

 A narrow binding was applied and a 4” sleeve sewn onto the back. Just three things left now; a signature, a touch of white to the horse’s eye to bring him to life and a title (the hardest part!)

 
                                                  Eyes

 
                                               Completed wall hanging


Sunday 19 January 2014

BLOG 183


This week I have been steaming ahead with the ‘In the red’ challenge quilt, if only to prove to myself that I can make the idea work! Drafting a workable pattern onto paper is the first manifestation of what I saw in my mind’s eye. But, it’s all very well having it on paper; there is still a lot of work to go before it will materialise (excuse the pun!) in fabric. I re-did the head of the horse using the same freezer paper method and you can see that it has been sewn as a raw edge applique. When I quilt the piece, I will use thread to help prevent the fragile raw edges from fraying any further.

 
                           Detail of applique

 Here is the completed head on my design wall; it’s on top of another piece of work that needs to make progress also. Oh the pressures … !!!!

ASIDE: I have been looking at my original drawing since getting it out again and something was niggling about it. It was only when I was working with fabric, and positioning the ears on the head, that I realised what was wrong. I had drawn the ears too far back; they look better in their present position!

 
                                  Completed head

 
Stupidly, I left the background pastel blocks on the design wall and started to pin 2” red squares over the top. I wanted to make it look as though the head was emerging from the patchwork squares.

                               Patchwork squares


After some time and effort, I began to realise that the pastel colours of the background blocks were distracting. And then I had to ask myself why on earth I was making pins holes in the batik fabric underneath? All I can say in answer was that I was in the narrow furrow of creativity and just concentrating on the head and the red. I probably didn’t even see the pastels until I stepped away from the design wall! So I took out all the pins, removed all the red squares, removed the pastel blocks and started again.

    
                            Re-positioned head

 
                                 More squares

 I continued in this vein, cutting 2” squares from left-over red fabrics and placing them randomly around the head. I started to sew the squares into lines and then join the lines. Because I didn’t want to make a full quilt of squares to cover the area underneath the head, I drew a 3” grid onto iron-on Vylene and placed it, glue side upwards, onto my work surface. The lines gave me a good vertical and horizontal grid for placing the seams, and the Vylene has given stability and structure to the wall hanging once the fabrics were ironed on. Here is the completed quilt top. So far, so good!

                                           Pattern

 
                                      Completed top

 ASIDE: The one think that is annoying me is the horizontal line of light squares in the lower left quarter. Once I spotted it, it is all I see!

Sunday 12 January 2014

BLOG 182


This week, I decided to concentrate on the challenge I have committed myself to do this year, called ‘In The Red’. You may remember that I referred to it in the hazy past of 2013, but we were given another year to complete it as the challenge quilts had not been registered into the exhibitions that usually take them. I had no difficulty in putting it out of my mind but I received a nudge about it recently so I need to make progress.

The rules say that you can do anything you like as long as red dominates the quilt. The quilts need to be 36” x 36” or a perimeter of not less than 144”.  So here goes. This is the drawing that I have unearthed and what I aspire to create in fabric and, for your interest, here is how I am starting to go about it.


                                          Drawing


 I’m not sure how I am going to construct the image at this stage (with or without a fusible?) so I start by overlaying the drawing with freezer paper to trace off the face of the horse. This I break down into smaller pieces to try and isolate the different tones of light, medium light, medium dark and dark. (I traced the same freezer paper pattern onto baking parchment just as a reference but didn’t actually refer to it again!)

                                             Patterns

I want to work section by section so I highlight the lines and attempt to identify the smaller sections of the pattern.

                      Sections of the pattern
 

The next step, and it has to be said my favourite part, is to sort out the fabrics. Here is a workable palette from darks through to lights. I have reversed some of the fabrics to get a very light tone.

 
                                        Palette of fabrics

 I have always had a belief that I can do anything I set my mind to, if I want to do it (and it’s the want that drives me, that’s imperative!). This to me is the excitement of creativity, bringing an idea to life and creating a ‘fabric’ from a pattern which is what a quilt top is essentially. So at this stage I am not daunted by the number of pattern pieces or the complexity of the pattern and I leap straight in. I use the freezer paper pattern and cut out individual pattern pieces, making sure that I had plenty of reference lines so the pattern will fit back together again. Here is my first attempt on the muzzle and nostrils using raw edge applique.

                                 The muzzle and nostrils

I continued in this vein and this is what it looked like after most of the paper had been removed. I was pleased with the effect but I felt the shading was awry and decided to start again.

 
                                       First attempt

 I returned to the pattern and simplified it. It’s all very well having lots of pattern pieces on paper but when you start to work it in fabric, it can be fiendishly fiddly! The revised pattern still looks complex but there are fewer pieces. Back to the drawing board!

                                      Revised pattern

PS I will be teaching the ‘string piecing’ technique used for my String of Diamonds quilt in Llangollen next month as follows:- Quiltfest Workshop with Dilys Fronks A String of Diamonds

Llangollen Pavilion on Saturday 8th February 10am-4pm

www.quiltfest.org.uk for booking form and details. I hope to see you there!


Sunday 5 January 2014

BLOG 181


Rog had just said that he doesn’t know how I find things to talk about each week, especially as I am talking ‘in the dark’ to people I can’t see. I know there are lots of people out there following my blog because you tell me so when you see me! But because I can’t see you, writing this blog is essentially a leap of faith, with a dash of hope that someone is listening. I am not really talking to myself, am I?! On your side, there is an expectation that the blog will be posted each week and that is what keeps me writing it. So I hope you continue to listen ‘in the dark’, look in regularly and enjoy what I am making and what I have to say. You may learn something on the way and I would be delighted to answer any questions or address any comments.

I just love the festive season and we have survived it once again but it is really nice to get things back to normal and the Christmas boxes back in the loft. Post-Xmas rooms can look terribly bleak but here there are plenty of colourful quilts to go back over chairs and onto walls to cheer me up. I have always tried to sew on Christmas day, usually after the turkey and pud, when the family are replete and relaxing over their presents. This year it was impossible with the little ones in residence, I just couldn’t slope off, but I managed it on Boxing Day after they had moved onto their other grandparents. Before Xmas I had been creating a shaded background fabric in my painterly style, seen below. I made 12 squares measuring 18” each, with a hole in the middle but, back then, I didn’t have a clue what I was going to do with them apart from thinking in terms of some sort of a calendar.

                 Shaded background fabric


Then the seed of an idea started to form as I played with threads at the machine embroidery class I go to. Initially I think my intention was to make floral plates, like the one you saw in Blog 178, and to put one in the centre of each square. But I felt the detail in the plate was too small for the size of the square. So this is what I made during my last embroidery class, a cluster of anemones. I trapped some sheers and fibres in appropriate colours between 2 layers of ‘Ultra Solvy’ and I worked in a tight frame.

                                 A cluster of anemones

 
To get rid of the ‘Solvy’, I removed it from the frame and placed it in a glass bowl in the sink.

                                         Place in the sink

 I then poured hot water from the kettle over it and the ‘Solvy’ began to dissolve.

                            Dissolve with hot water


I did this several times until there was no stickiness left on the embroidery. I then put it onto a cloth on top of a radiator to dry.

                                         Leave to dry


This is the background square it will eventually be attached to.

                      Background square and anemones

 Oh it’s lovely to be back climbing the fabric face again! Happy New Year!