TISSUE BOX continued: Constructing
the base of the box
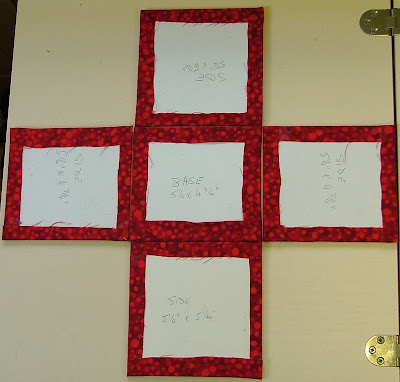
Place the
covered pieces of the box base on a flat surface to make sure that you are
familiar with the sewing sequence. The sides should fit corner to corner around
the base.
Layout
Use a strong
thread (I use quilting thread) to match the lining fabric and whip stitch
closely and firmly from corner to corner (this line of stitching will not be
visible on the completed box).
Secure the
corner and then fold the sewn side away from the base to position the next side
and hold it with masking tape.
Continue
sewing around the base to attach the 4 sides. Then sew the vertical sides of
the base (again these stitches will not be visible). I always start at the top edge
with several tight stitches to make sure that the corners are level.
After
The tops are
a bit scratched so they may need sanding and re-varnishing … or I could make a
quilted runner to cover them? … Do I need the excuse to make one?
And these
are some of her drawings. I’m sure you can recognise Paddington Bear, robot,
jellyfish, chicken, hand, giraffe and butterfly, ladybird and rainbow!! I love the naivety of them.
Drawings


Oh I love your furniture re-do!! And of course a bright new runner would be just the perfect finishing touch.
ReplyDeleteThanks Maria, we were amazed at how well it turned out. Really we had nothing to lose and everything to gain by trying.
ReplyDeleteI will think about the idea of a new runner, an autumn project perhaps, as I have plenty of reds and neutrals left over from the Delectable Mountain wall quilt which is in the same room..
Dilys