Am I unusual
in liking this time of the year, that slow but inevitable transition from
summer to autumn? We have had a wonderful summer weather-wise this year so every
flower, shrub and tree (and weed it has to be said!) has had its ‘time’ or season
in the garden. I love the way they bristle with new growth leaves, bud, flower
and bloom to the best of their ability and then produce seeds to make replicas
of themselves before dying off, job done. And, thankfully, they will be back to
do the same next year so the least I can do is to put them to bed to the best
of my ability. And that’s what I have been doing for most of this week, hacking,
slicing, dragging, sawing, scrapping and chopping. There have been umpteen
trips with the trailer to the tip and there’s still a lot more to do. BUT, it’s
also the time when the log burner is lit early evening to take the chill off
the room, thus providing me with the excuse to sit down in front of it to sew.
Curtains are drawn for cosiness, lights are lit and I settle down creatively my
fabrics. I wonder what will materialise (excuse the pun!).
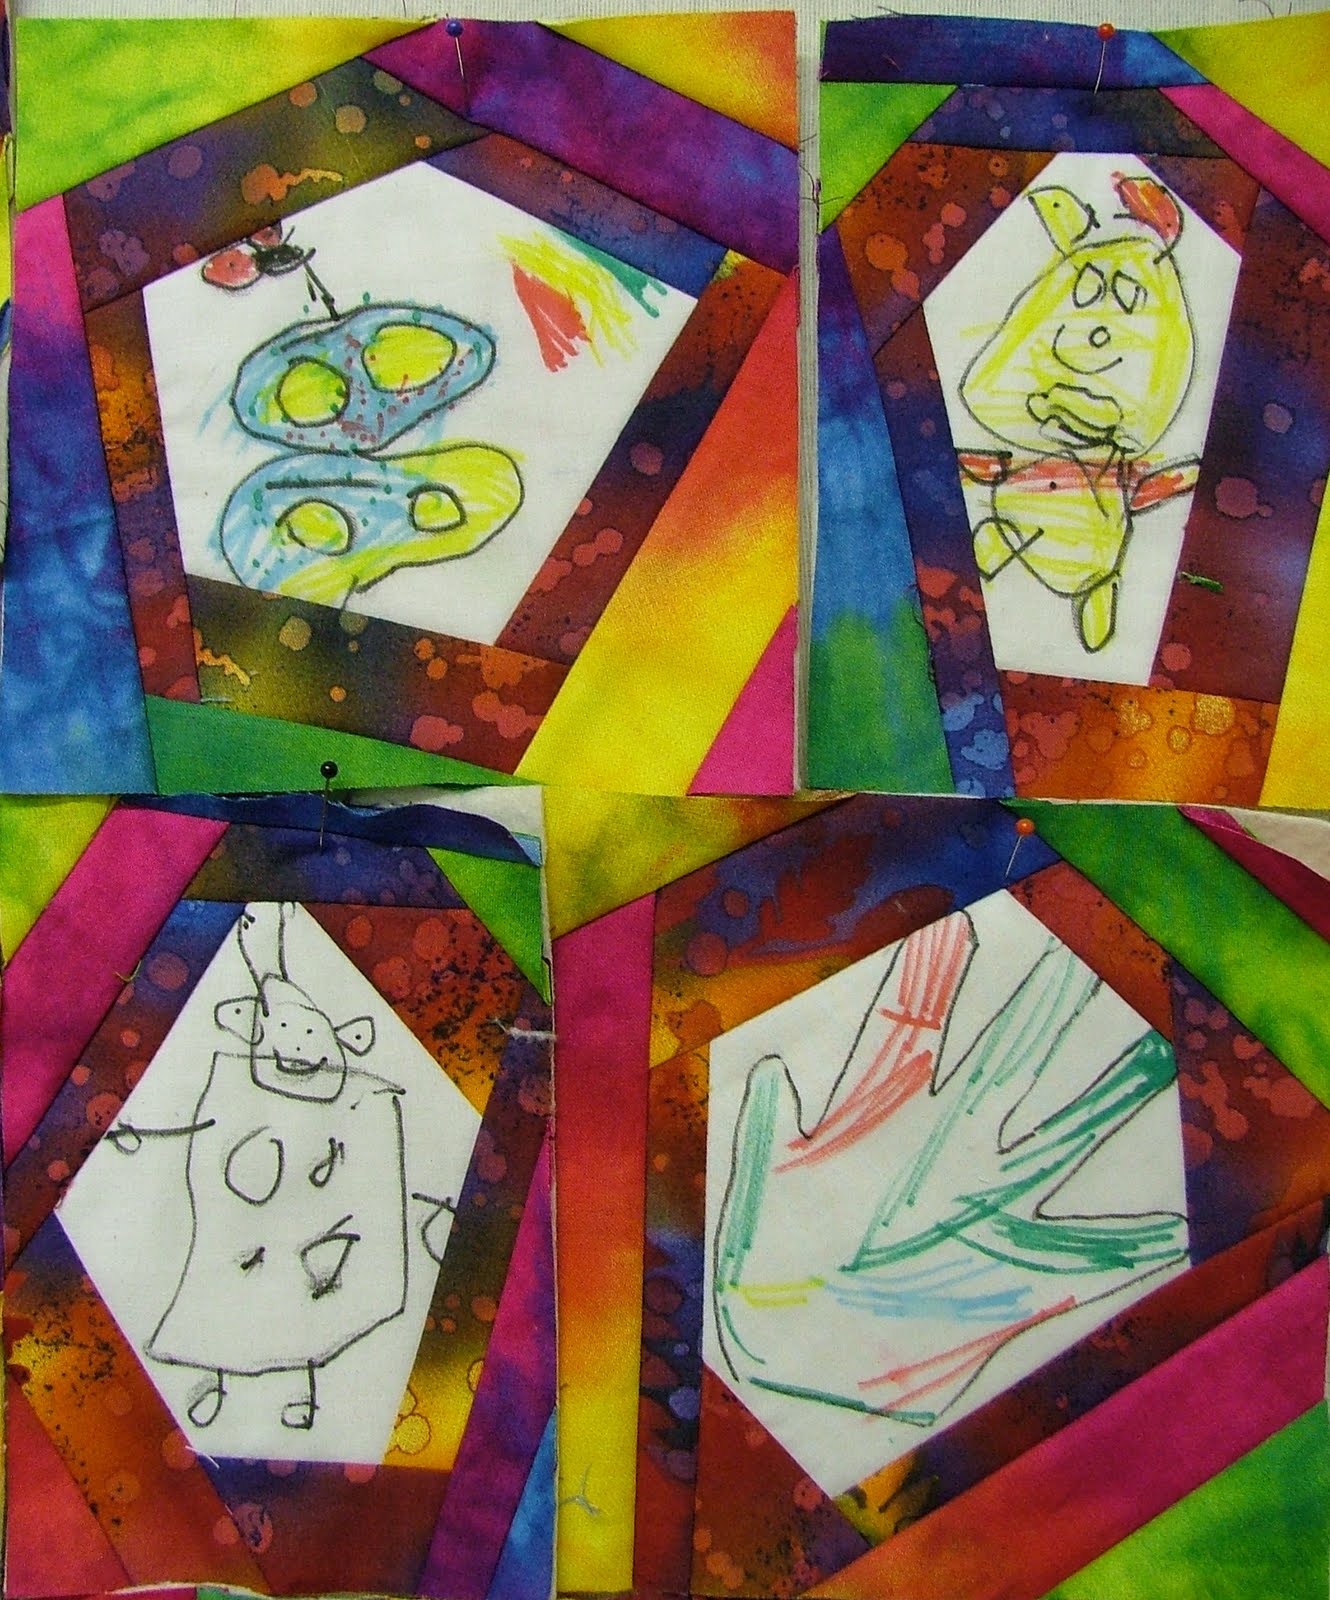
ELLA’S WALL HANGING
(ASIDE: This has to be one of the
most joyous things I have ever done! It is simple to do and a wonderful project
to try with any youngster. It is like freeze-framing a bit of their developmental
history in fabric.)
My granddaughter
(and Jackie’s, hello) Ella, who has just
had her 4th birthday and starts full time school next week, did some
drawings on white cotton fabric with ‘DYLON fabric painting fine nib pens’.

They were
hot ironed, following the manufacturer’s instructions, to seal the colours.
Here are some of her lovely spontaneous drawings.

Drawings

METHOD
Cut the
pictures out randomly with 4 or 5 straight sides so there is not too much white
fabric visible around the outer edge. Place a picture centrally onto a square
of batting, the size will depend on the scale of the drawing. (I used 3”, 4”, 6” and 8” squares)

Cut some strips
of colourful fabric for the borders. (I used
2 fabrics and I cut 1 ½”, 1 ¾” and 2” strips)

Place a
fabric strip, RS together, along one of the straight sides. Sew a ¼” seam with
a neutral thread, starting and finishing at the edges of the white fabric.

Lift the
strip away from the picture and finger-press it so that it lies flat on the
batting.

Trim away
the excess fabric from both ends of the strip, angling them to follow the line
of the adjacent sides.

Work clock-wise
around the centre, sewing, pressing and trimming as you go.


Continue
adding strips until the batting has been covered.

From the WS,
the fabric extends beyond the batting.

WS of batting
Trim away
the excess fabric from this side to the size of the batting.

Trimmed square
Repeat for
the other squares, making different sizes for added interest.


No comments:
Post a Comment