This
week I have been enjoying the Olympics and rejoicing in our continued success
as a nation. On Saturday (4th August) I was emotionally drained during a day of
athletics which saw Jessica Ennis, Mo Farah and Greg Rutherford bring home gold
medals. I don’t think I can take any more excitement today! I have become a
sports geek too, along with the rest of the UK. And I have to say for the
record that I do have abs like Jessica Ennis, but I wrap them up in copious rolls
of adipose to protect them!
Signature Quilt
I
have managed to get my friend’s birthday signature quilt together and want to
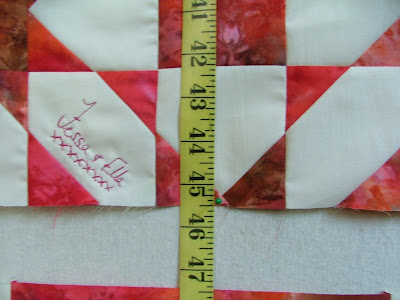
concentrate on the border now. At this stage it measures 45 ½” square.
Signature
quilt
There
is room for more signatures and once the border has been attached, I will hand
it over to her to collect more from friends and work colleagues who were unable
to attend her party.
Signatures
and spaces
I
want to make simple border from strips of both fabrics but I’m not quite sure
yet what I am going to do. So I have cut some of the Batik at 9 ½” x 2” (the
size of the star block) and the cream at 3 ½” x 2” (the size of the individual
squares) to have a play.
Strips
I
joined some of these strips together and auditioned them around the edge of the
quilt to see how they looked.
Suggested
border
Seeing
it on the wall like this, I felt it didn’t look quite right because it took
away the delicacy of the points around the outer edge of the blocks. So I then decided
that a cream border was needed to give a breathing space between the blocks and
the fragmented border. As the cream fabric is 44” wide, I needed to join 2”
strips together to give me the required lengths. This is done on the diagonal as
shown below.
Diagonal
seam
Remove
corners
To
prevent wavy borders on a quilt, always measure through the centre of the quilt
and cut the borders to this length.
Measure
through the centre
Seam
allowances vary fractionally during sewing, so borders sometimes don’t finish
accurately. Fabric also stretches with ironing and the outer edges suffer the
most. I am as pleased as punch to report that my 15 x 3” squares have resulted,
with seam allowances, at exactly 45 ½”, and here’s the proof (shame in my
moment of glory that the pic is not focused!!)
Measurement
I add
the cream borders to the quilt before sewing. First I secure the corners, then
the centre points and then I add several pins in between. These pins are always
at right angles to the seam for easy removal. I sew with the seam allowances
uppermost so that the border strip is on the machine table. This means that I
can double check the direction of the seams. A coloured corner square completes
the first border.
Seams
on top
Accurate
seams are essential.
Accurate
seams
A
second border is added using the prepared strips. And that is all I intend to
do at this stage.
Two
borders


No comments:
Post a Comment