I have had a lovely time at Centre Parcs in Sherwood Forest.
Despite biting winds and plummeting temperatures, we spent quality time with our
daughter, husband and young family and there is nothing quite like that. Everyone
relaxes together and just plays. Many families had grandparents in tow; in fact
anyone without grandparents appeared deprived!
It’s back to the sewing machine now. I have been preparing
samples for a residential WE at Alston Hall where I am the invited tutor. I
always try to use whatever technique I am teaching as an excuse to make
something that I need as a gift or I can use myself. For the first sample for
fused piecing, I made a quilt for the newest arrival in the extended family, Hugo
Osmotherley.
The quilt started with a central pattern of an appliquéd
teddy bear, Hugo Bear.

This image was repeated four times in stitch. I chose a
stitch that was easily adjusted to follow the curves of the pattern, and which
made the bear look fluffy. I used a variegated thread to match the chosen fabric.
I added detail with a free motion stitch.

I made four patchwork blocks to look like this, but, because
I wanted to control the placement of the colours and use up scraps of the fabric,
I prepared them using a Vilene base. (Not an original idea, it has been demonstrated
for years.)

Patchwork blocks
METHOD
I started off with a multi-coloured fabric and a neutral
fabric and cut out several 2” squares. (Each block required 25 neutral and 24
coloured).
Fabric and squares
I cut a 12” square of lightweight iron-on Vilene and placed
it glue side up on top of a 2” grid drawn onto cardboard. I secured it with
pins.
Vilene on grid
I then placed the fabric squares in sequence onto the
Vilene, RS up, so the raw edges touched but didn’t over-lap. The grid helped
with placement.
Squares onto Vilene
When I was happy with the arrangement, I ironed the squares
well to stick them onto the Vilene.
Stick the squares
To sew the vertical seam lines, I folded the first row of
squares over the second row with RS together. (It folded easily along the line
where the raw edges of the squares meet.) I sewed an accurate ¼” seam, feeding
one block through after another to save thread.
Vertical seam

Repeat for every seam
Before I could sew the horizontal seam lines in the same
way, I needed to snip into the seam allowances of the vertical seams, up to the
line of stitches but not through it.
Clip the seam
The snip into the seam allowance allowed me to alternate the
seams from light to dark.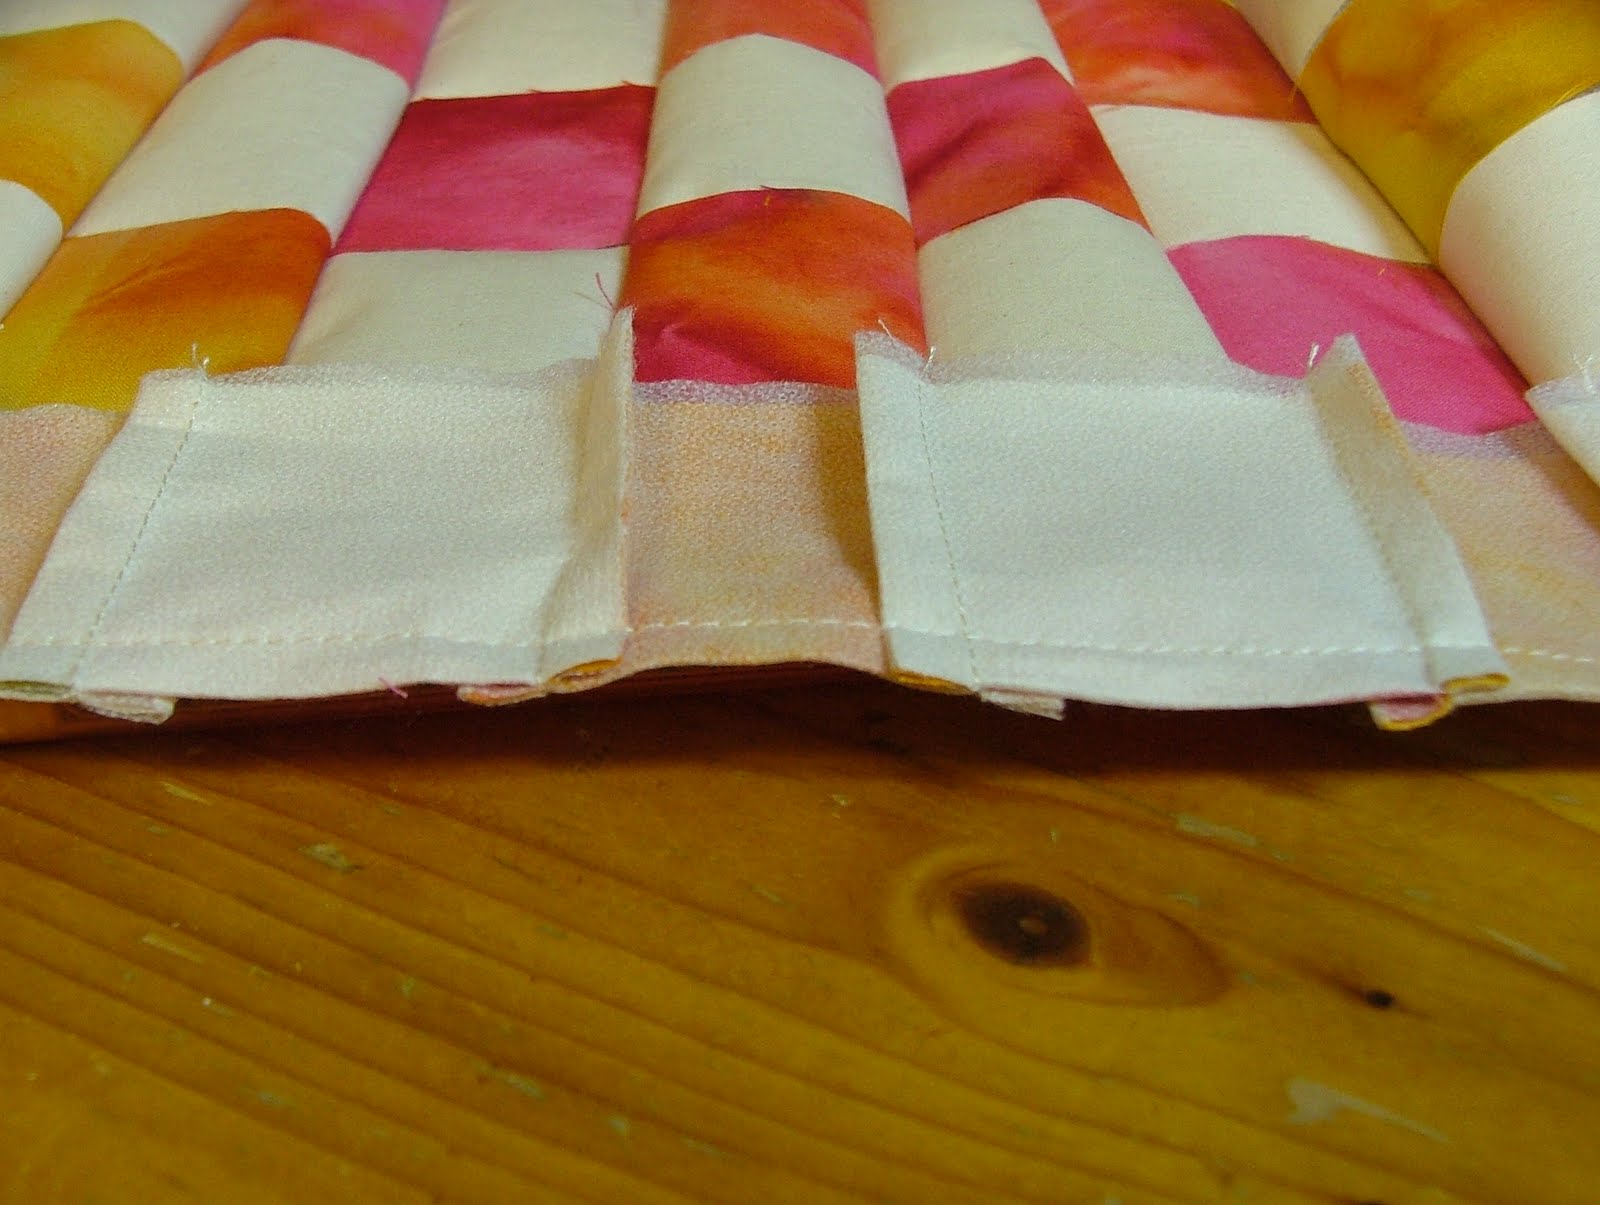
Horizontal seams

Completed patchwork

No comments:
Post a Comment